> ## Documentation Index
> Fetch the complete documentation index at: https://docs.userpilot.com/llms.txt
> Use this file to discover all available pages before exploring further.
# Userpilot Installation Quickstart
> Quick installation of Userpilot, user and event tracking setup, environment configuration, and security best practices.
Follow these steps to quickly integrate Userpilot into your web application and ensure a smooth setup.
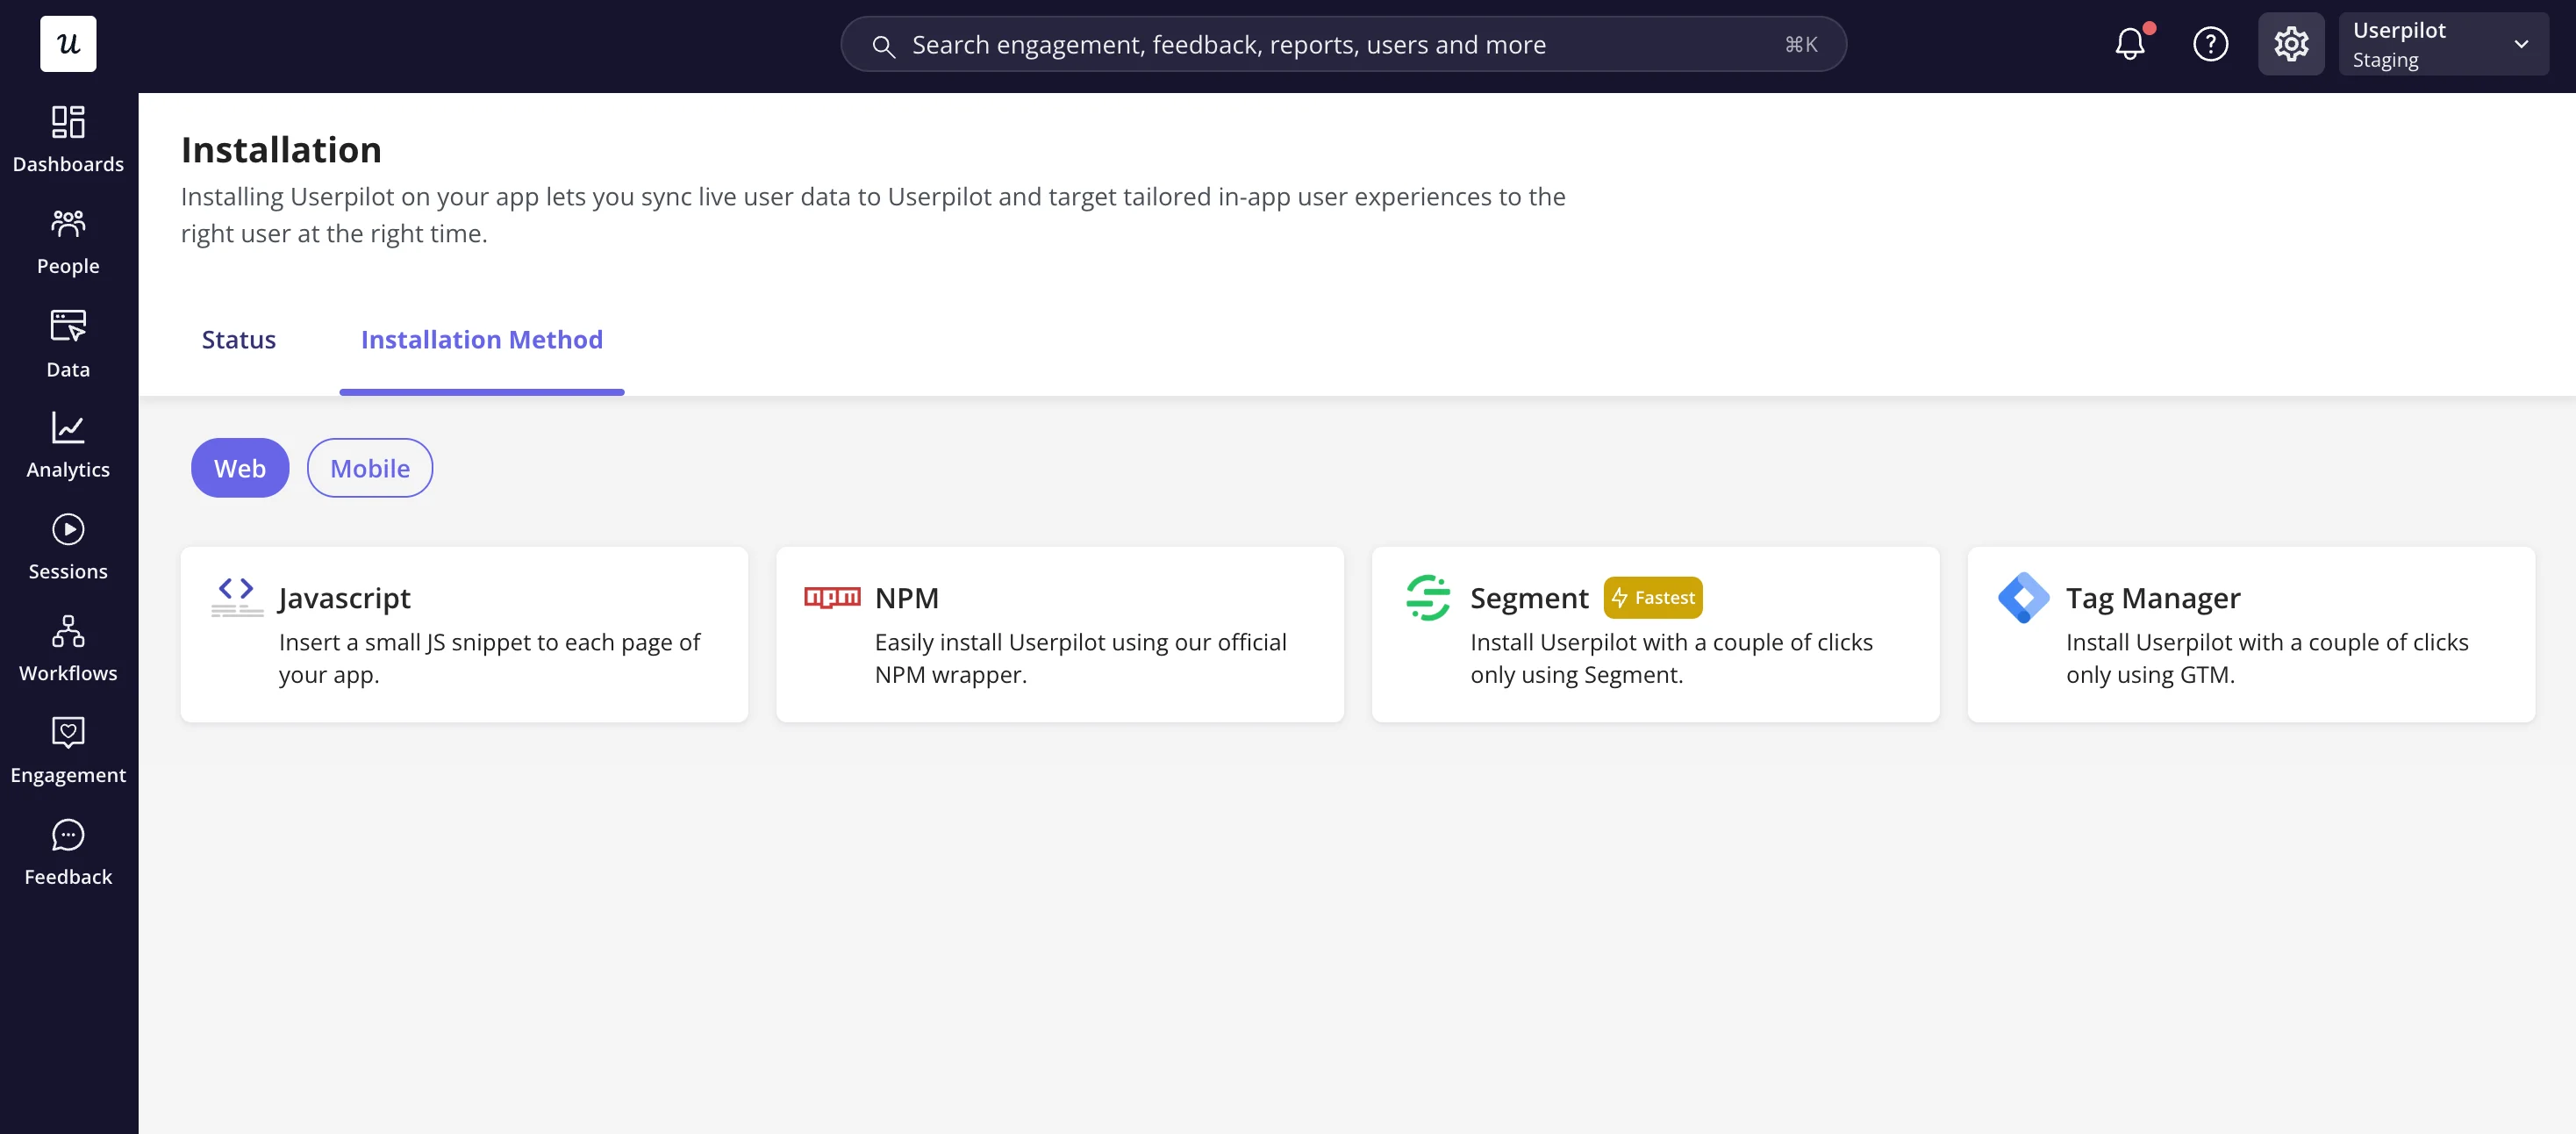
## **1. Choose an installation method**
You can install Userpilot using:
* **JavaScript Snippet**: Directly embed Userpilot in your app.
* **Segment Integration**: If you're already using Segment.
* **Google Tag Manager (GTM)**: Deploy Userpilot via GTM.
 ## **2. Plan user properties, company properties, and events**
Before installing Userpilot, decide:
* **User Properties**: What user data will help segment and personalize experiences? (e.g., name, email, signup date).
* **Company Properties**: If you're working with teams, what company data should be tracked? (e.g., company name, plan type).
* **Tracked Events**: What key actions should be monitored in Userpilot? (e.g., button clicks, feature usage).
Define these **before implementation** for an optimal setup.
## **3. Install Userpilot via JavaScript**
### **Step 1: Add the Script**
Place this in the `` section of every page:
```javascript html theme={null}
html
```
Replace `"Your_App_Token"` with your actual App Token from the [Userpilot dashboard.](https://run.userpilot.io/environment)
### **Step 2: Identify users**
* **Multi-Page Applications (MPAs)**: Call `userpilot.identify()` on each page load.
* **Single Page Applications (SPAs)**: Call `userpilot.identify()` once after authentication.
```javascript theme={null}
userpilot.identify("USER_ID", {
name: "John Doe",
email: "john@example.com",
created_at: "2025-03-17",
company: {
id: "COMPANY_ID",
name: "Acme Inc.",
},
});
```
### **Step 3: Reload on route change (For SPAs)**
```javascript theme={null}
import { useLocation } from "react-router-dom";
const location = useLocation();
React.useEffect(() => {
userpilot.reload();
}, [location]);
```
### **Step 4: Track key events**
```javascript theme={null}
userpilot.track("Clicked purchase button");
```
## **4. Set up production and staging environments**
To ensure a smooth testing and deployment process, configure **separate environments** for production and staging. Learn how to set up staging and production tokens in [this guide](../developer/installation/production-staging).
## **5. Ensure security with a content security policy (CSP)**
If your app enforces a **Content Security Policy (CSP)**, add the required domains to your CSP settings. Follow the [Userpilot CSP Guide](../developer/security/csp) to prevent issues.
Following these steps ensures a **smooth** and **secure** integration of Userpilot. Need more details? Check out the [full installation guide](../developer/installation/web).
**For any questions or concerns, please reach out to [support@userpilot.com](mailto:support@userpilot.com)**
## **2. Plan user properties, company properties, and events**
Before installing Userpilot, decide:
* **User Properties**: What user data will help segment and personalize experiences? (e.g., name, email, signup date).
* **Company Properties**: If you're working with teams, what company data should be tracked? (e.g., company name, plan type).
* **Tracked Events**: What key actions should be monitored in Userpilot? (e.g., button clicks, feature usage).
Define these **before implementation** for an optimal setup.
## **3. Install Userpilot via JavaScript**
### **Step 1: Add the Script**
Place this in the `` section of every page:
```javascript html theme={null}
html
```
Replace `"Your_App_Token"` with your actual App Token from the [Userpilot dashboard.](https://run.userpilot.io/environment)
### **Step 2: Identify users**
* **Multi-Page Applications (MPAs)**: Call `userpilot.identify()` on each page load.
* **Single Page Applications (SPAs)**: Call `userpilot.identify()` once after authentication.
```javascript theme={null}
userpilot.identify("USER_ID", {
name: "John Doe",
email: "john@example.com",
created_at: "2025-03-17",
company: {
id: "COMPANY_ID",
name: "Acme Inc.",
},
});
```
### **Step 3: Reload on route change (For SPAs)**
```javascript theme={null}
import { useLocation } from "react-router-dom";
const location = useLocation();
React.useEffect(() => {
userpilot.reload();
}, [location]);
```
### **Step 4: Track key events**
```javascript theme={null}
userpilot.track("Clicked purchase button");
```
## **4. Set up production and staging environments**
To ensure a smooth testing and deployment process, configure **separate environments** for production and staging. Learn how to set up staging and production tokens in [this guide](../developer/installation/production-staging).
## **5. Ensure security with a content security policy (CSP)**
If your app enforces a **Content Security Policy (CSP)**, add the required domains to your CSP settings. Follow the [Userpilot CSP Guide](../developer/security/csp) to prevent issues.
Following these steps ensures a **smooth** and **secure** integration of Userpilot. Need more details? Check out the [full installation guide](../developer/installation/web).
**For any questions or concerns, please reach out to [support@userpilot.com](mailto:support@userpilot.com)**