> ## Documentation Index
> Fetch the complete documentation index at: https://docs.userpilot.com/llms.txt
> Use this file to discover all available pages before exploring further.
# Create a Flow
> Create guided in-app flows in Userpilot to onboard, educate, and engage users through tooltips, modals, slideouts, and driven actions.
## Prerequisites
* [Userpilot Chrome Extension](https://chromewebstore.google.com/detail/userpilot/ecmjjdafjebhegfhjincbdhgfonpibfm) installed
* Logged in to your Userpilot account
* Access to your web application, where you want to build the flow
* Userpilot SDK is installed on your target pages
## Overview
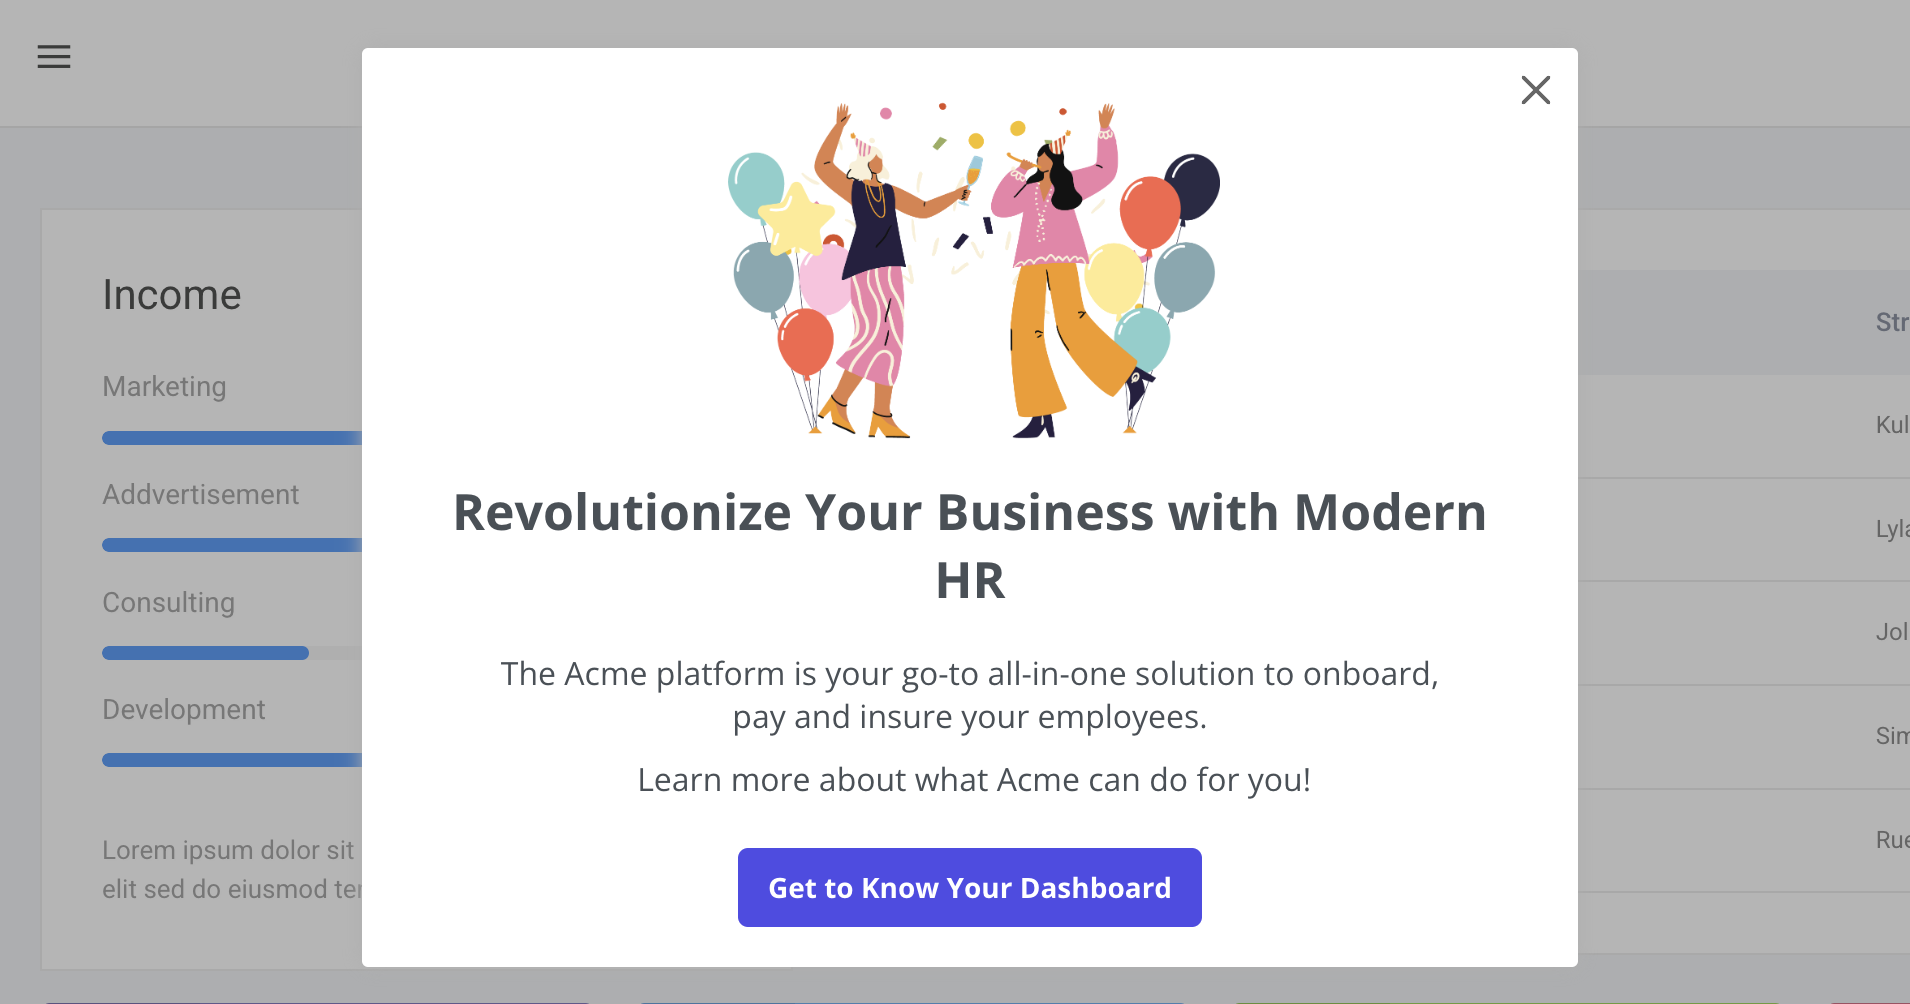
Flows are guided user experiences designed to onboard, engage, or educate users within your product. It consists of interactive steps such as tooltips, driven actions, modals, and slideouts that help users navigate features, complete tasks, or discover new functionalities seamlessly.
 ## Use Cases
* Announce new product updates and improvements to increase feature adoption.
* Guide new users through key features and set up to ensure a smooth start.
* Provide step-by-step guidance on how to use specific tools or functionalities.
* Assist users in completing processes by providing in-app guidance, minimizing the need for additional support.
## How to create a Flow
Creating flows with Userpilot is simple and intuitive. However, before you begin, ensure that the [Userpilot Chrome extension](https://chromewebstore.google.com/detail/userpilot/ecmjjdafjebhegfhjincbdhgfonpibfm?hl=en) is installed to access the builder.
Once the Userpilot builder is installed, you can start building your flows in two ways:
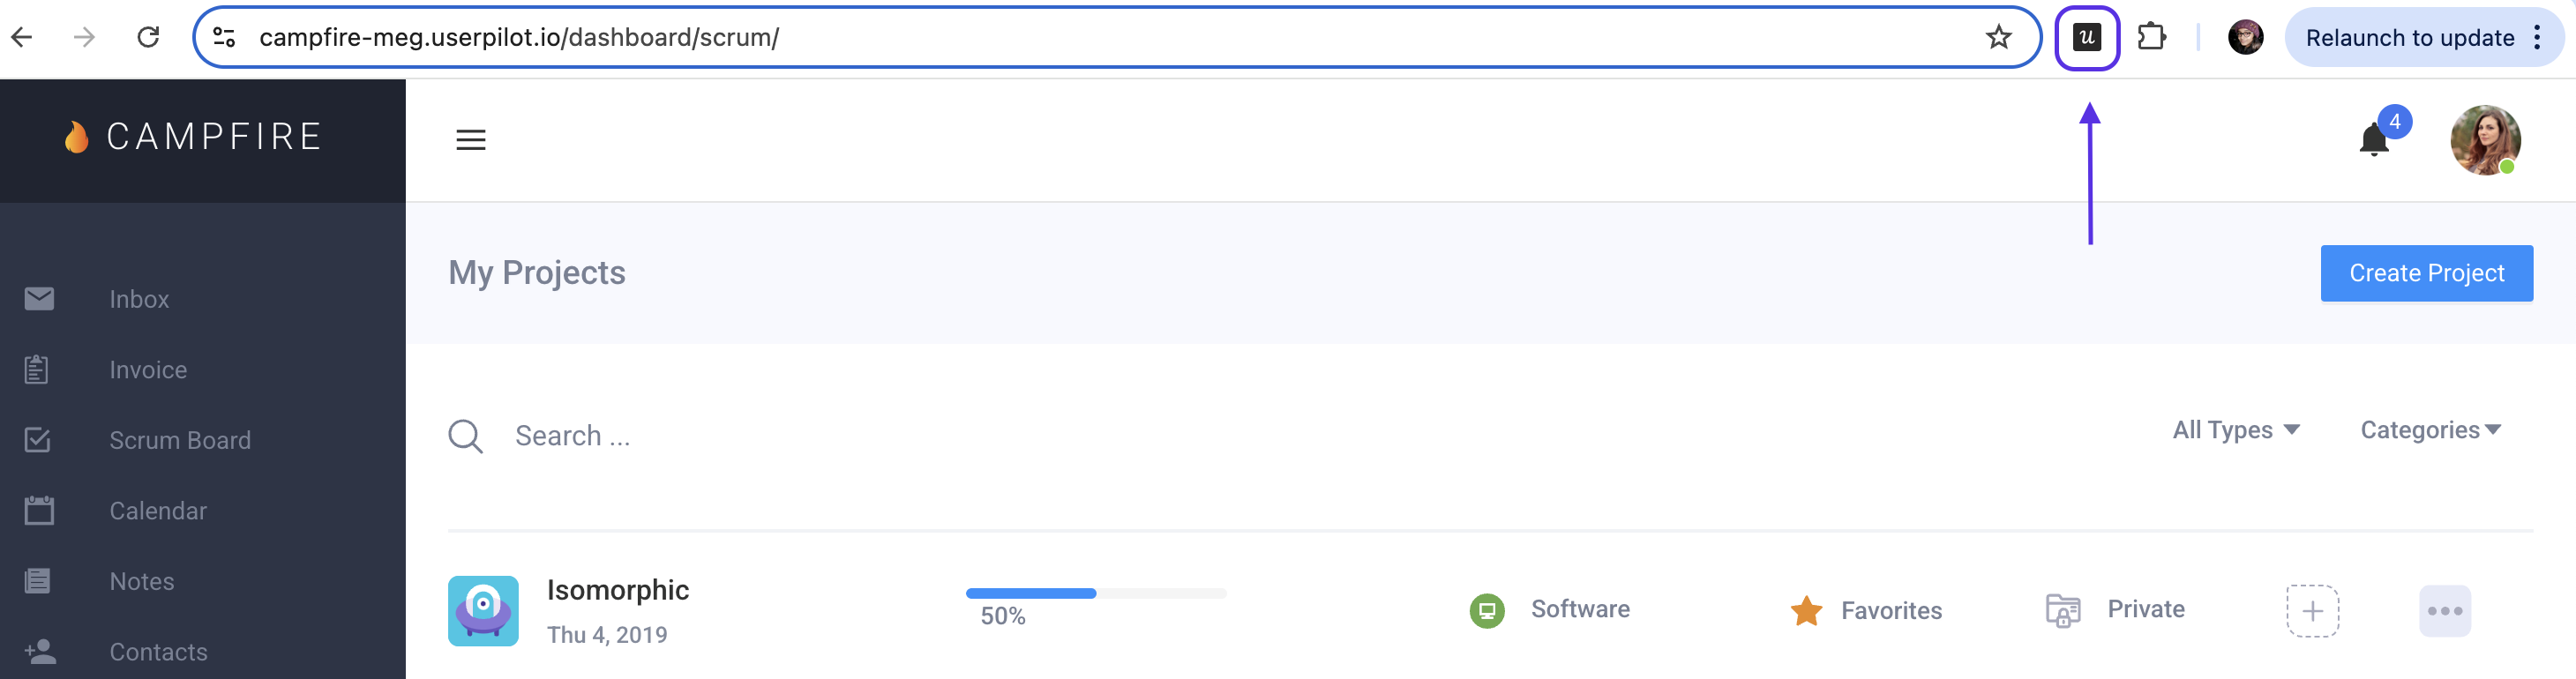
1. Navigate to your web application and launch the Userpilot builder by clicking the extension icon in your browser’s toolbar.
## Use Cases
* Announce new product updates and improvements to increase feature adoption.
* Guide new users through key features and set up to ensure a smooth start.
* Provide step-by-step guidance on how to use specific tools or functionalities.
* Assist users in completing processes by providing in-app guidance, minimizing the need for additional support.
## How to create a Flow
Creating flows with Userpilot is simple and intuitive. However, before you begin, ensure that the [Userpilot Chrome extension](https://chromewebstore.google.com/detail/userpilot/ecmjjdafjebhegfhjincbdhgfonpibfm?hl=en) is installed to access the builder.
Once the Userpilot builder is installed, you can start building your flows in two ways:
1. Navigate to your web application and launch the Userpilot builder by clicking the extension icon in your browser’s toolbar.
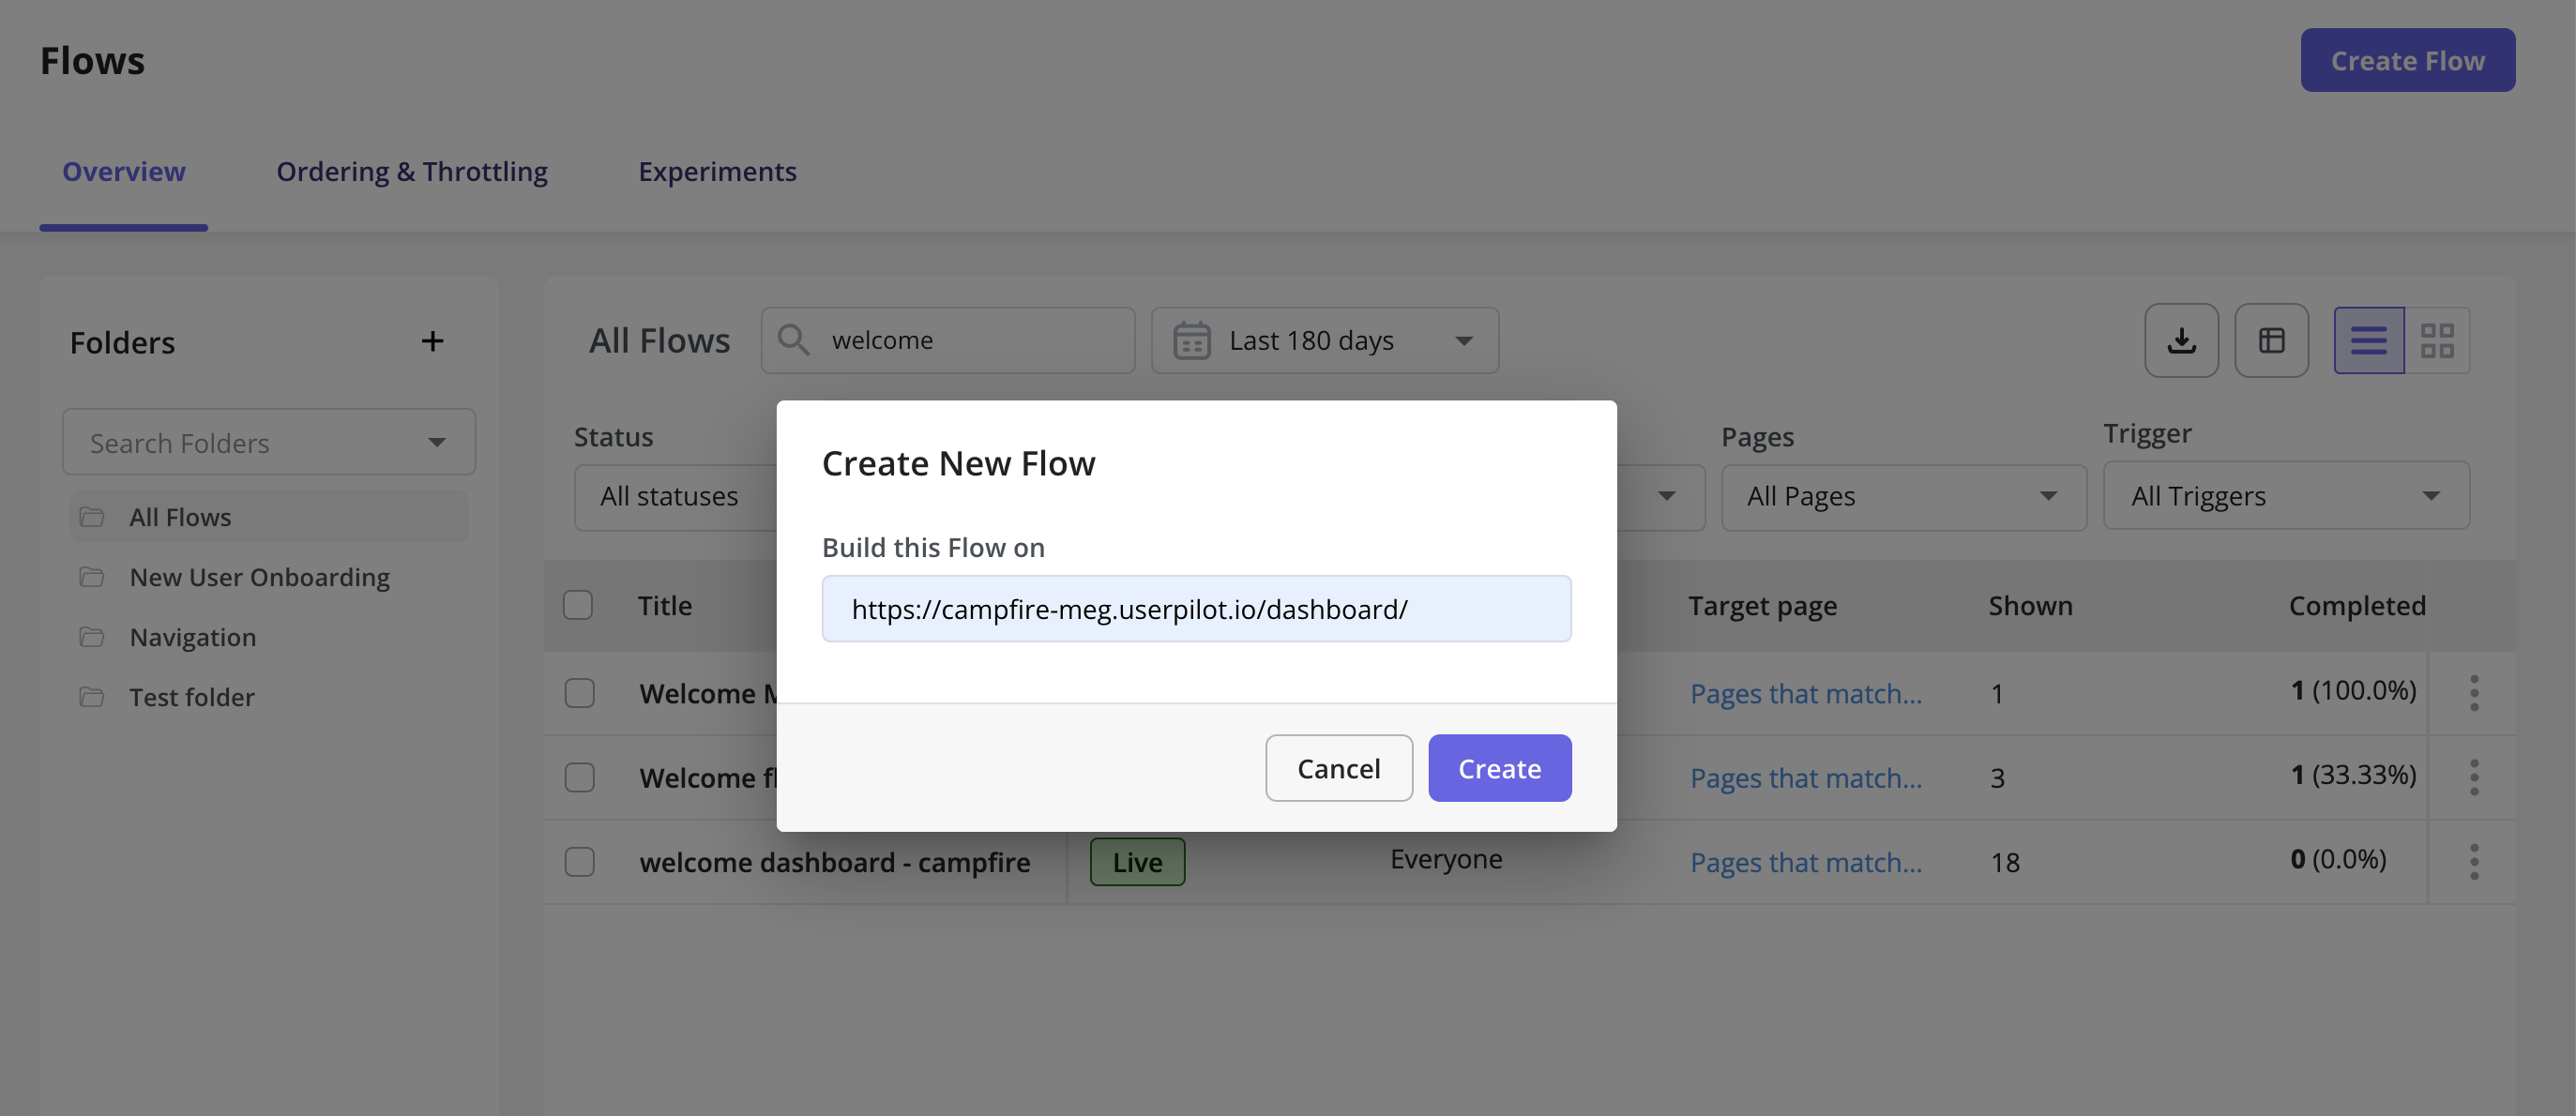
 2. You can also start creating your flow from the Userpilot web app by navigating to **Engagement Layer > Flows > Create New Flow**.
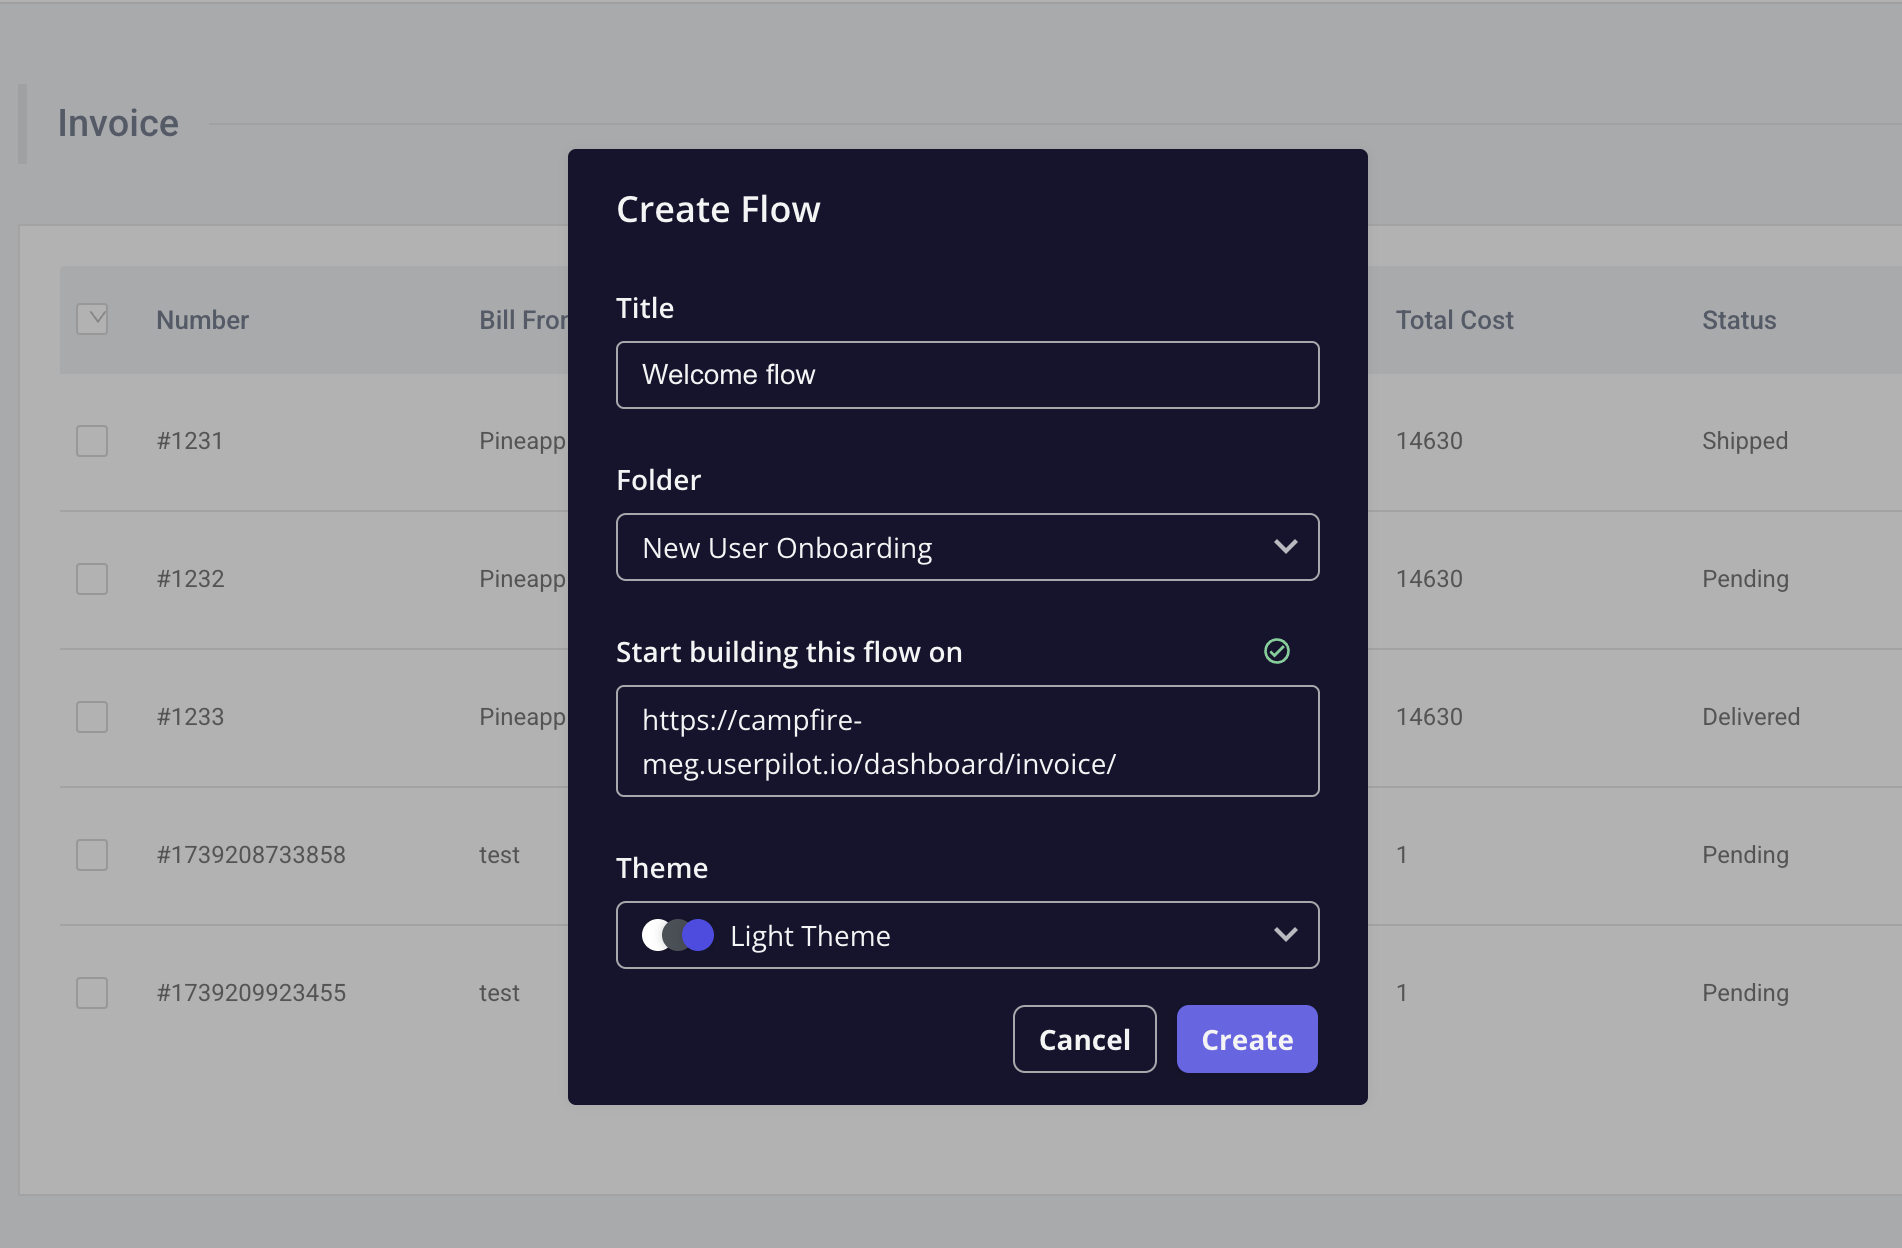
 Once the builder is launched, click on "Create New Content" and navigate to the page where you want to build the flow. Once you're ready, select "Start Here" to begin creating the flow on the chosen page. You will then see a selection of content types available. Click "Create a Flow" to proceed.
 ## Adding UI patterns
Choose the type of step to begin with from the following options:
Modals are Large, attention-grabbing announcements centered on the page and demand the user's full focus. They are ideal for welcoming new users, announcing major feature releases, or sharing critical updates like outages. To minimize disruption, it's best to use them sparingly.
## Adding UI patterns
Choose the type of step to begin with from the following options:
Modals are Large, attention-grabbing announcements centered on the page and demand the user's full focus. They are ideal for welcoming new users, announcing major feature releases, or sharing critical updates like outages. To minimize disruption, it's best to use them sparingly.
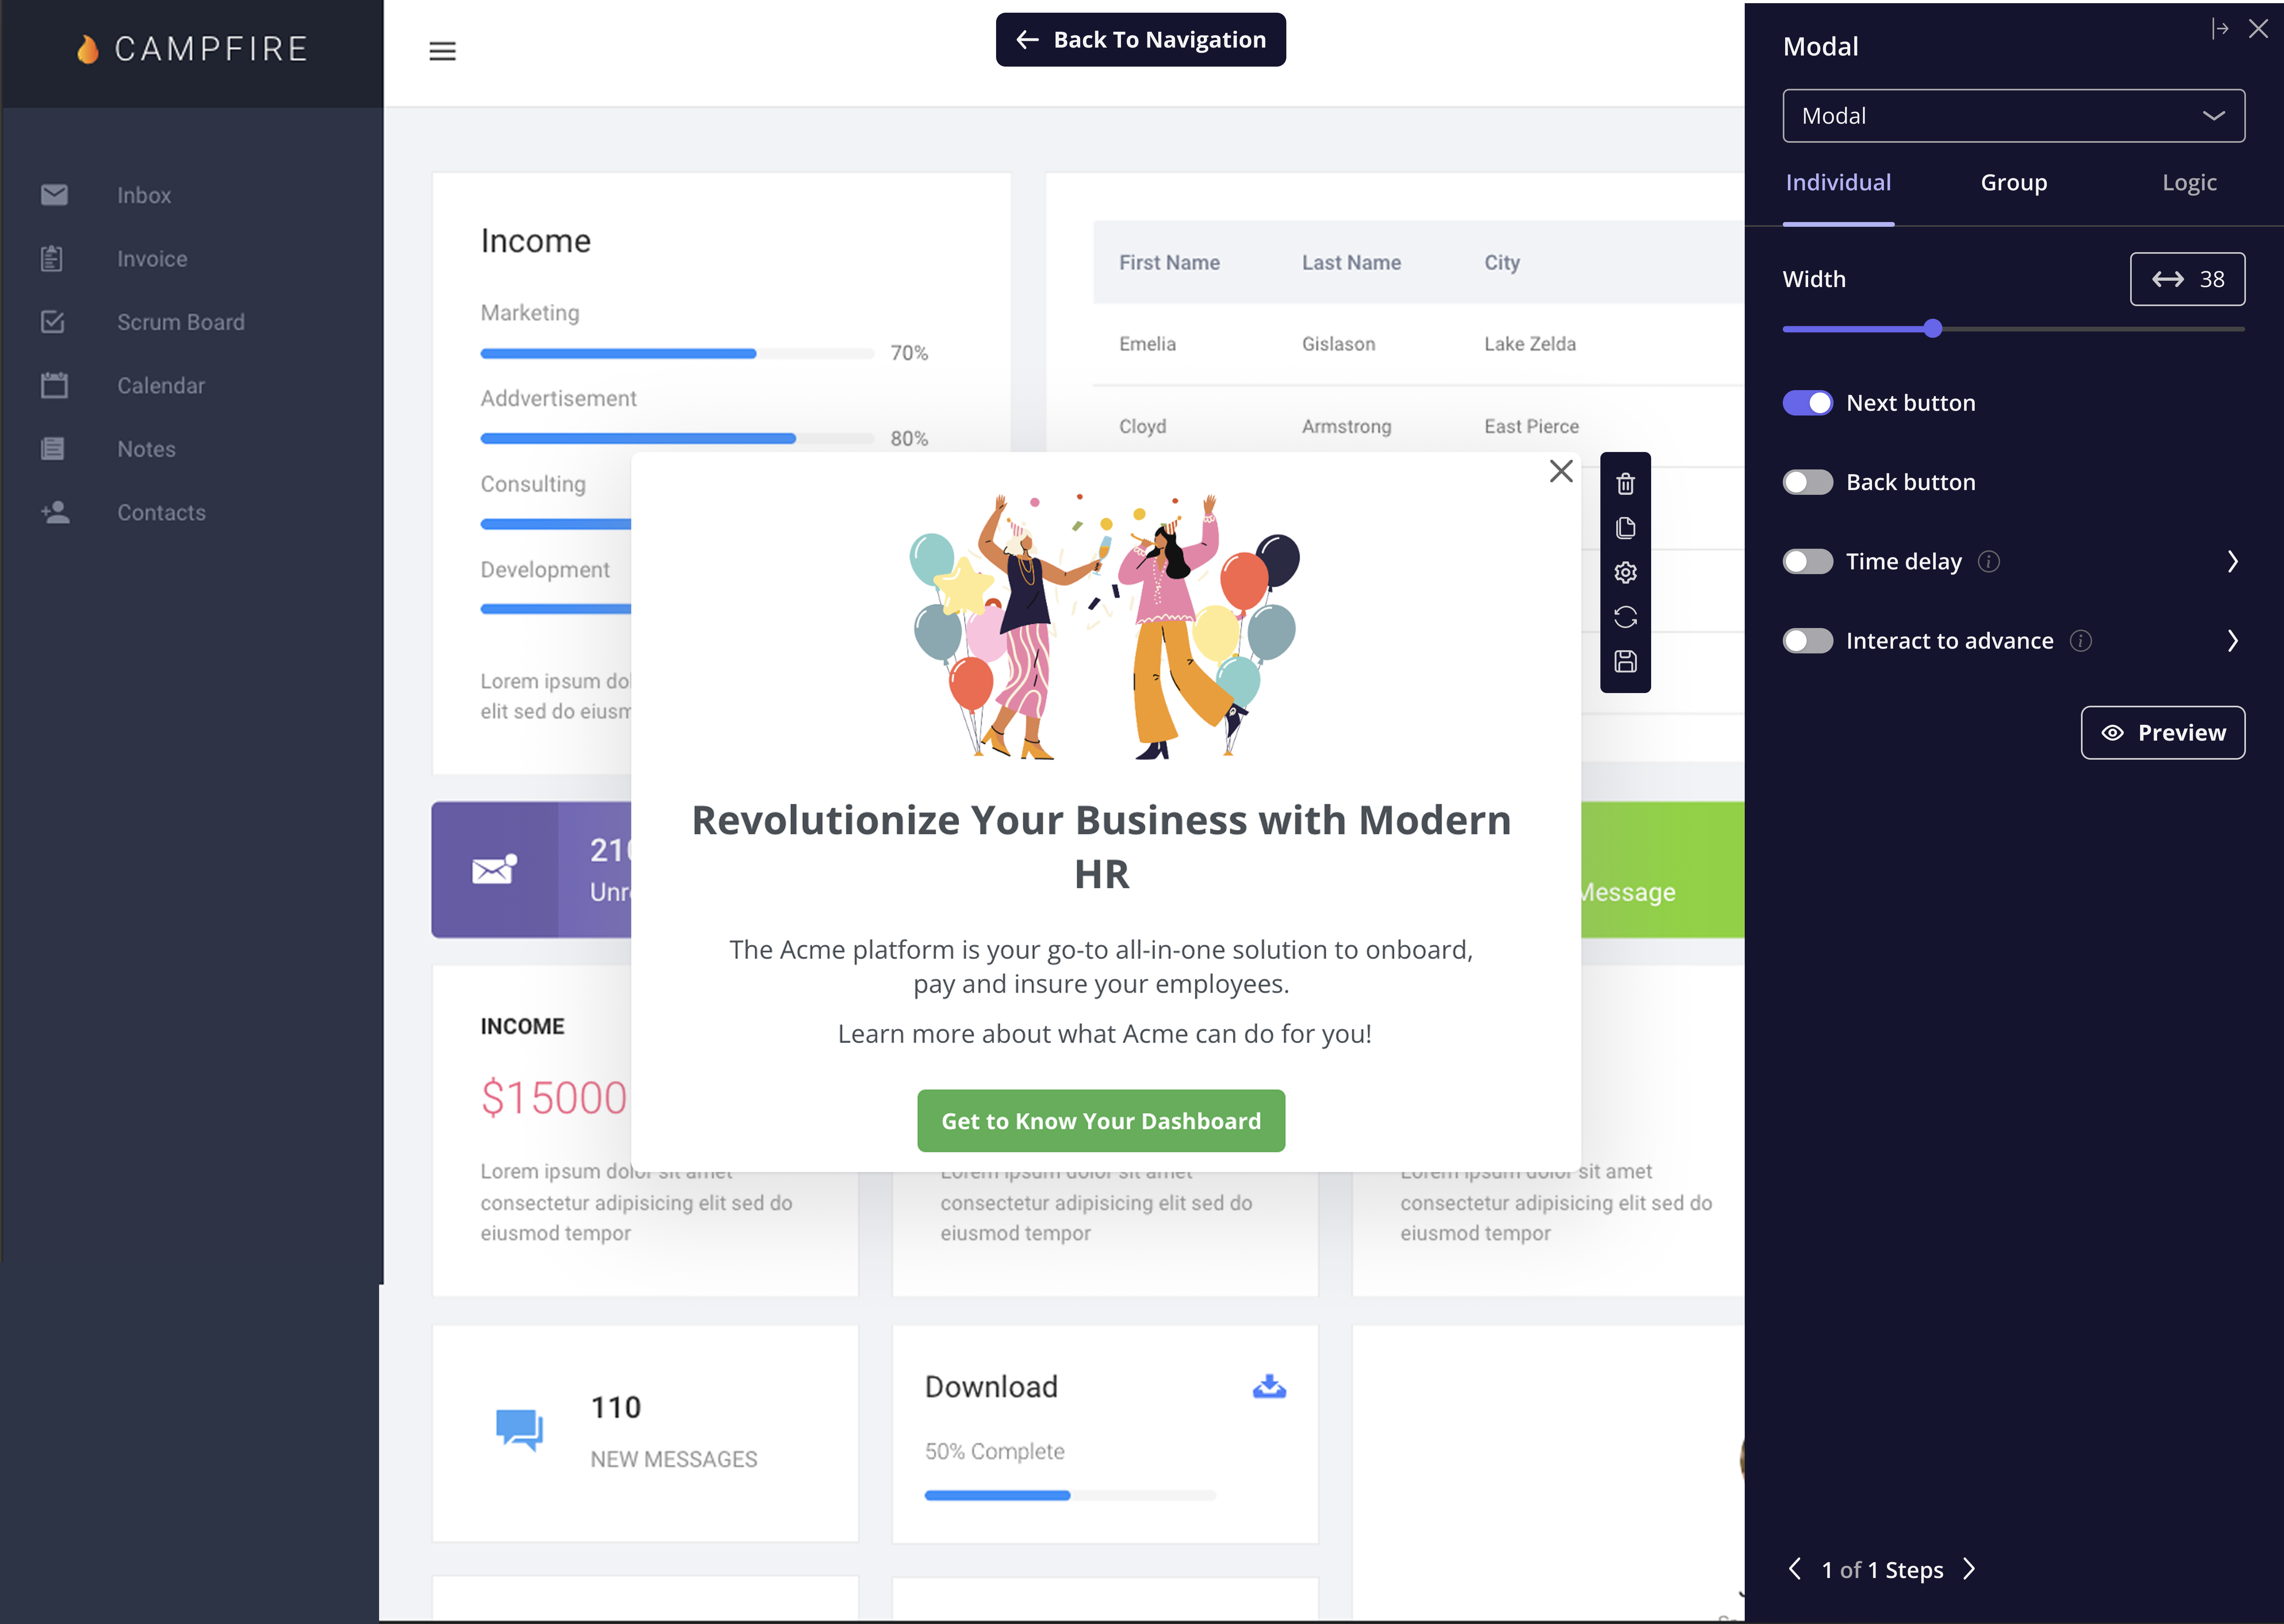 After adding the desired UI Patterns/steps to your flow, you can configure the flow settings in the Userpilot web app as outlined here.
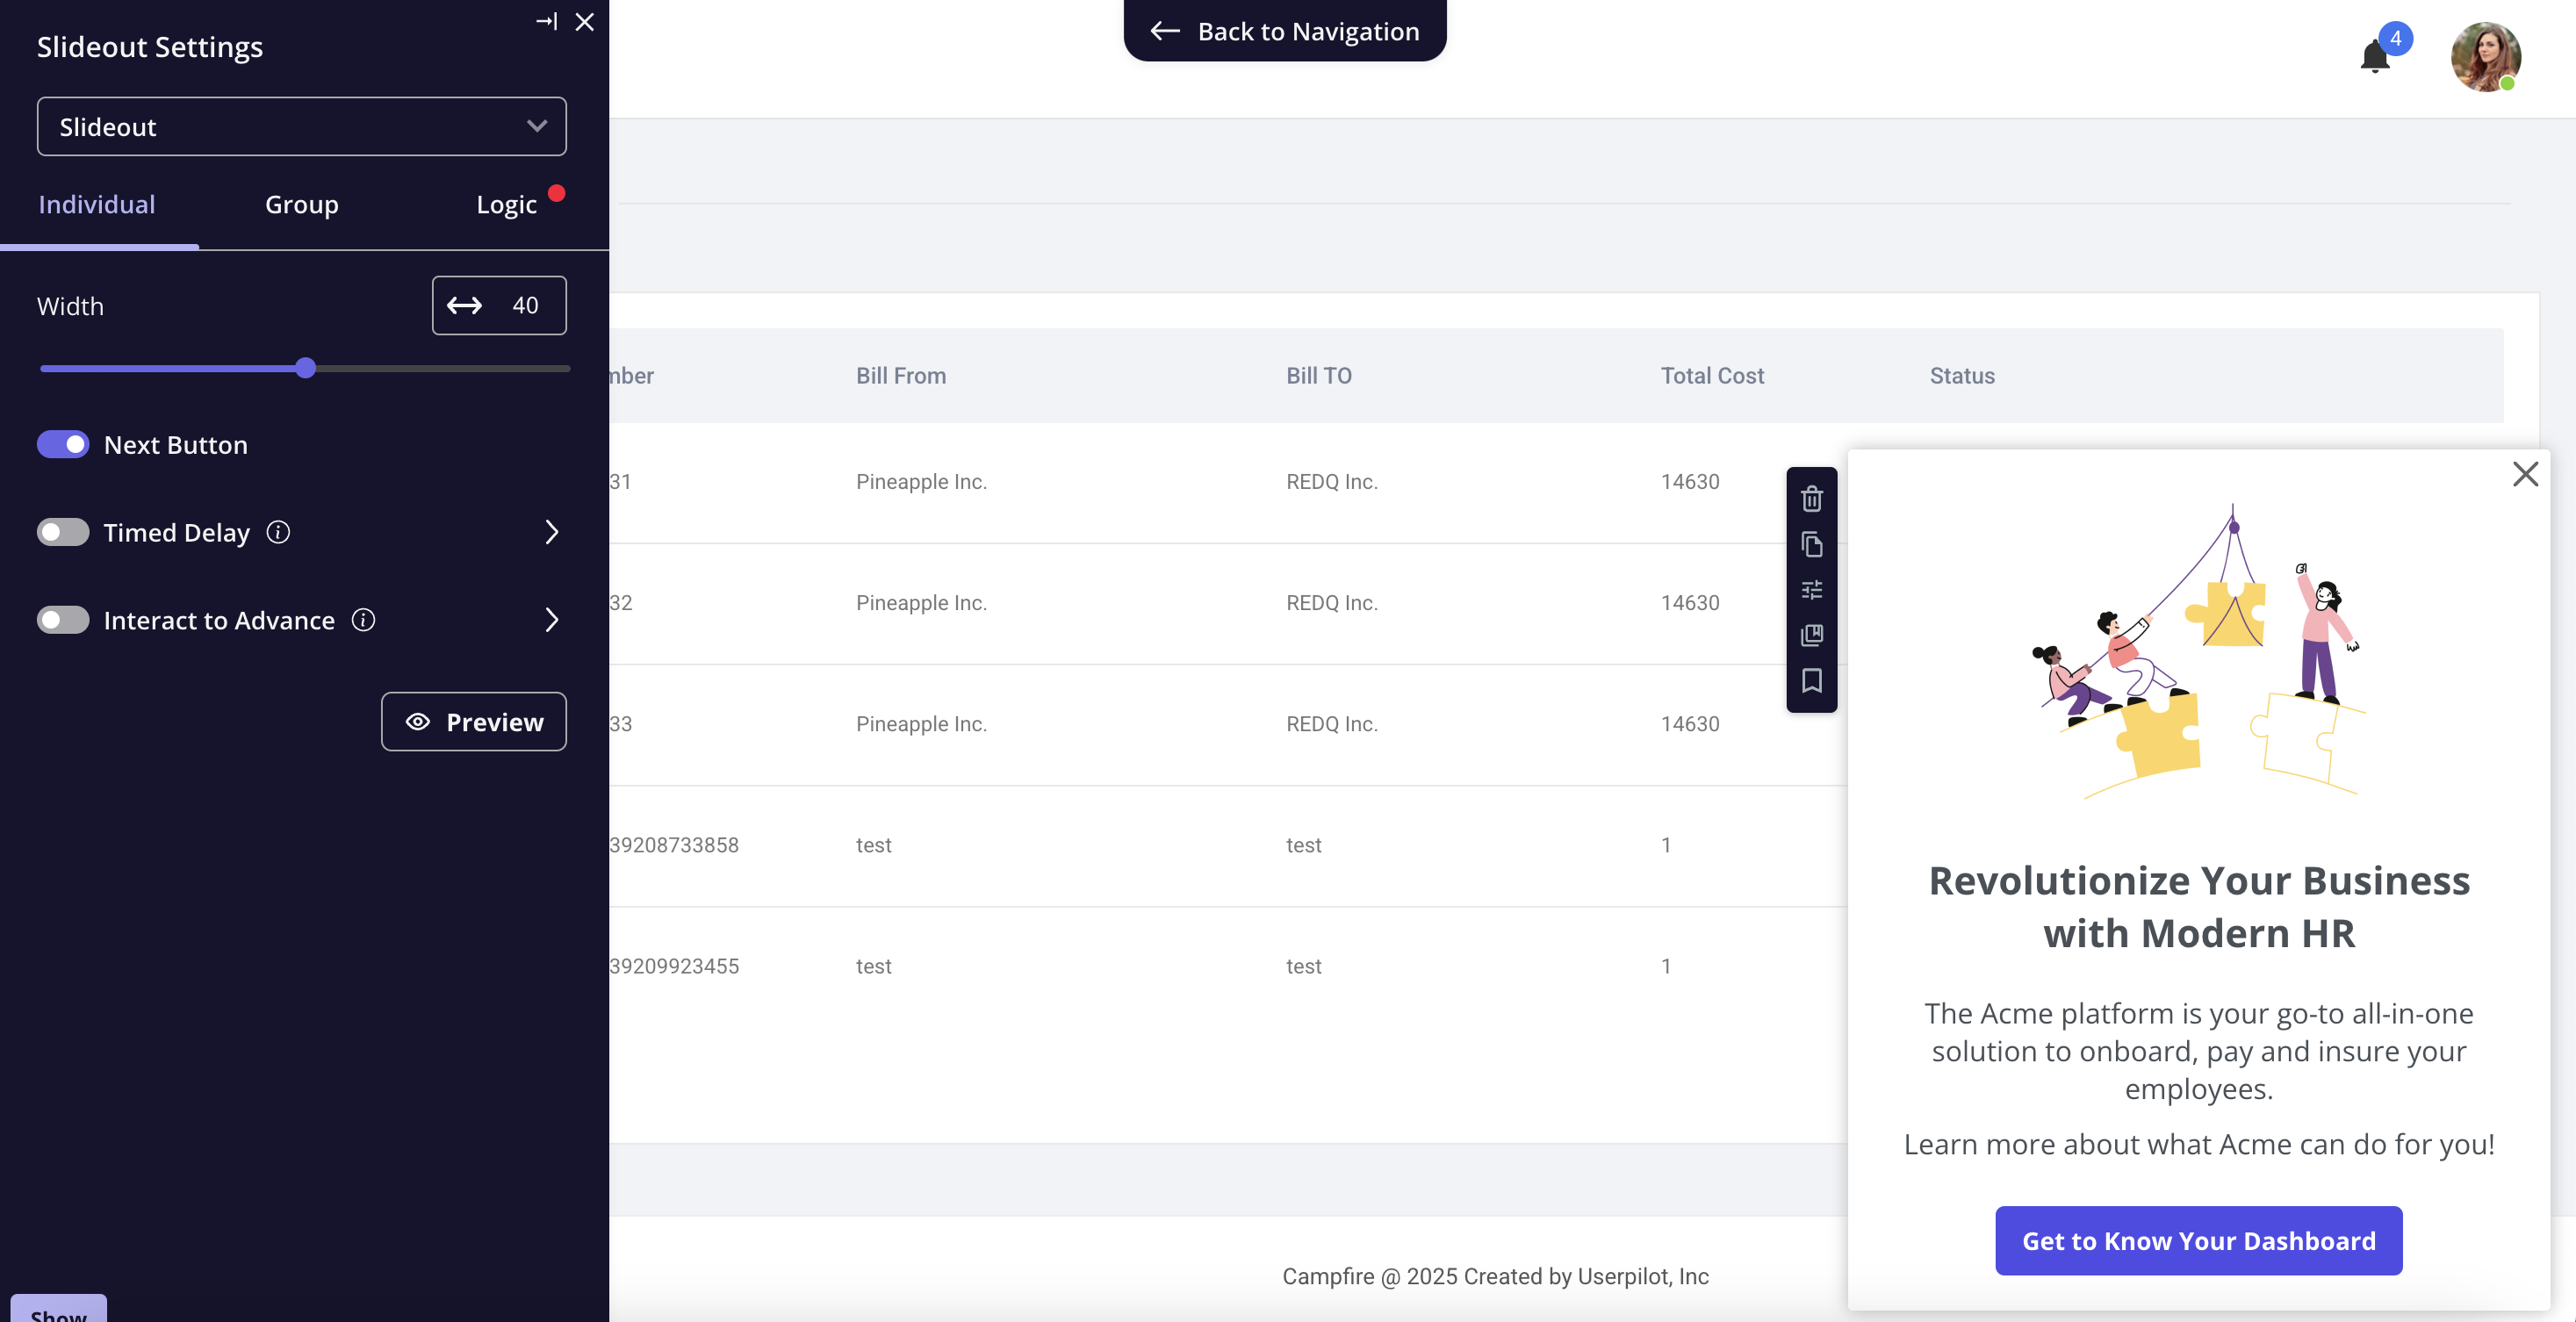
Slideouts are non-intrusive, mid-sized modals designed to capture user attention with minimal disruption. They are ideal for introducing minor features, gathering feedback, reinforcing feature value, and sharing non-critical messages like webinar announcements. Unlike modals, slideouts offer a more subtle way to engage users without disrupting their workflow.
After adding the desired UI Patterns/steps to your flow, you can configure the flow settings in the Userpilot web app as outlined here.
Slideouts are non-intrusive, mid-sized modals designed to capture user attention with minimal disruption. They are ideal for introducing minor features, gathering feedback, reinforcing feature value, and sharing non-critical messages like webinar announcements. Unlike modals, slideouts offer a more subtle way to engage users without disrupting their workflow.
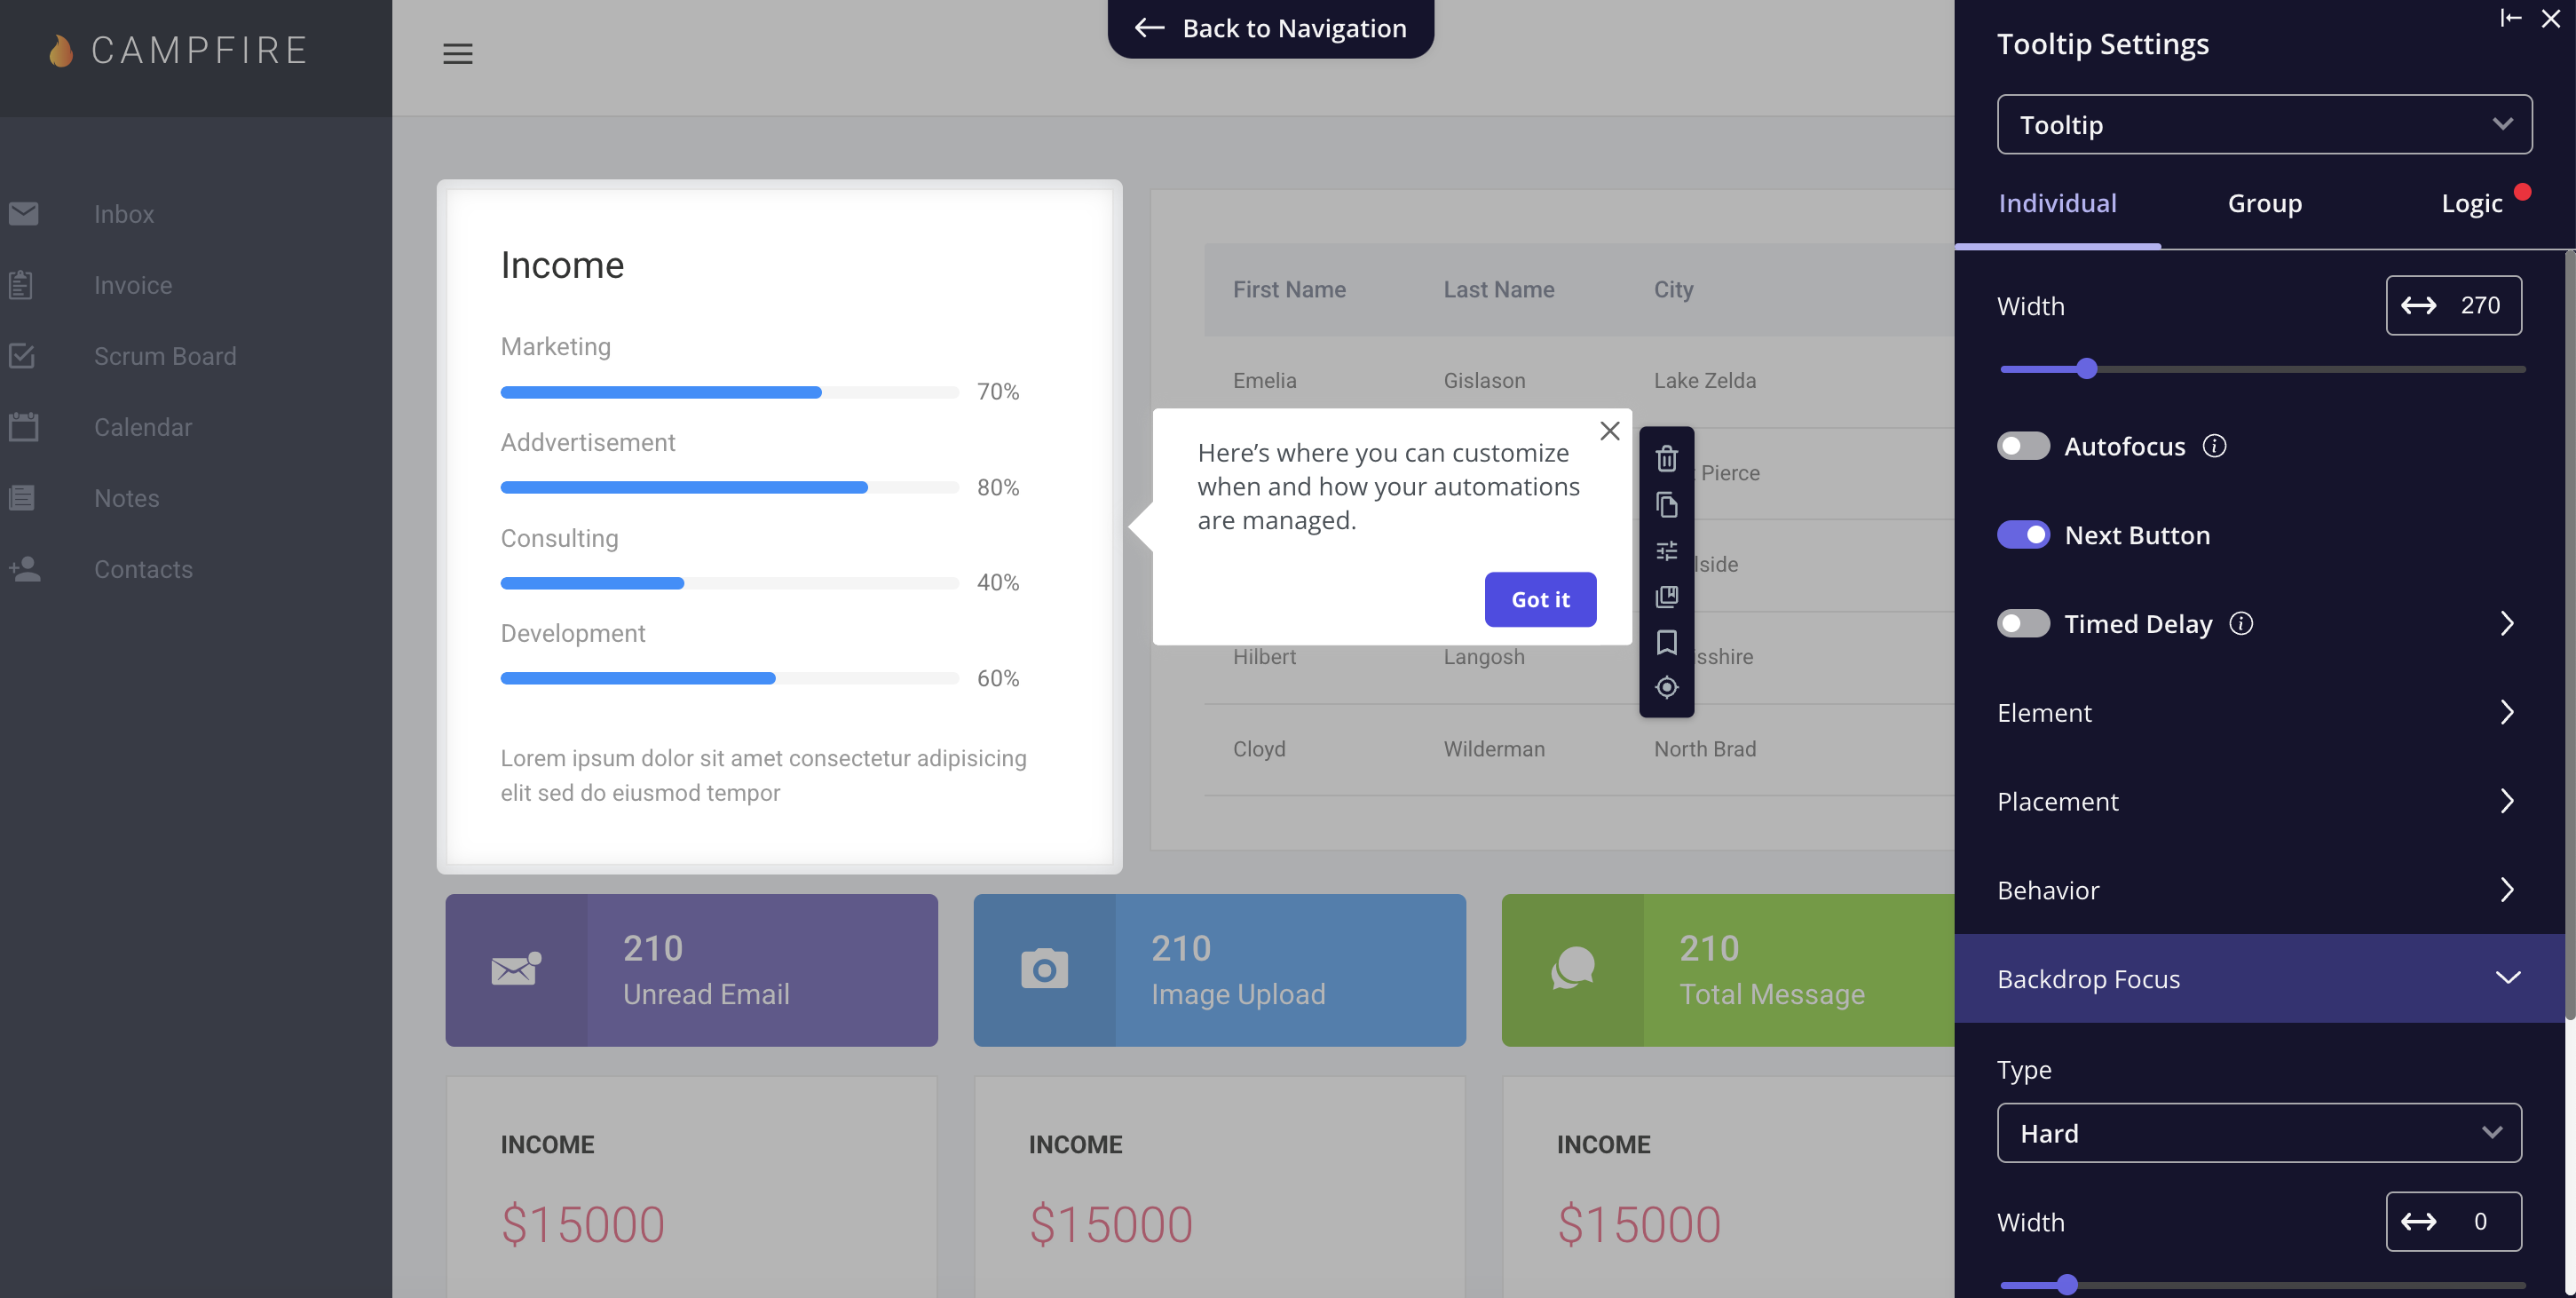
 Tooltips are anchored to specific elements within your application, making them ideal for providing contextual guidance on particular features. They help users navigate your product by offering step-by-step instructions and highlighting key actions.
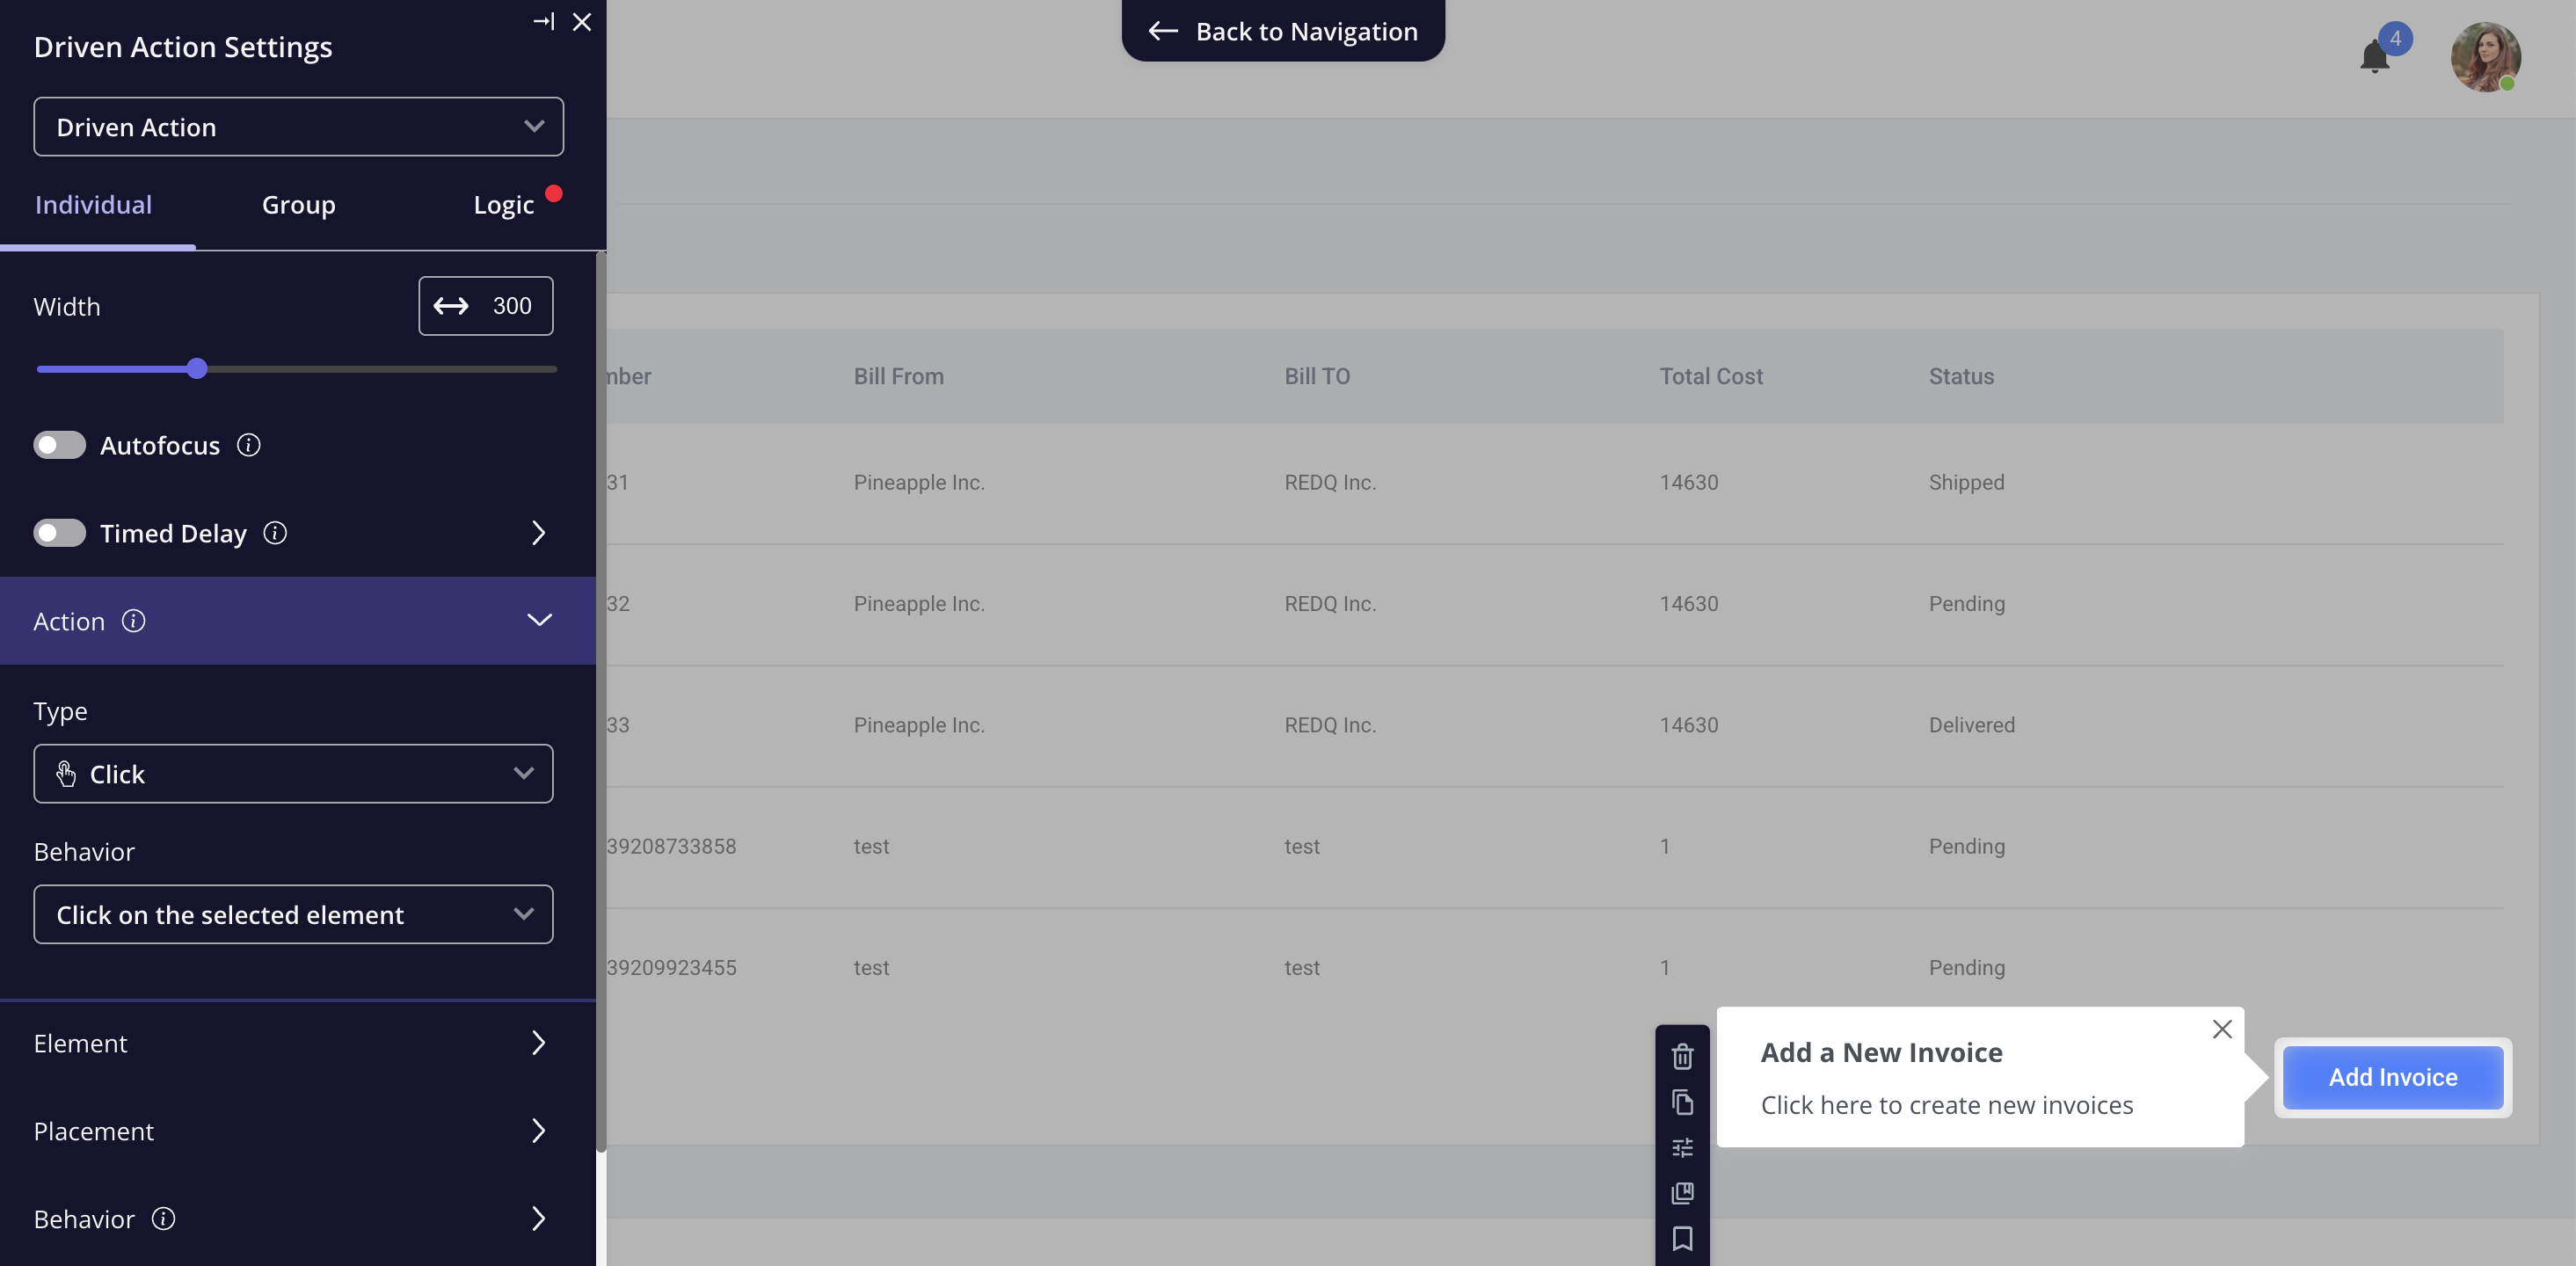
 Driven actions resemble tooltips but function differently—they wait for users to interact with a specific element in your app. They are ideal for guiding user attention toward key actions, such as clicking a button or entering input, to ensure engagement.
 ### FAQs
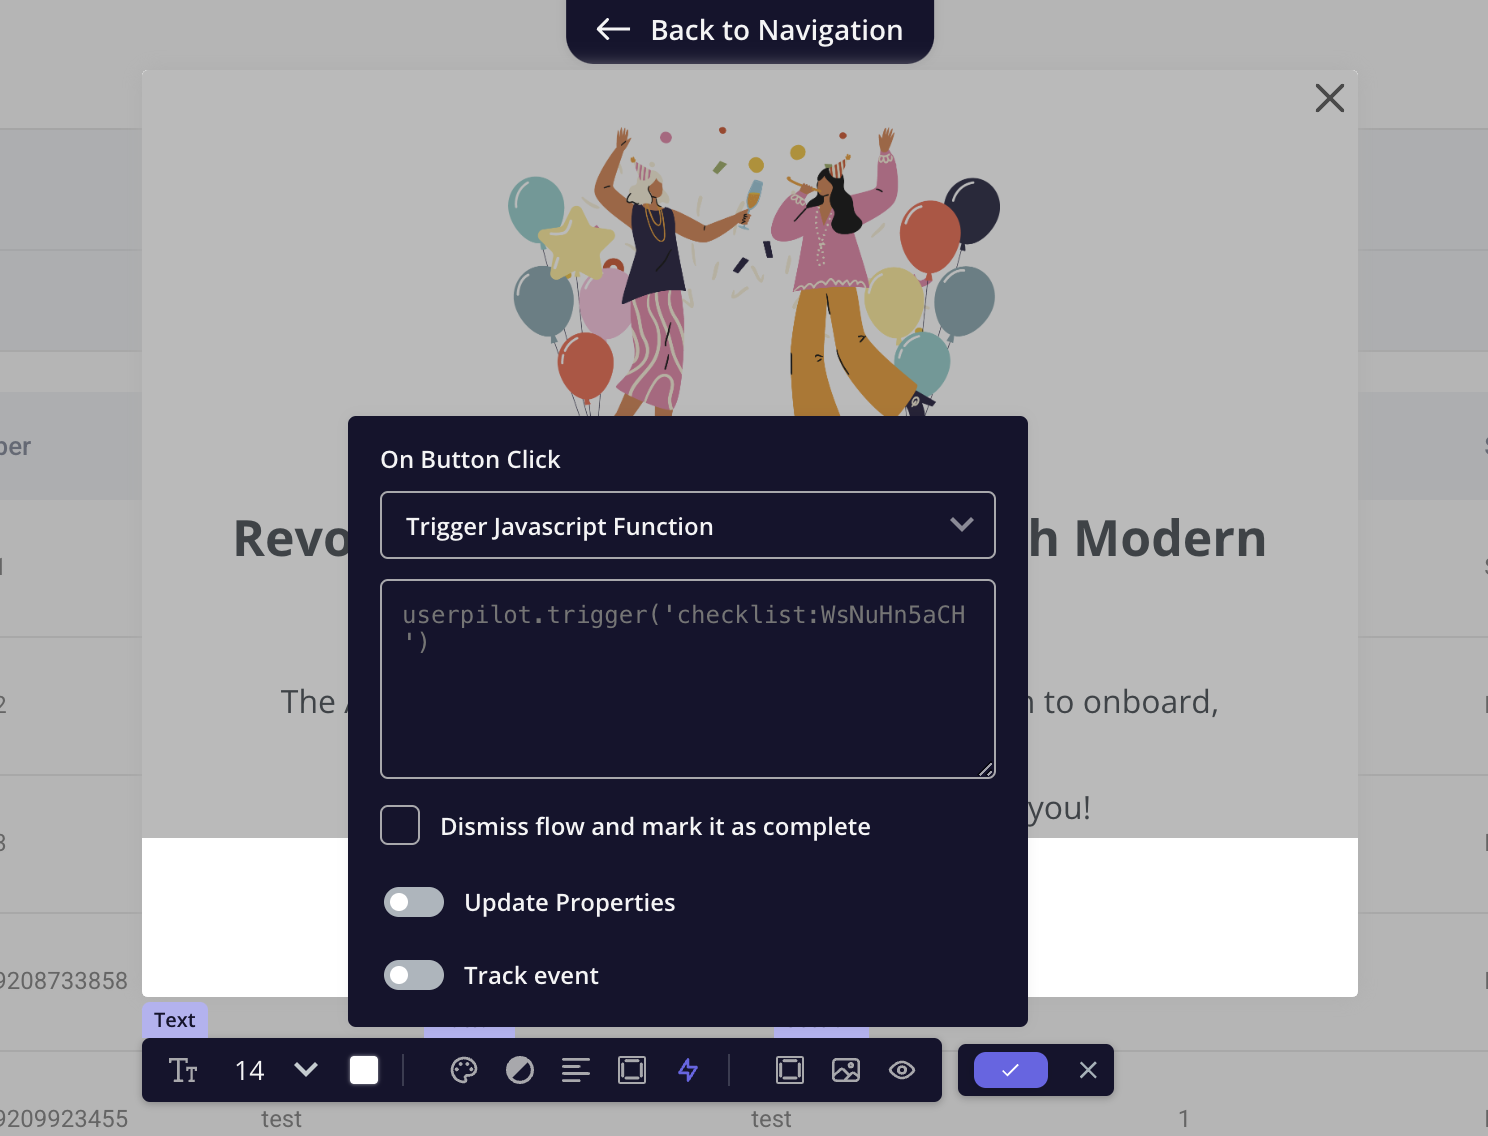
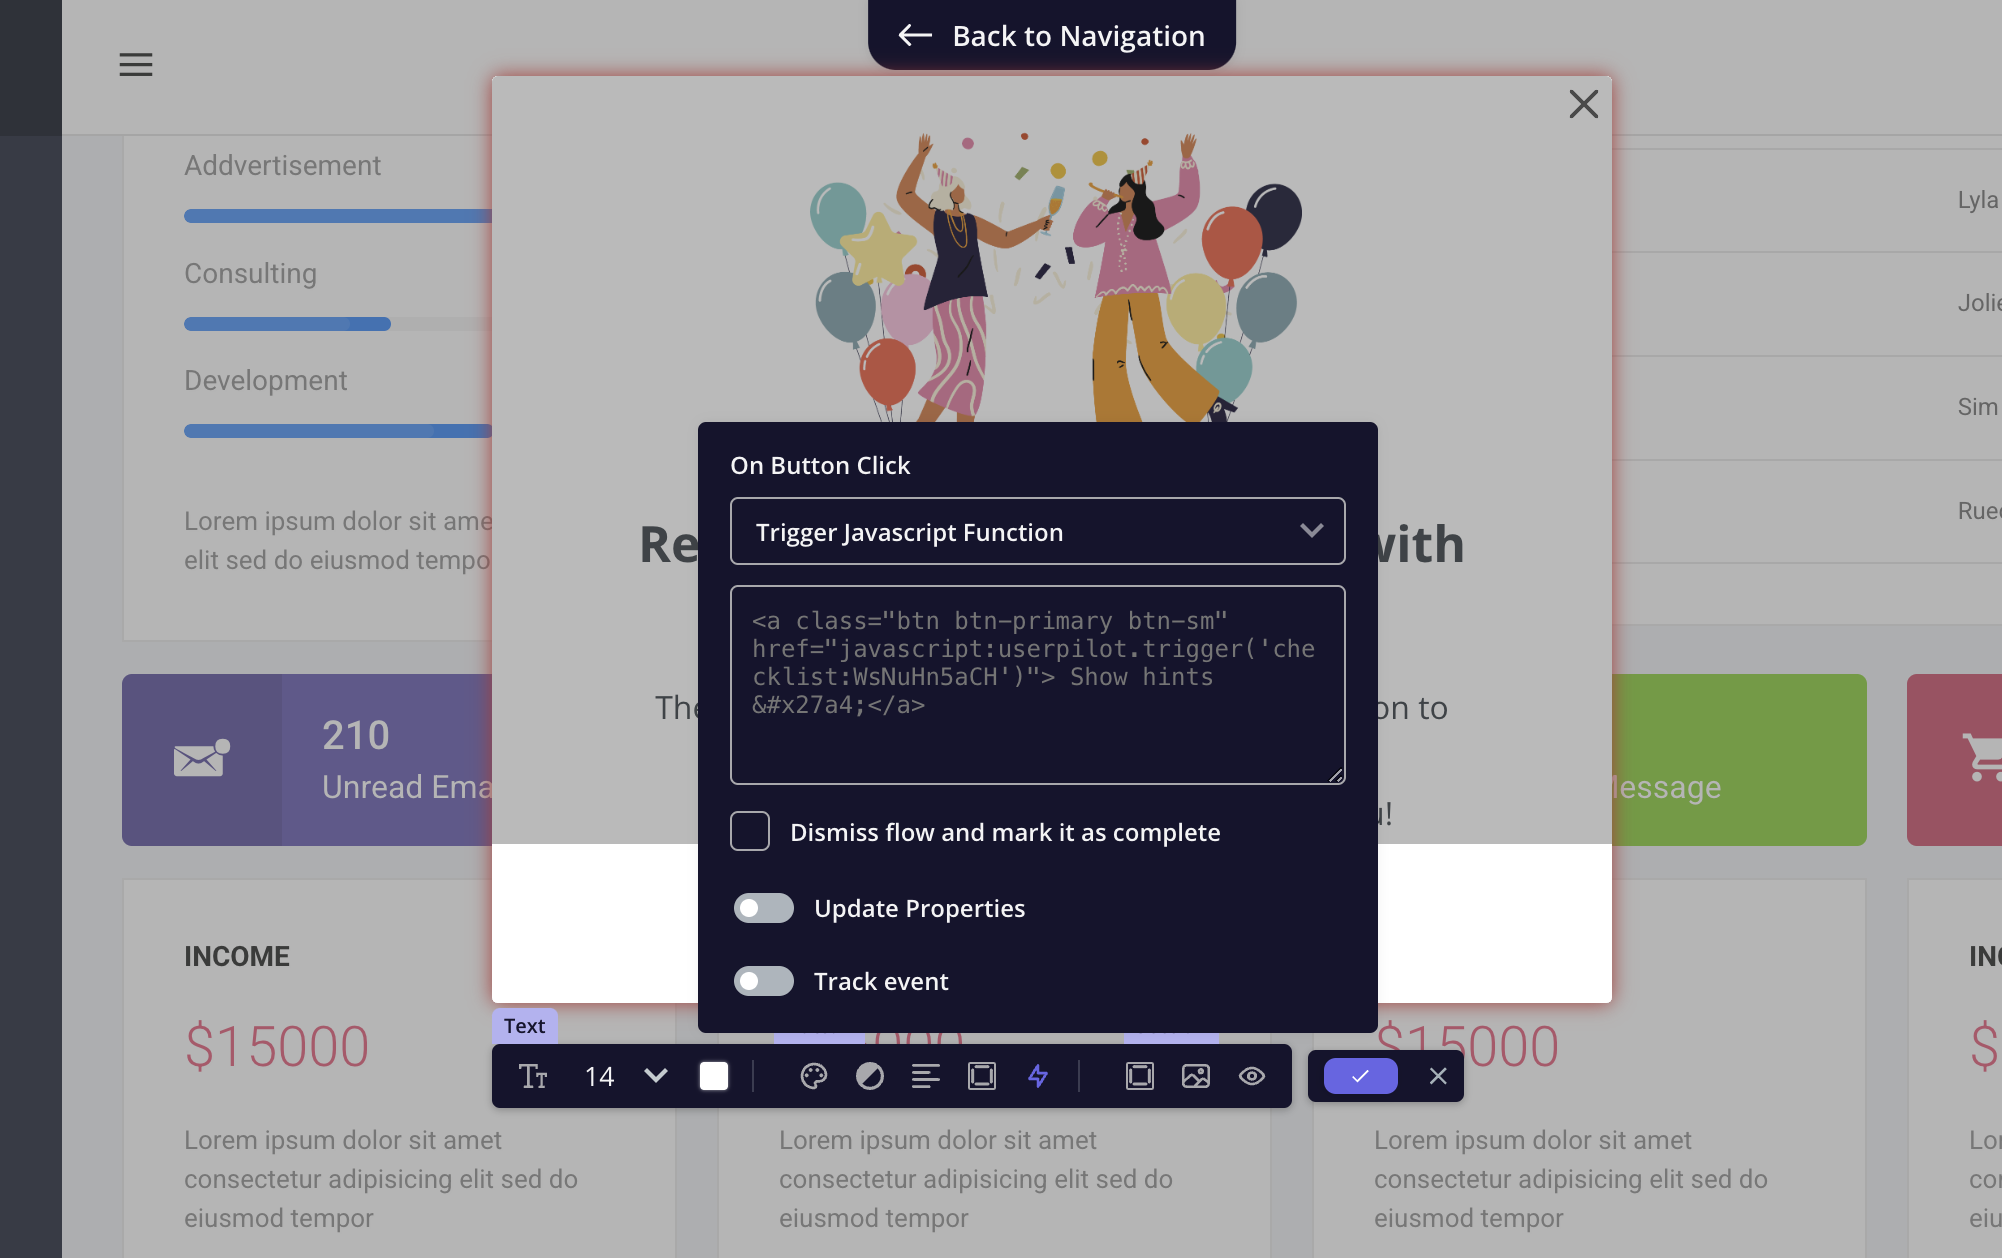
Yes, you can trigger a JavaScript function from the button and include the JS code to launch the checklist. You can find this code on the checklist settings page under the "only-manually" tab.
### FAQs
Yes, you can trigger a JavaScript function from the button and include the JS code to launch the checklist. You can find this code on the checklist settings page under the "only-manually" tab.
 You can add the HTML embed code of your video to the flow Modal as mentioned below: Hover over the modal -> click on the '+' icon -> select "video" -> paste the HTML embed code.
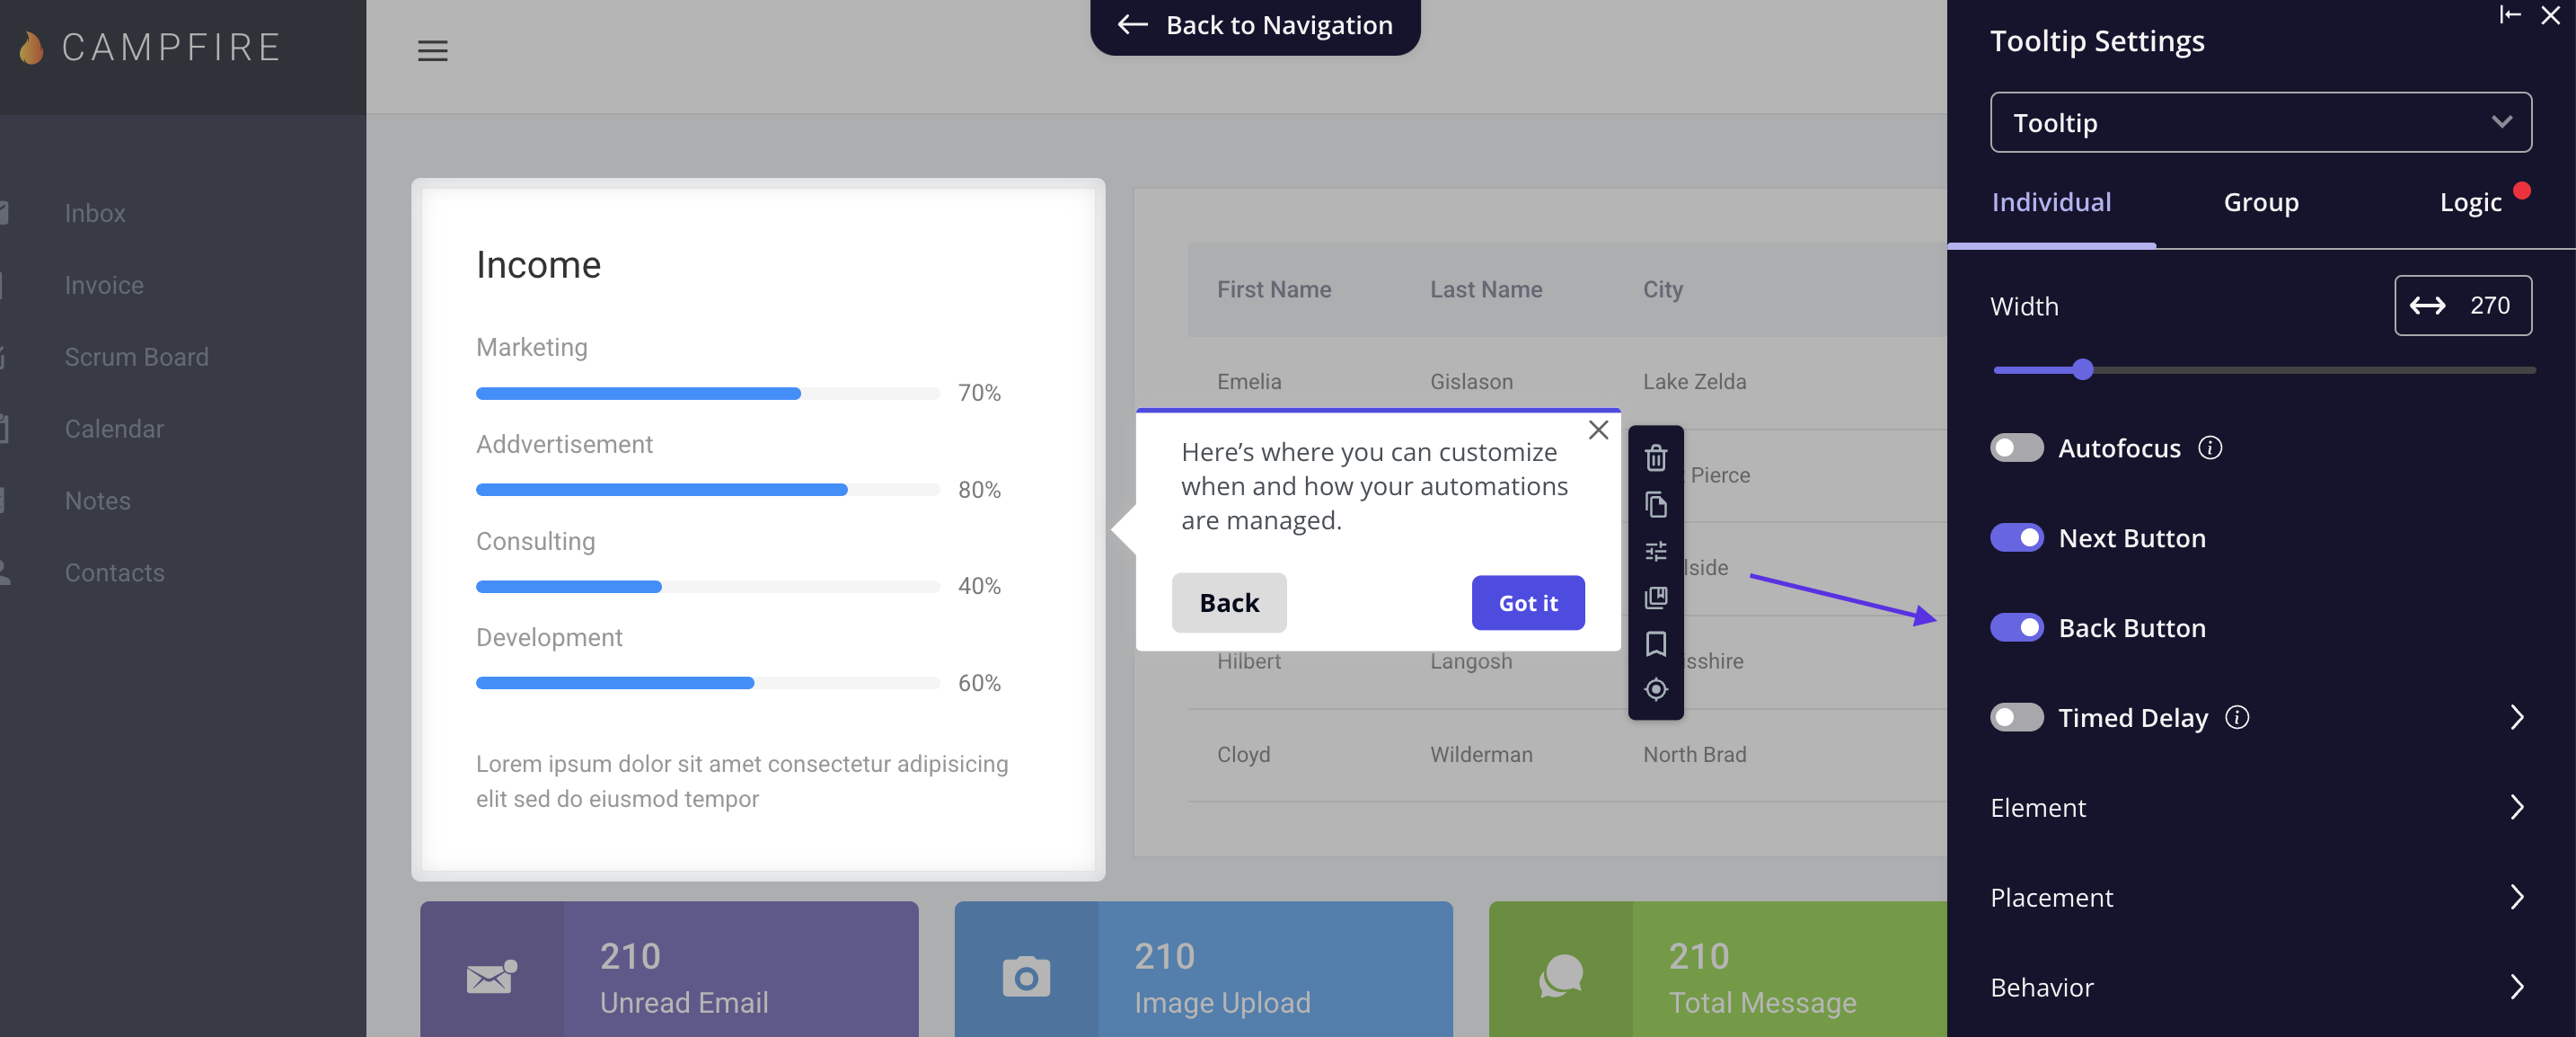
 Yes, you can add a back button to tooltips if they belong to a group. Simply drag and drop the steps to create a new group and the back button option will appear in the builder settings.
 ## Expected Result
After creating and publishing a flow:
* Flow appears in the [Flows list](https://run.userpilot.io/flows) with status "Live."
* Targeted users see the flow when conditions are met
* Flow analytics show impressions and completion rates
## Common Issues
| Symptom | Cause | Solution |
| --------------------------------- | ---------------------------- | --------------------------------------------- |
| Flow not appearing | User doesn't match targeting | Check audience and page targeting rules |
| Flow not appearing | Content not published | Publish flow from settings page |
| Element not found | Dynamic selector changed | Re-select element or use stable selector |
| The flow shows to the wrong users | Targeting too broad | Add more specific segment or property filters |
## Related
* [Flow Settings](/in-app-engagement/flows/getting-started/flow-settings) - Configure targeting, frequency, triggers
* [Testing Flows](/in-app-engagement/flows/getting-started/testing-flows) - Preview before publishing
* [Flow Analytics](/in-app-engagement/flows/getting-started/Flow-performance-analytics) - Measure performance
* [UI Templates](/ce-basics/ui-templates) - Customize flow appearance
* [Element Selection](/ce-basics/select-element) - Best practices for stable selectors
[**For any questions or concerns please reach out to support@userpilot.com**](mailto:support@userpilot.com)
## Expected Result
After creating and publishing a flow:
* Flow appears in the [Flows list](https://run.userpilot.io/flows) with status "Live."
* Targeted users see the flow when conditions are met
* Flow analytics show impressions and completion rates
## Common Issues
| Symptom | Cause | Solution |
| --------------------------------- | ---------------------------- | --------------------------------------------- |
| Flow not appearing | User doesn't match targeting | Check audience and page targeting rules |
| Flow not appearing | Content not published | Publish flow from settings page |
| Element not found | Dynamic selector changed | Re-select element or use stable selector |
| The flow shows to the wrong users | Targeting too broad | Add more specific segment or property filters |
## Related
* [Flow Settings](/in-app-engagement/flows/getting-started/flow-settings) - Configure targeting, frequency, triggers
* [Testing Flows](/in-app-engagement/flows/getting-started/testing-flows) - Preview before publishing
* [Flow Analytics](/in-app-engagement/flows/getting-started/Flow-performance-analytics) - Measure performance
* [UI Templates](/ce-basics/ui-templates) - Customize flow appearance
* [Element Selection](/ce-basics/select-element) - Best practices for stable selectors
[**For any questions or concerns please reach out to support@userpilot.com**](mailto:support@userpilot.com)