> ## Documentation Index
> Fetch the complete documentation index at: https://docs.userpilot.com/llms.txt
> Use this file to discover all available pages before exploring further.
# Preparing to Send Push Notifications
> Before you can start sending push notifications to your mobile app users through Userpilot, you’ll need to complete some one-time setup steps for both iOS and.
Before you can start sending **push notifications** to your mobile app users through Userpilot, you’ll need to **complete some one-time setup steps** for both **iOS** and **Android**.
This guide will walk you through the fields you'll see under **Settings → Mobile** in Userpilot and explain what you need to prepare with your engineering team.
## The need for this setup
Push notifications depend on your app being registered with Apple (iOS) and Google (Android) push services. These configurations **authenticate Userpilot** to send push notifications on your behalf.
Your development team will typically generate these credentials during your app’s push notification integration process.
## iOS push notifications setup
Under **Settings → Mobile → iOS push notifications**, you’ll need to provide the following:
* **Developer Team ID**
* Your Apple Developer Team ID
* Used to identify your Apple developer account.
* Example: `ABCD1234XY`
* **App Bundle Identifier**
* The unique identifier of your iOS app
* Must match the bundle ID in Xcode
* Example: `com.example.myapp`
* **APNs Key File**
* Upload the `.p8` APN's key file you generated in the Apple Developer portal
* This file securely authenticates Userpilot with Apple Push Notification Service
* **APNs Key ID**
* The Key ID is linked to your APNs key file
* Example: `A1B2C3D4E5`
* **Mode**
* Choose between **Dev** (development/testing) or **Prod** (production/live) modes.
* This ensures notifications go to the correct version of your app.
.png?fit=max&auto=format&n=eKuoNPh2qVInx2ej&q=85&s=698689a306998eabc7839b70b38f6246) Your engineering team will know where to find the Developer Team ID, Bundle ID, and APNs Key details in your Apple Developer account.
## Android push notifications setup
Under **Settings → Mobile → Android push notifications**, you’ll need:
* **Project Number**
* Your Firebase or Google Cloud project number.
* Used to identify your app project in Google’s services.
* Example: `ABCD123456`
* **Service Account File**
* Upload your Firebase service account JSON file.
* This file allows Userpilot to send messages through Firebase Cloud Messaging (FCM).
Your engineering team will know where to find the Developer Team ID, Bundle ID, and APNs Key details in your Apple Developer account.
## Android push notifications setup
Under **Settings → Mobile → Android push notifications**, you’ll need:
* **Project Number**
* Your Firebase or Google Cloud project number.
* Used to identify your app project in Google’s services.
* Example: `ABCD123456`
* **Service Account File**
* Upload your Firebase service account JSON file.
* This file allows Userpilot to send messages through Firebase Cloud Messaging (FCM).
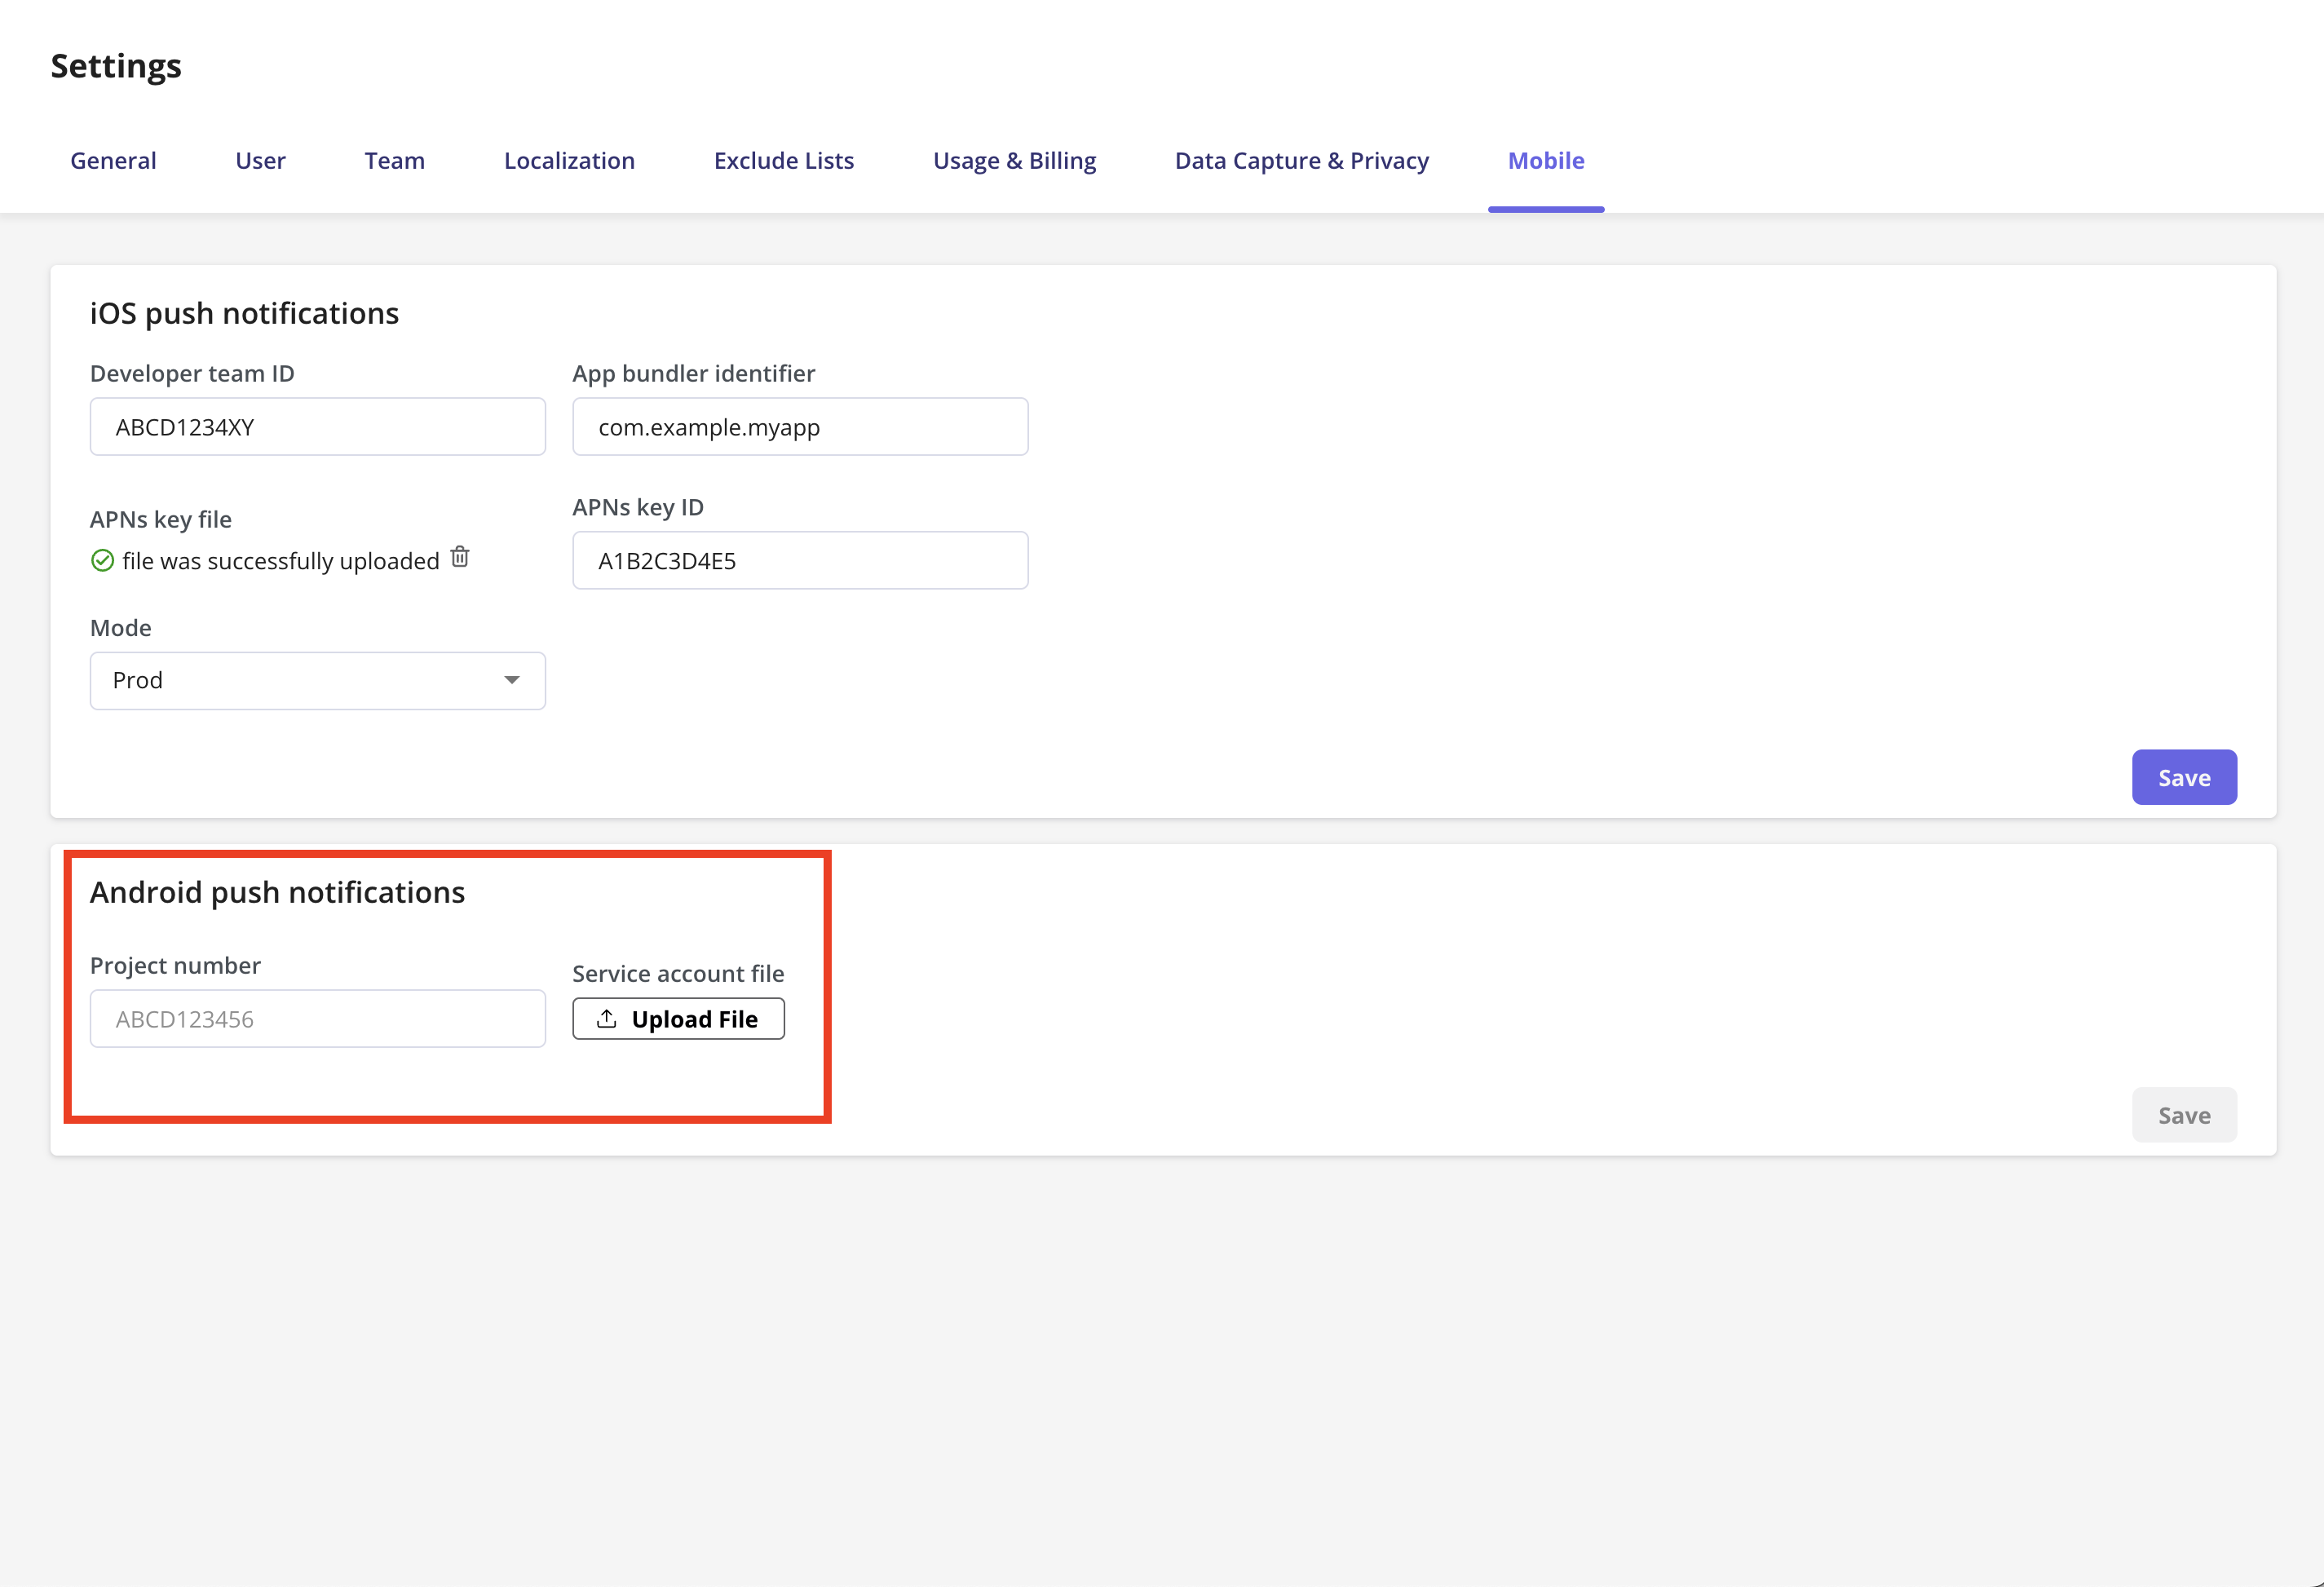 Your developers will have access to your Firebase project settings and can generate the necessary service account file.
## Next Step: Verify and save
Once you’ve filled in these fields:
1. Upload the required files.
2. Double-check the identifiers and IDs.
3. Click “Save” to store your settings.
After setup is complete, you’ll be ready to **create, schedule, and send push notifications** to your mobile users using Userpilot.
If you’re not sure how to get these details or encounter any issues during setup, please **reach out to your engineering team or contact Userpilot Support** at [**support@userpilot.com**](mailto:support@userpilot.com).
Your developers will have access to your Firebase project settings and can generate the necessary service account file.
## Next Step: Verify and save
Once you’ve filled in these fields:
1. Upload the required files.
2. Double-check the identifiers and IDs.
3. Click “Save” to store your settings.
After setup is complete, you’ll be ready to **create, schedule, and send push notifications** to your mobile users using Userpilot.
If you’re not sure how to get these details or encounter any issues during setup, please **reach out to your engineering team or contact Userpilot Support** at [**support@userpilot.com**](mailto:support@userpilot.com).