> ## Documentation Index
> Fetch the complete documentation index at: https://docs.userpilot.com/llms.txt
> Use this file to discover all available pages before exploring further.
# Adding Custom Objects in SalesForce
> Configure Userpilot custom objects in Salesforce to better view your Userpilot data
### Overview
Integrating Userpilot with Salesforce allows you to send user and event data to custom objects for deeper insights and automation. Follow these steps to create and configure a custom object in Salesforce.
### **Creating a Custom Object in Salesforce**
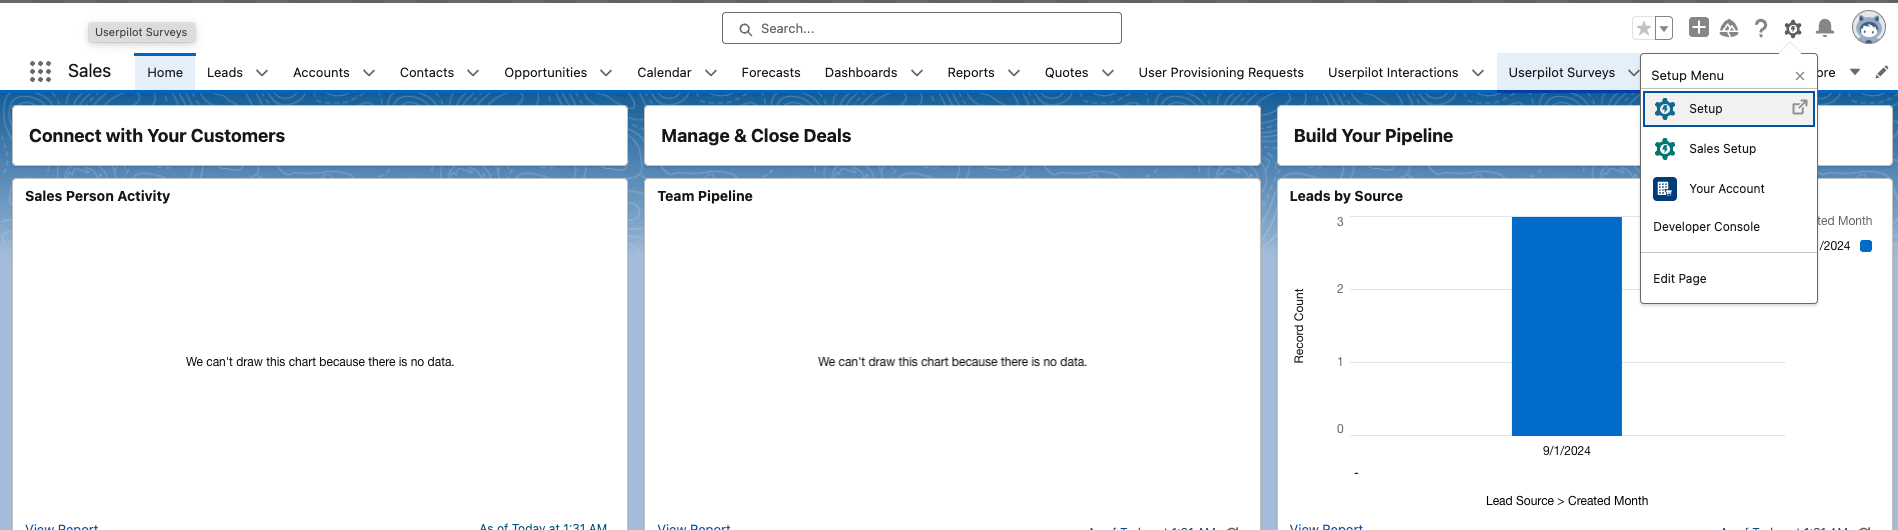 them
them
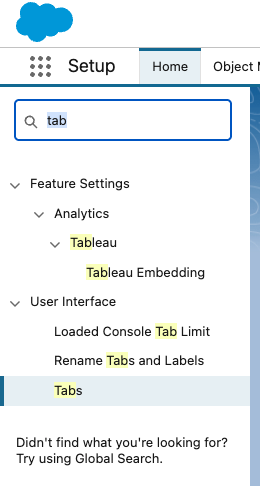
 Userpilot Interactions
Userpilot Nps
Userpilot Forms
Userpilot SurveyQuestions
Userpilot Surveys
Userpilot Interactions
Userpilot Nps
Userpilot Forms
Userpilot SurveyQuestions
Userpilot Surveys
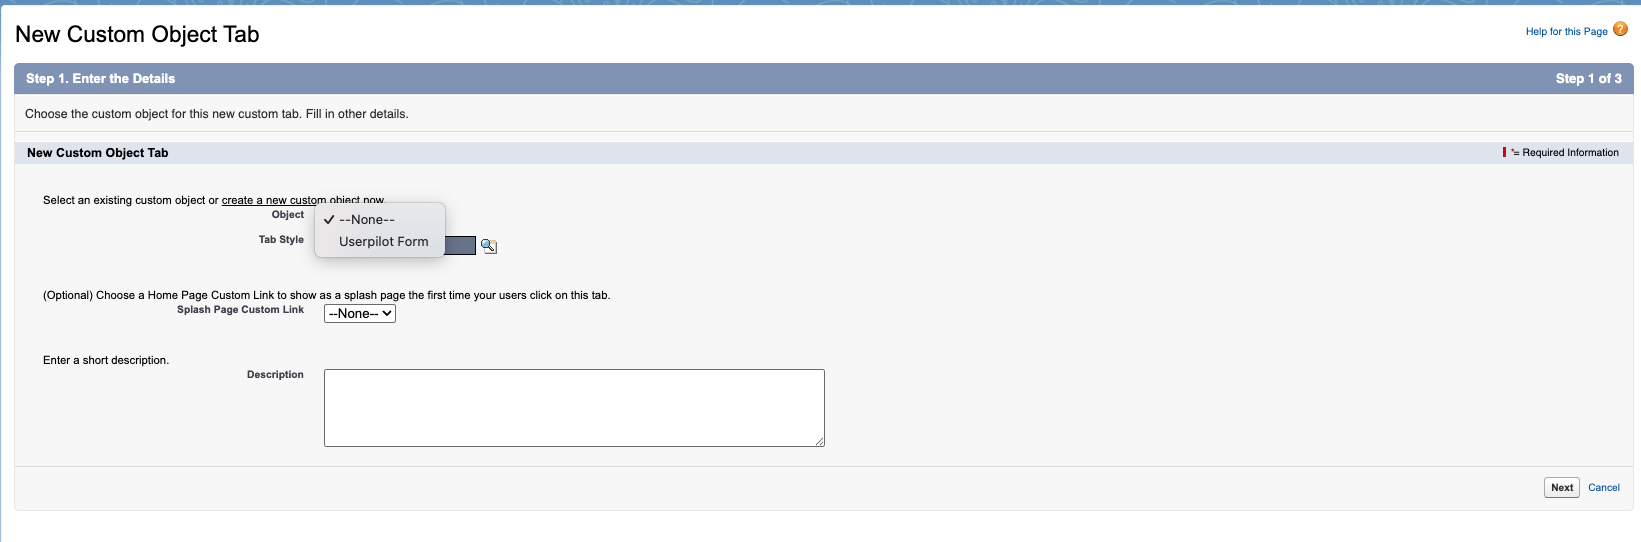
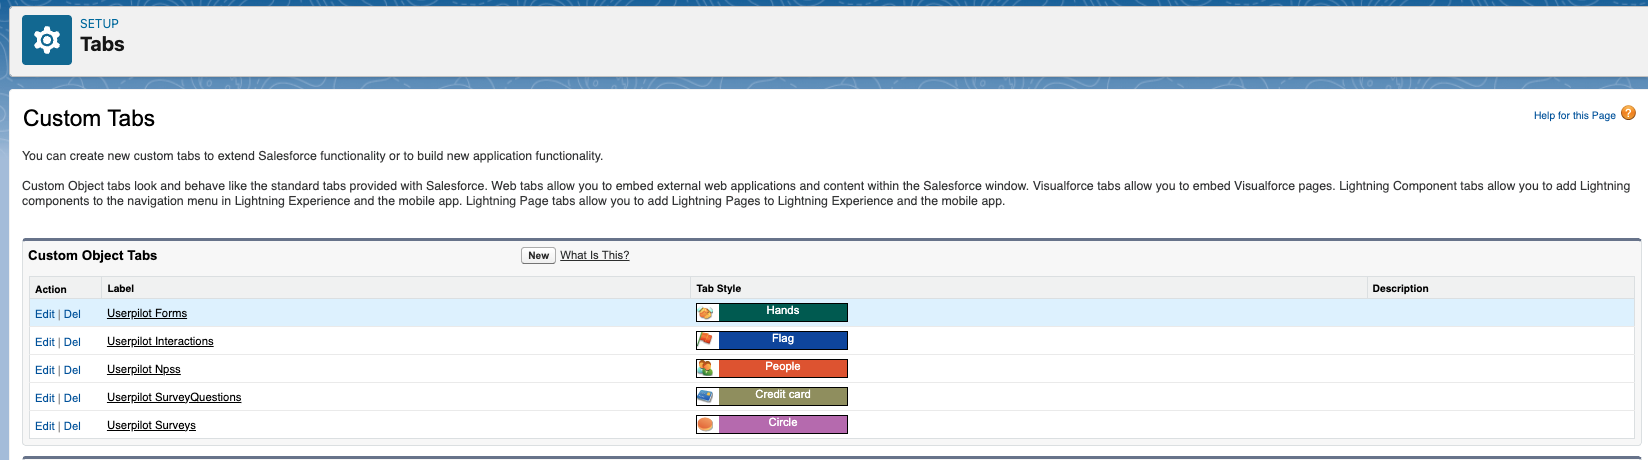 ### **Configure fields to show in custom objects table**
1. In Salesforce, search for Userpilot custom object (Userpilot Interaction, for example) and click on it.
2. Click on the “Allˮ option in the dropdown.\\
### **Configure fields to show in custom objects table**
1. In Salesforce, search for Userpilot custom object (Userpilot Interaction, for example) and click on it.
2. Click on the “Allˮ option in the dropdown.\\
 3. Click on the gear icon and select “Select fields to displayˮ.\\
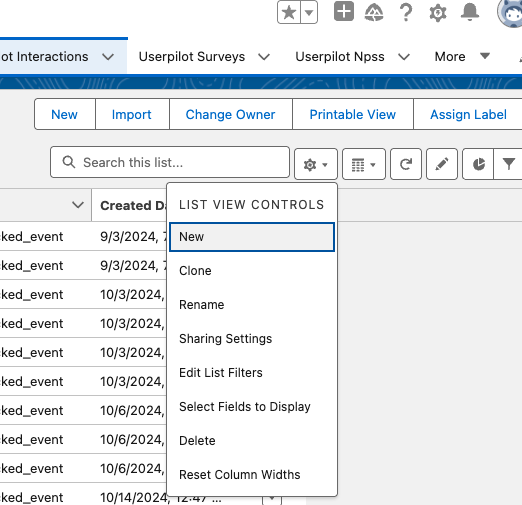 4. From the list on the left, select the fields you want to show in the table. Click on the right arrow to move them to the list on the right. When you're done selecting fields, click on "save".\\
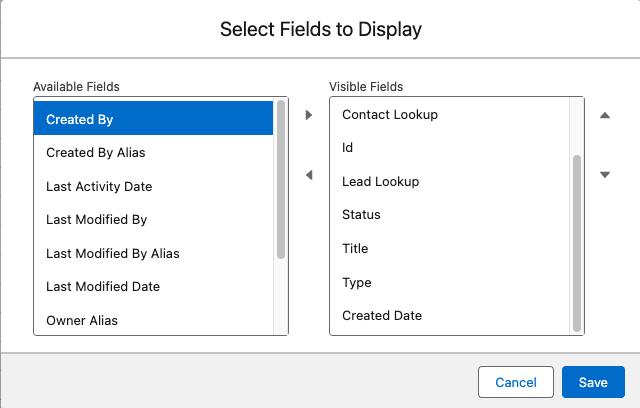 5. Once all steps are complete, you will see the fields in the table.
### **Showing the userpilot objects on Contact/Lead/Account**
1. Go to Setup, on the left menu search and click on “Object managerˮ.
2. Select the object you want to edit (Contact/Lead/Account) and click on it.
3. Click on “Page Layoutsˮ.\\
5. Once all steps are complete, you will see the fields in the table.
### **Showing the userpilot objects on Contact/Lead/Account**
1. Go to Setup, on the left menu search and click on “Object managerˮ.
2. Select the object you want to edit (Contact/Lead/Account) and click on it.
3. Click on “Page Layoutsˮ.\\
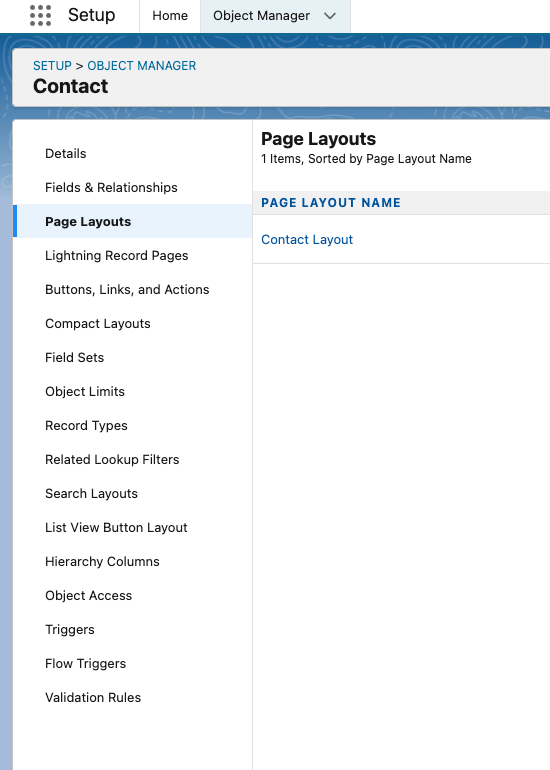 4. Click on “Related Listsˮ and drag each Userpilot Object you want to add to the layout to the “Related Listsˮ section below.\\
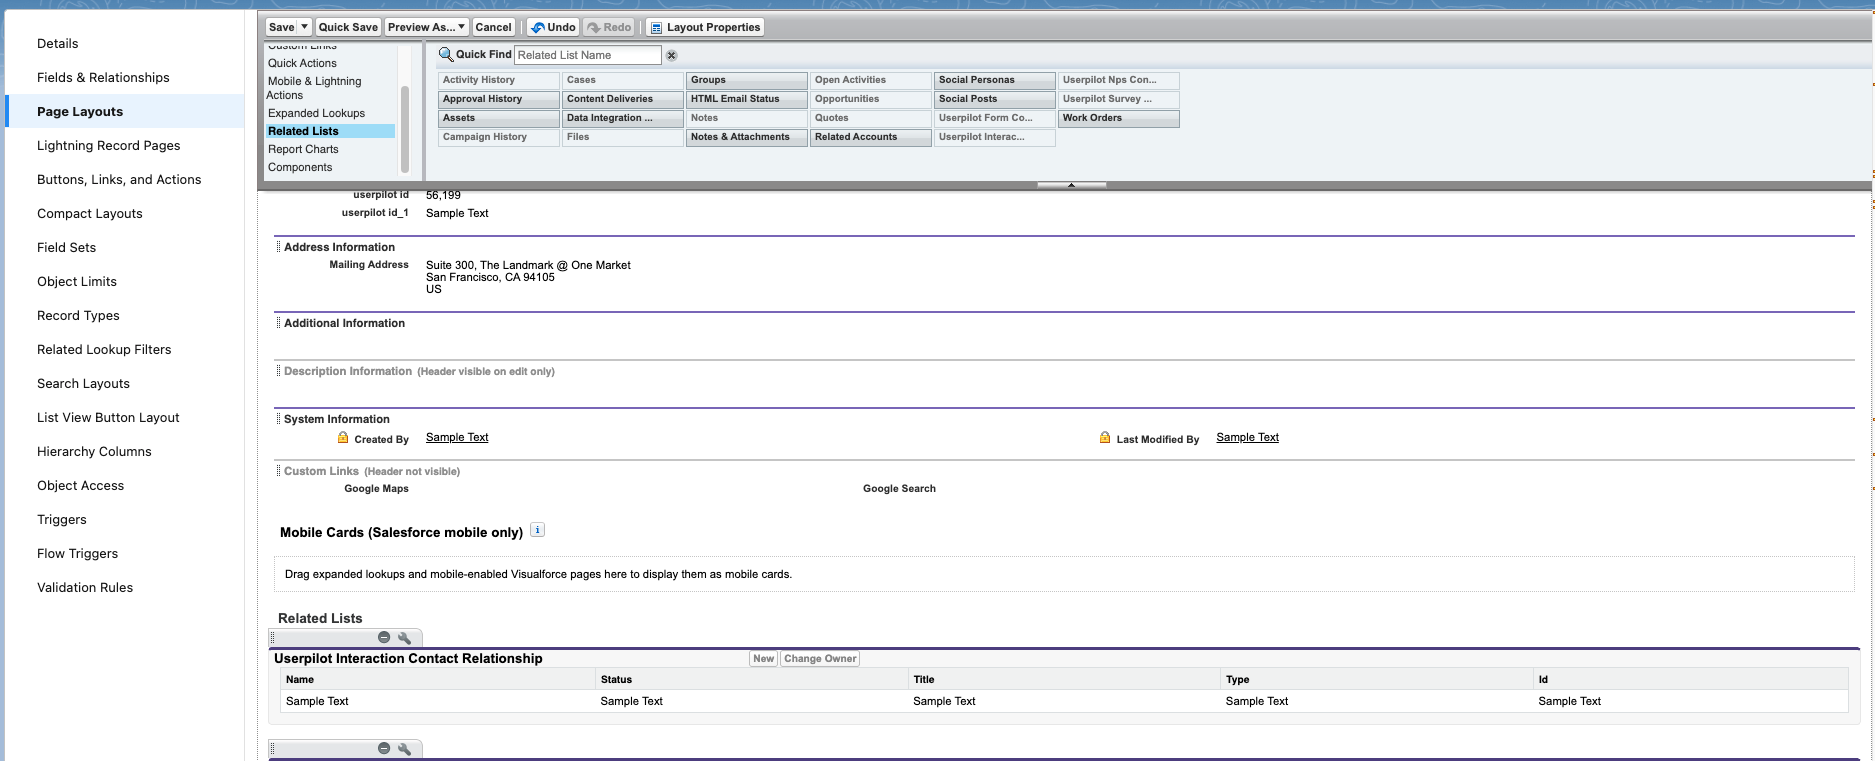 5. Select the wrench icon next to each item in the “Related Listsˮ to add the properties you want to show for the related object.\\
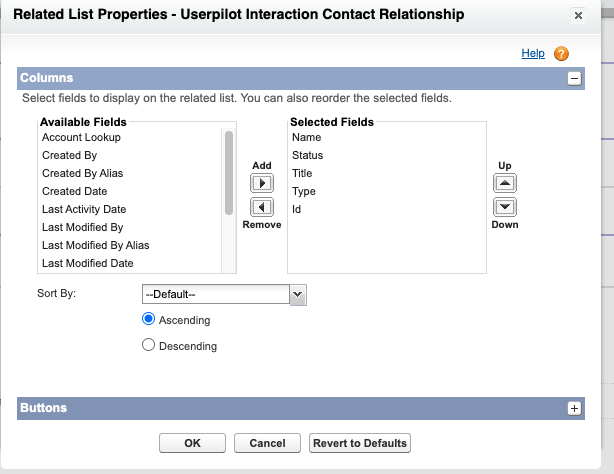 6. Once you select all the fields you need from the left menu, click on the right arrow to add them to the right list and click on “ok".
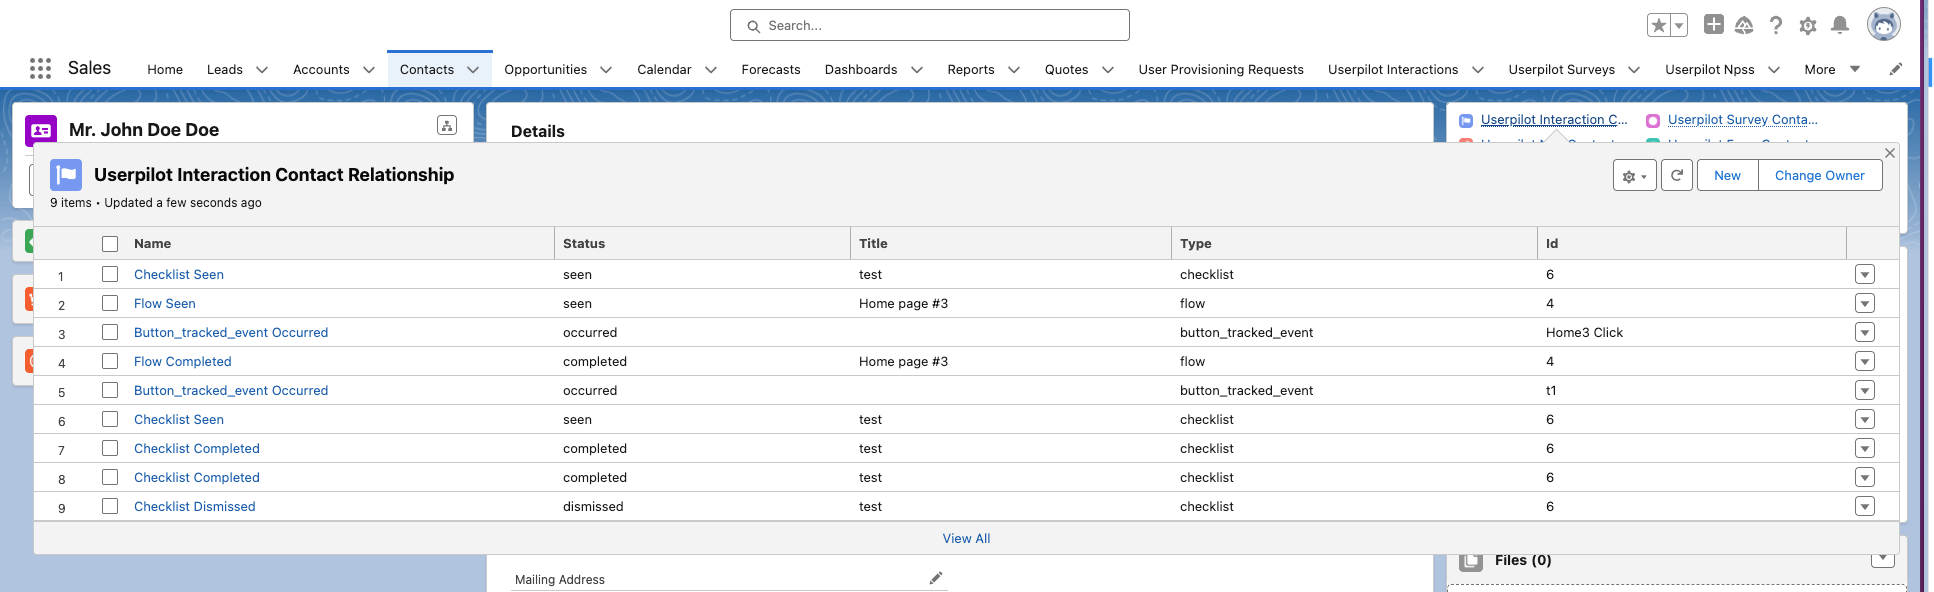
7. Navigate to any record of the custom object you just edited in the Sales dashboard, you should be able to see the new related object now.
6. Once you select all the fields you need from the left menu, click on the right arrow to add them to the right list and click on “ok".
7. Navigate to any record of the custom object you just edited in the Sales dashboard, you should be able to see the new related object now.
 [**For any questions or concerns please reach out to support@userpilot.com**](mailto:support@userpilot.com)