Step 1: Add the Userpilot Snippet to Your Web App
The first step is technical, but it’s quick: you need to install the Userpilot JavaScript snippet into your application. This snippet is what connects your app to Userpilot, allowing us to track users, render experiences, and power your analytics. You have a few installation options:- Manually via your app’s codebase
- JavaScript SDK
- NPM package
- Through Google Tag Manager
- Using Segment, if that’s already part of your stack
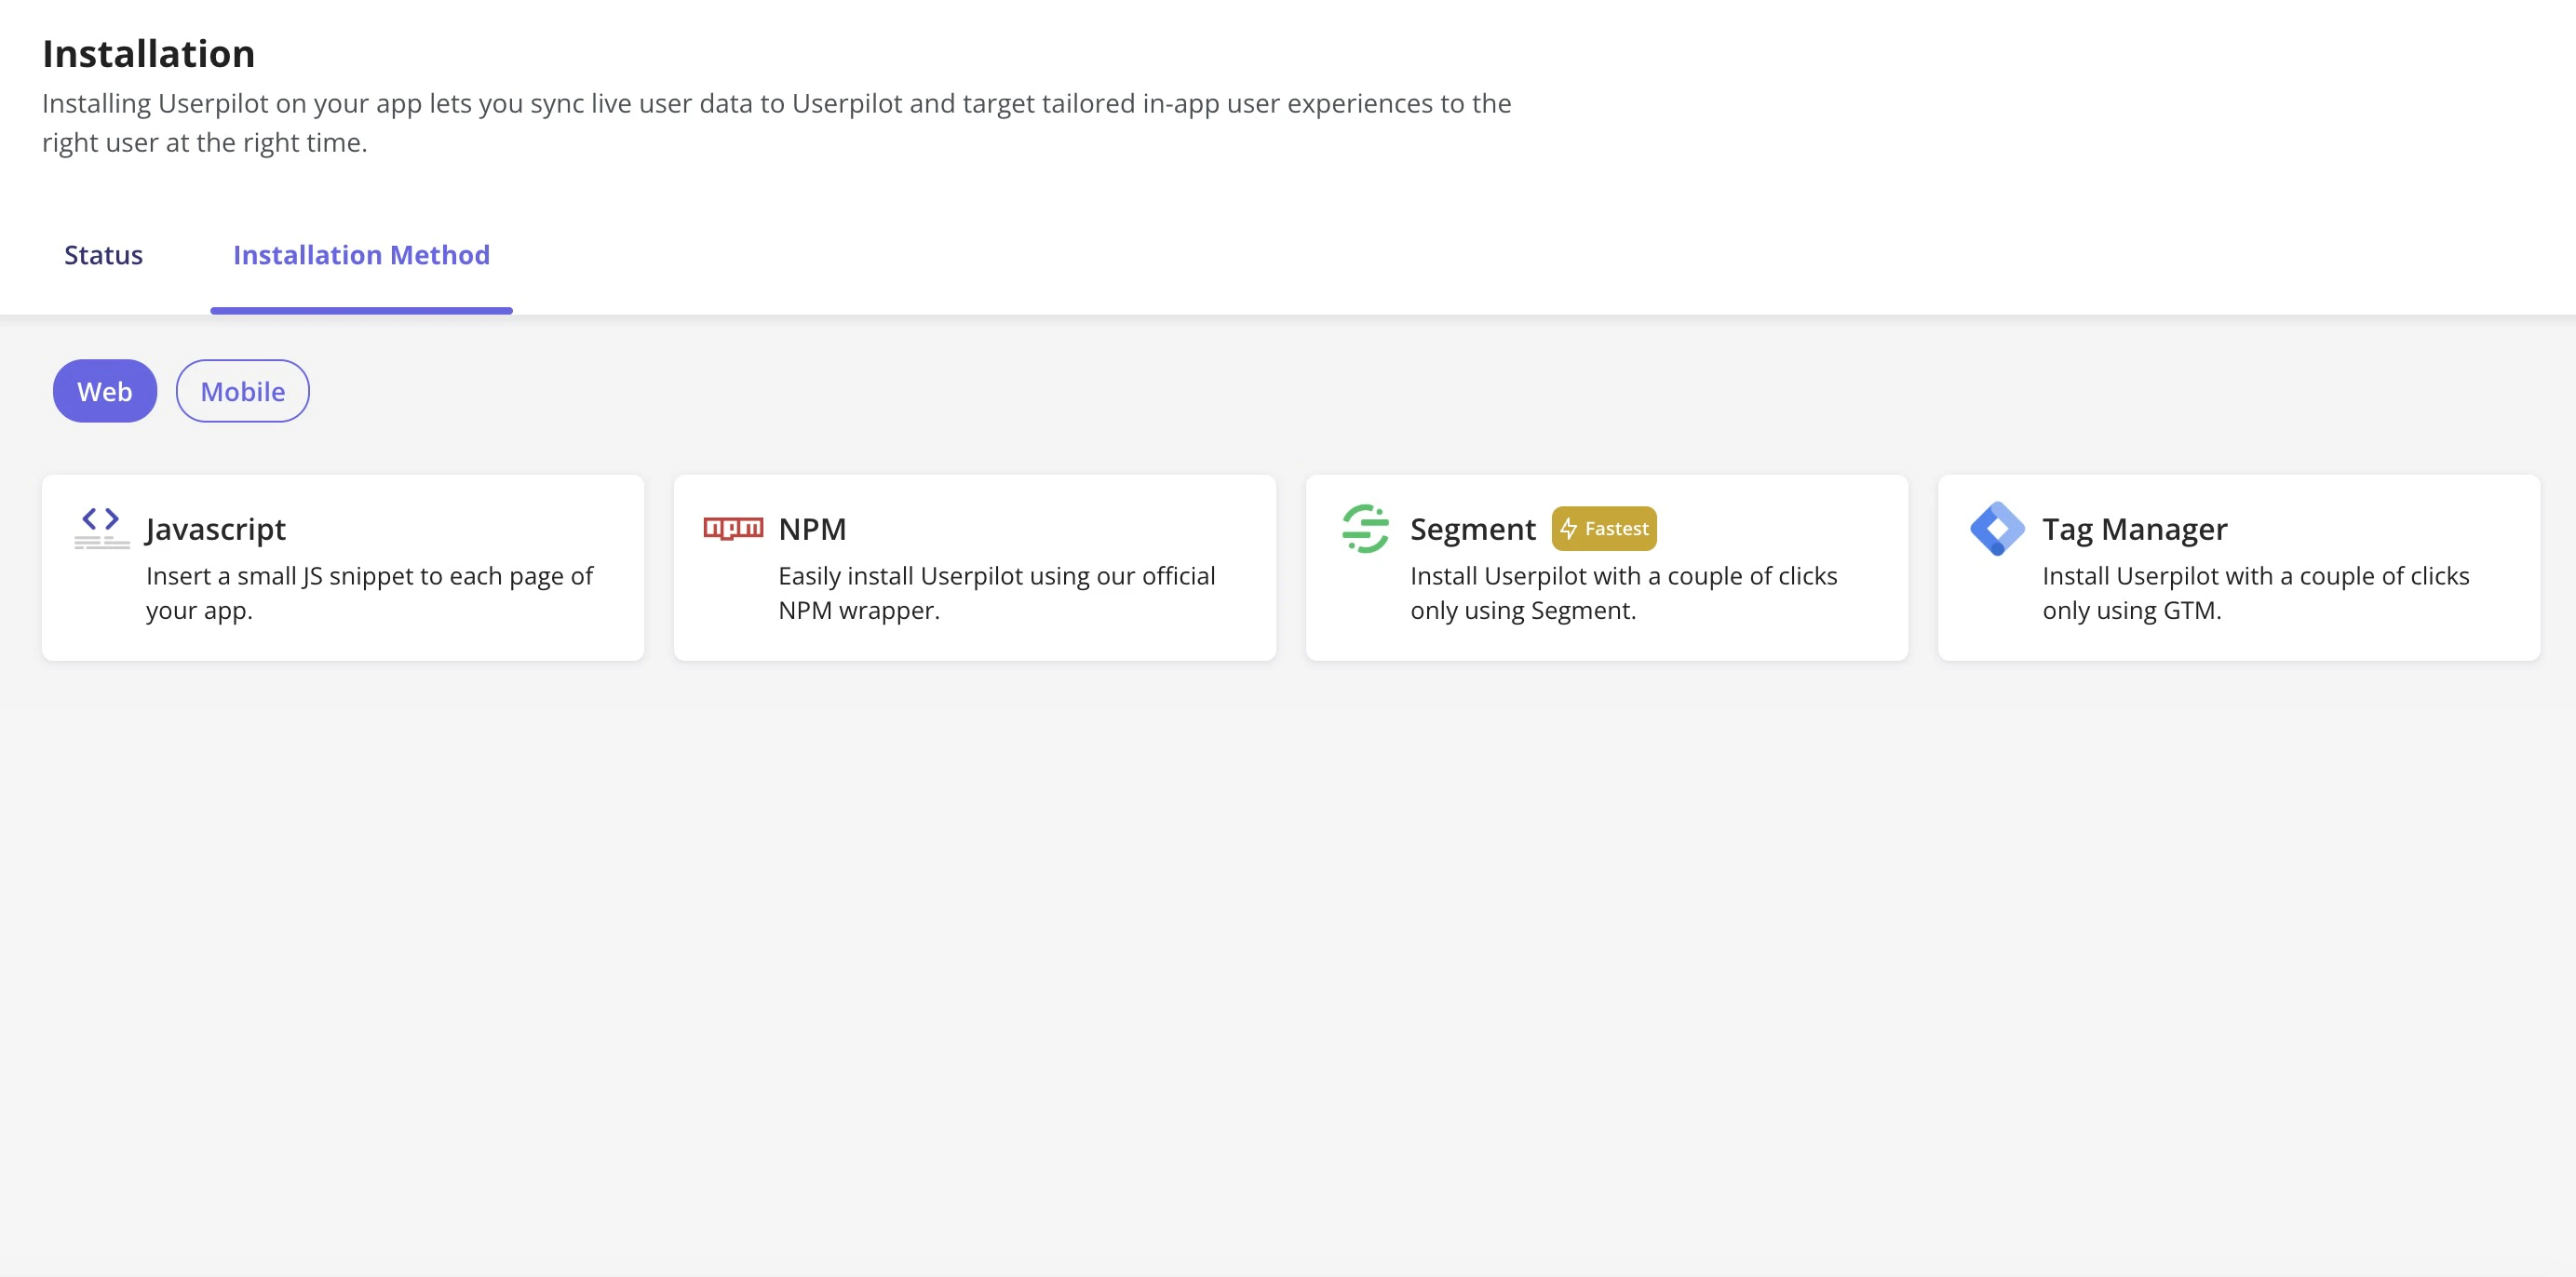
Once installed, you’ll be able to verify it in your Userpilot dashboard and start seeing live user activity. We recommend looping in your dev team here, it’s a one-time task.Installation Instructions
Step 2: Install the Chrome Extension
This step is crucial and often overlooked: install the Userpilot Builder Chrome Extension. This extension is your control panel for everything visual in Userpilot. It lets you:- Build flows, spotlights, and embeds directly on your web app
- Label an event with no code
- Preview how things look before launching
You can’t create in-app messages without this. So, before you even think about onboarding experiences, get the extension installed and ready.Install the Builder Extension

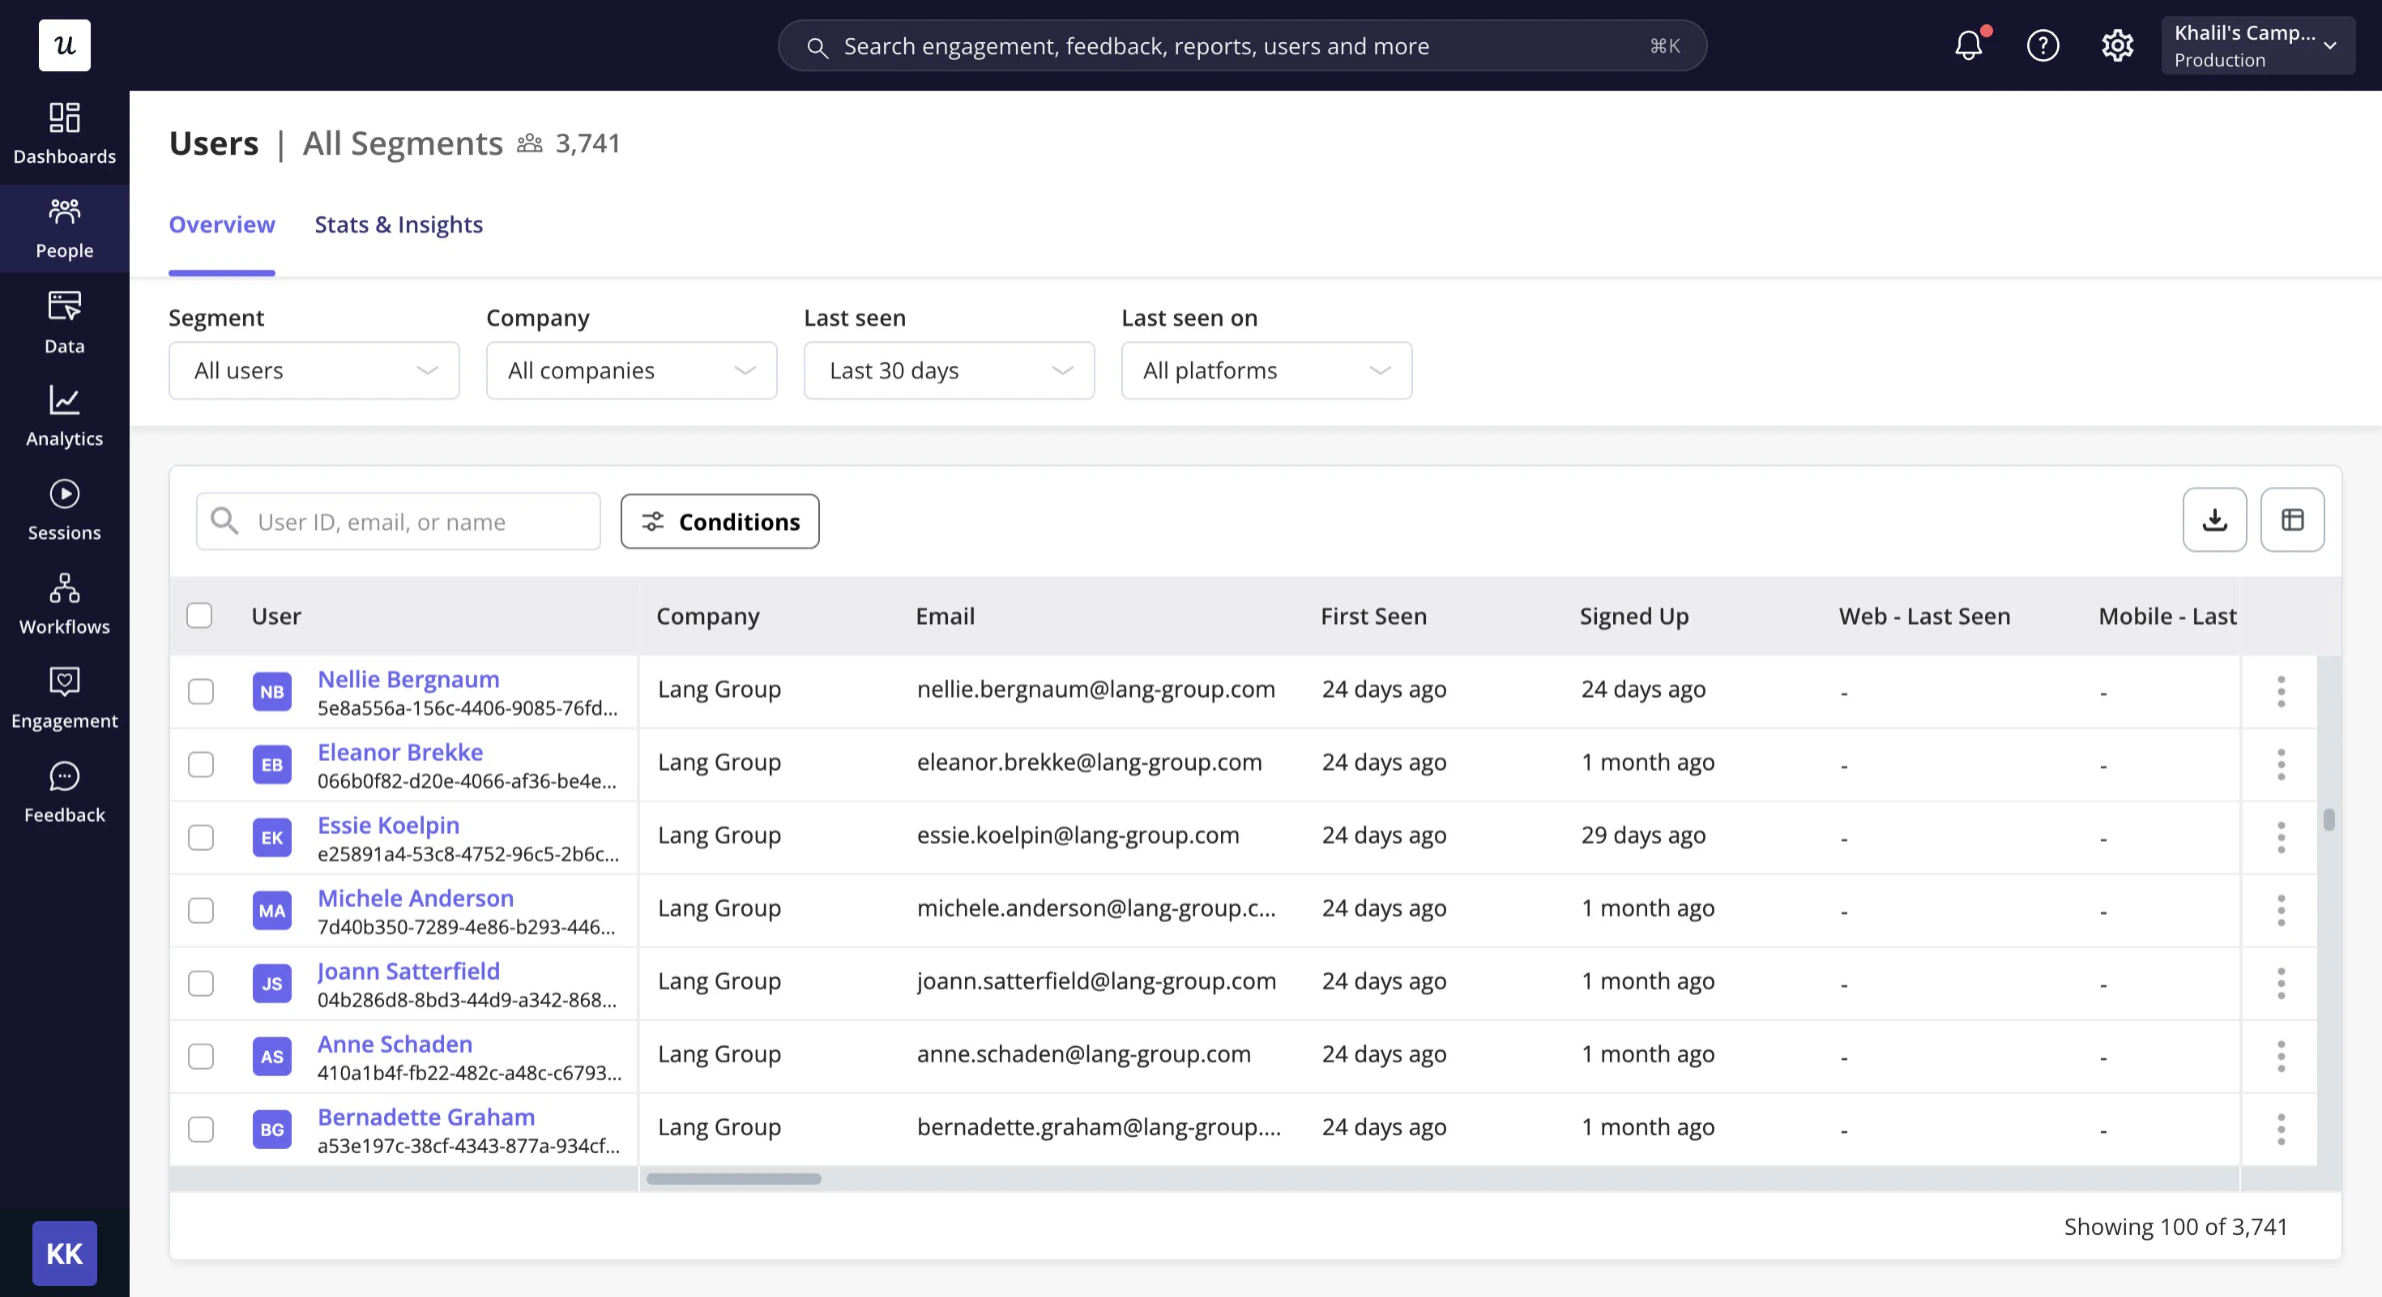
Step 3: Send in Your User and Company Data
To deliver the right experiences to the right users, Userpilot needs context. That’s where your user and company data come in. You’ll want to send:- User-level data like: user ID, email, role, signup date, and plan
- Company-level data like: company ID, company name, size, MRR, and industry
Step 4: Label and Track Events
You want to know who did what and when. Start labeling events and defining key ones. There are three ways to do this:- Tag UI elements visually using the Chrome extension. For example, tag a “Create Report” button or a “Billing” tab.
- Label an event using CSS by adding the element’s CSS selector to start tracking it. If you don’t have the selector or find it difficult to get, no worries — you can ask your dev team for help or reach out to us via chat.
- Track events programmatically like “Payment Successful,” “Trial Converted,” or “Subscription Renewed” by pushing them via code.
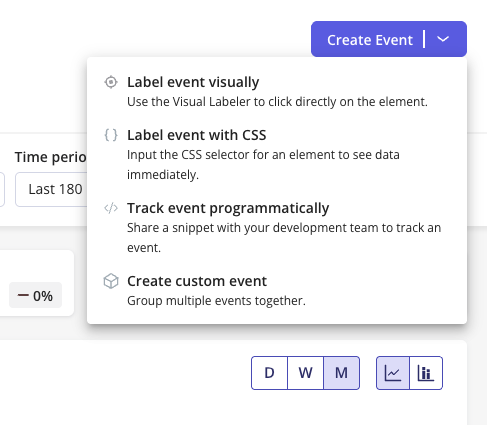
These events power targeting, reporting, and personalization. The more intentional your event setup, the better your insights will be later. Labeled Events (Visually/CSS)
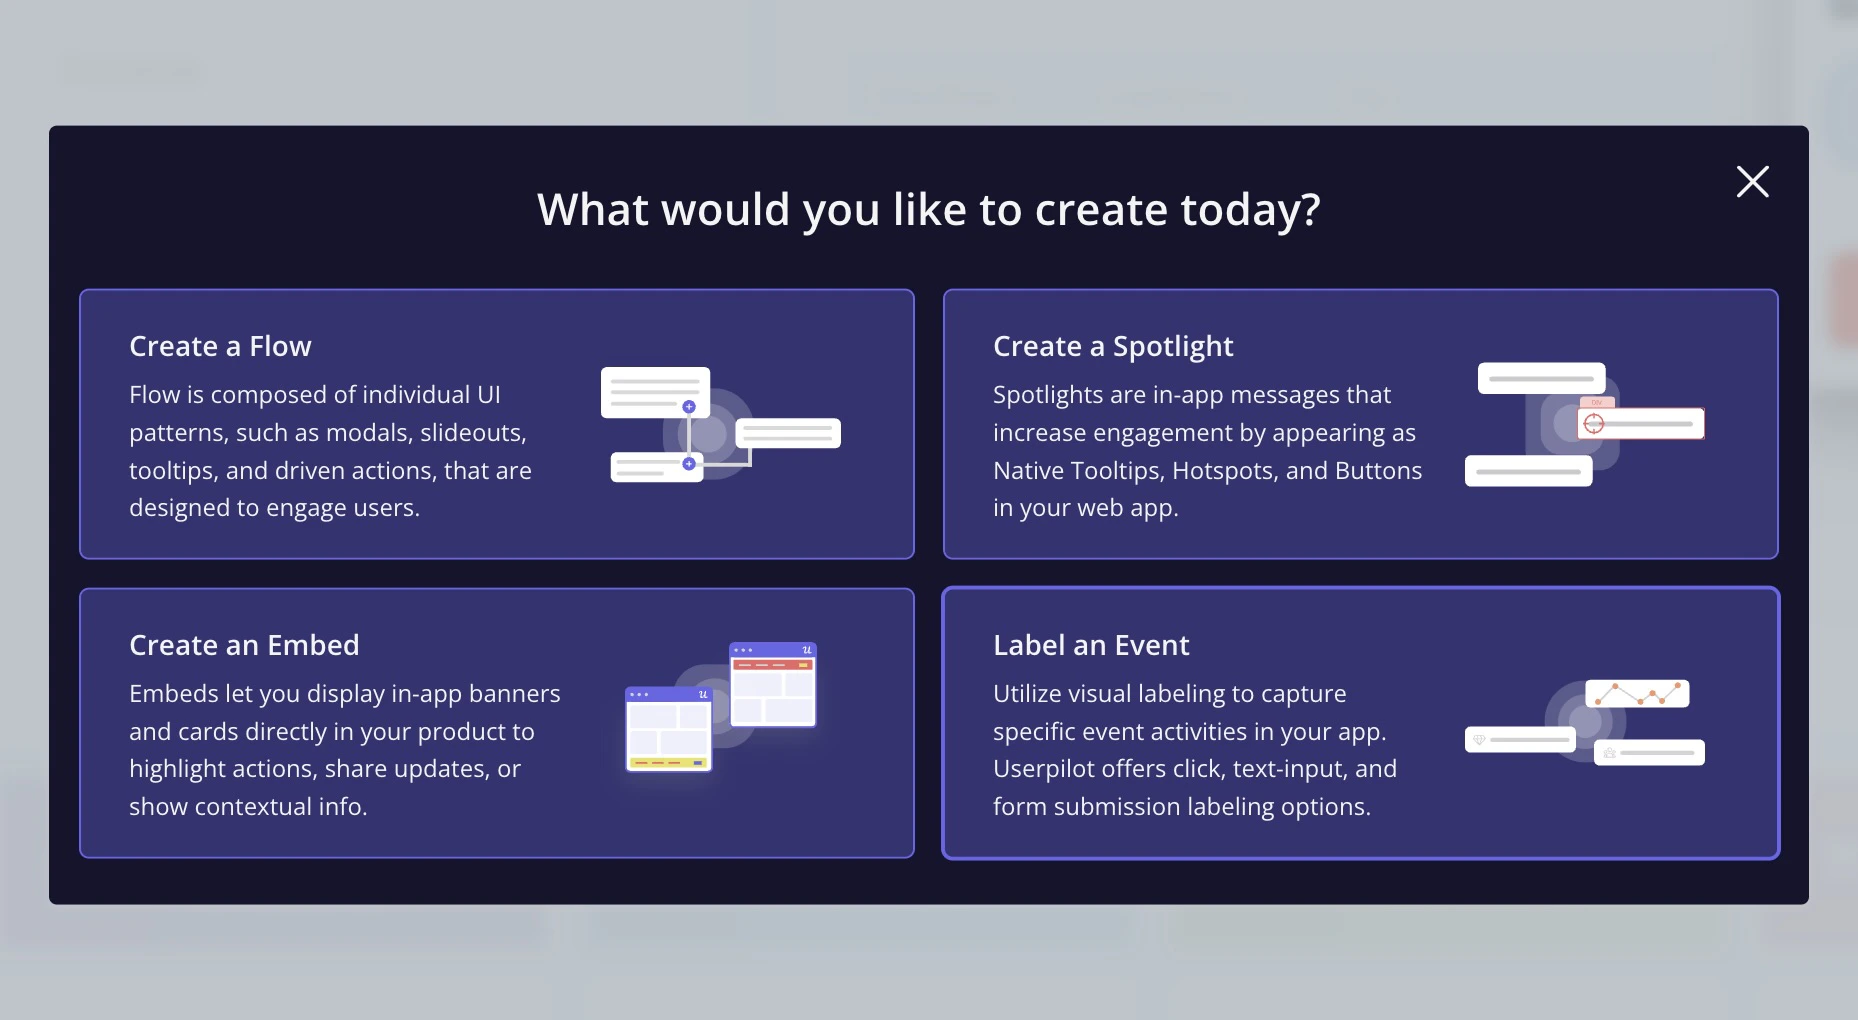
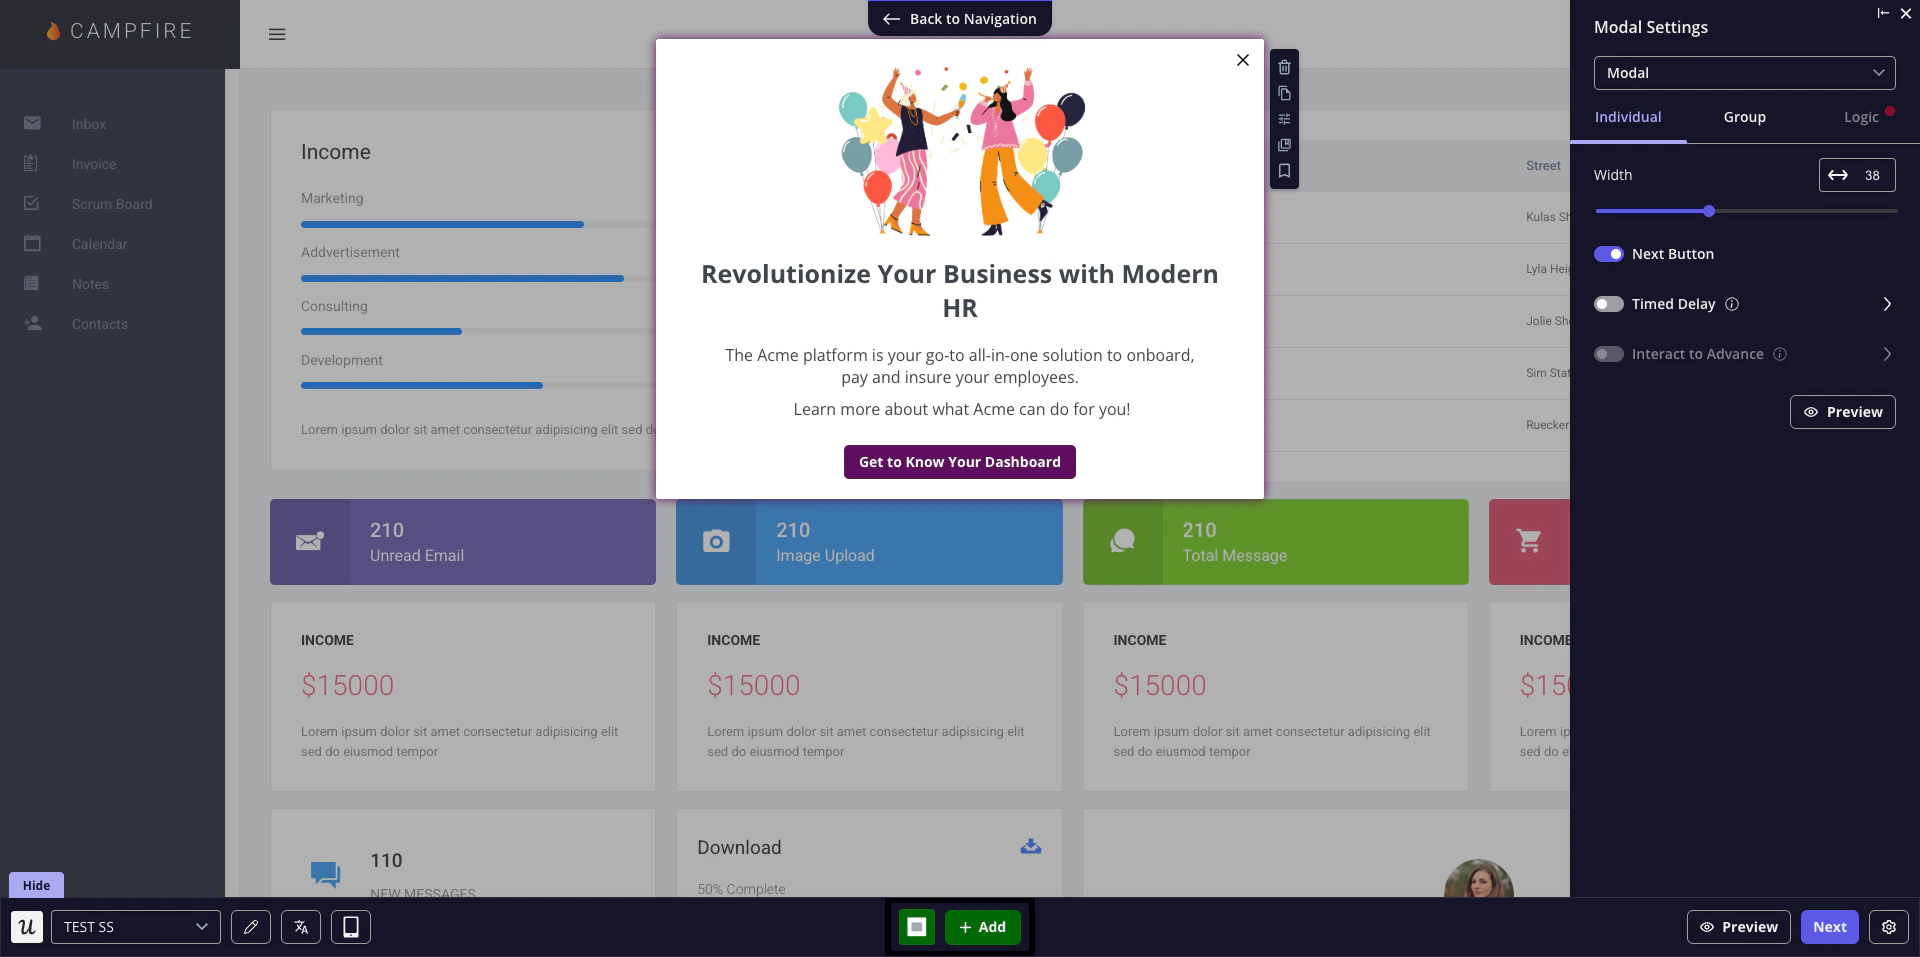
Step 5: Create Your First Flow
Flows are in-app experiences that guide users through your product. Think of them as conversations timed just right, based on what your user is doing or needs to do next. Examples include:- A tooltip that highlights a newly released feature when users land on the page
- A multi-step flow that introduces your app to first-time users
- A slideout that nudges users to finish the setup
- Pick your format: modals, slideouts, tooltips, or driven actions
- Choose who sees it and when
- Launch it without touching any code
Step 6: Use Checklists and Collect Feedback
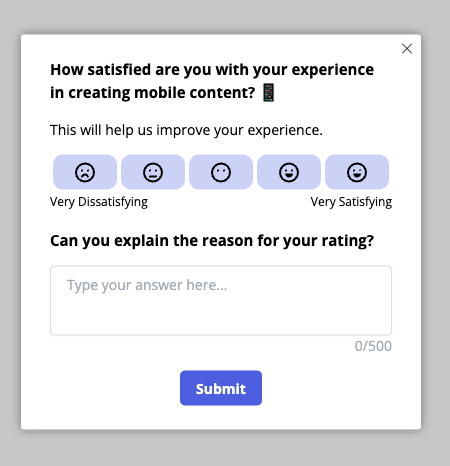
Once you have flows, take it a step further by layering in checklists and feedback experiences. Checklists help users complete a series of actions, like finishing onboarding, setting up integrations, or publishing their first campaign. They’re great for encouraging completion and reducing time-to-value. Checklists Guide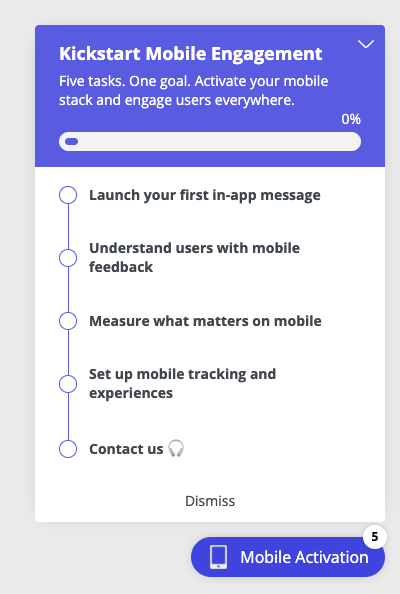
- CSAT: How satisfied are you with this feature?
- CES: How easy was this task?
- PMF: How would you feel if you could no longer use this product?
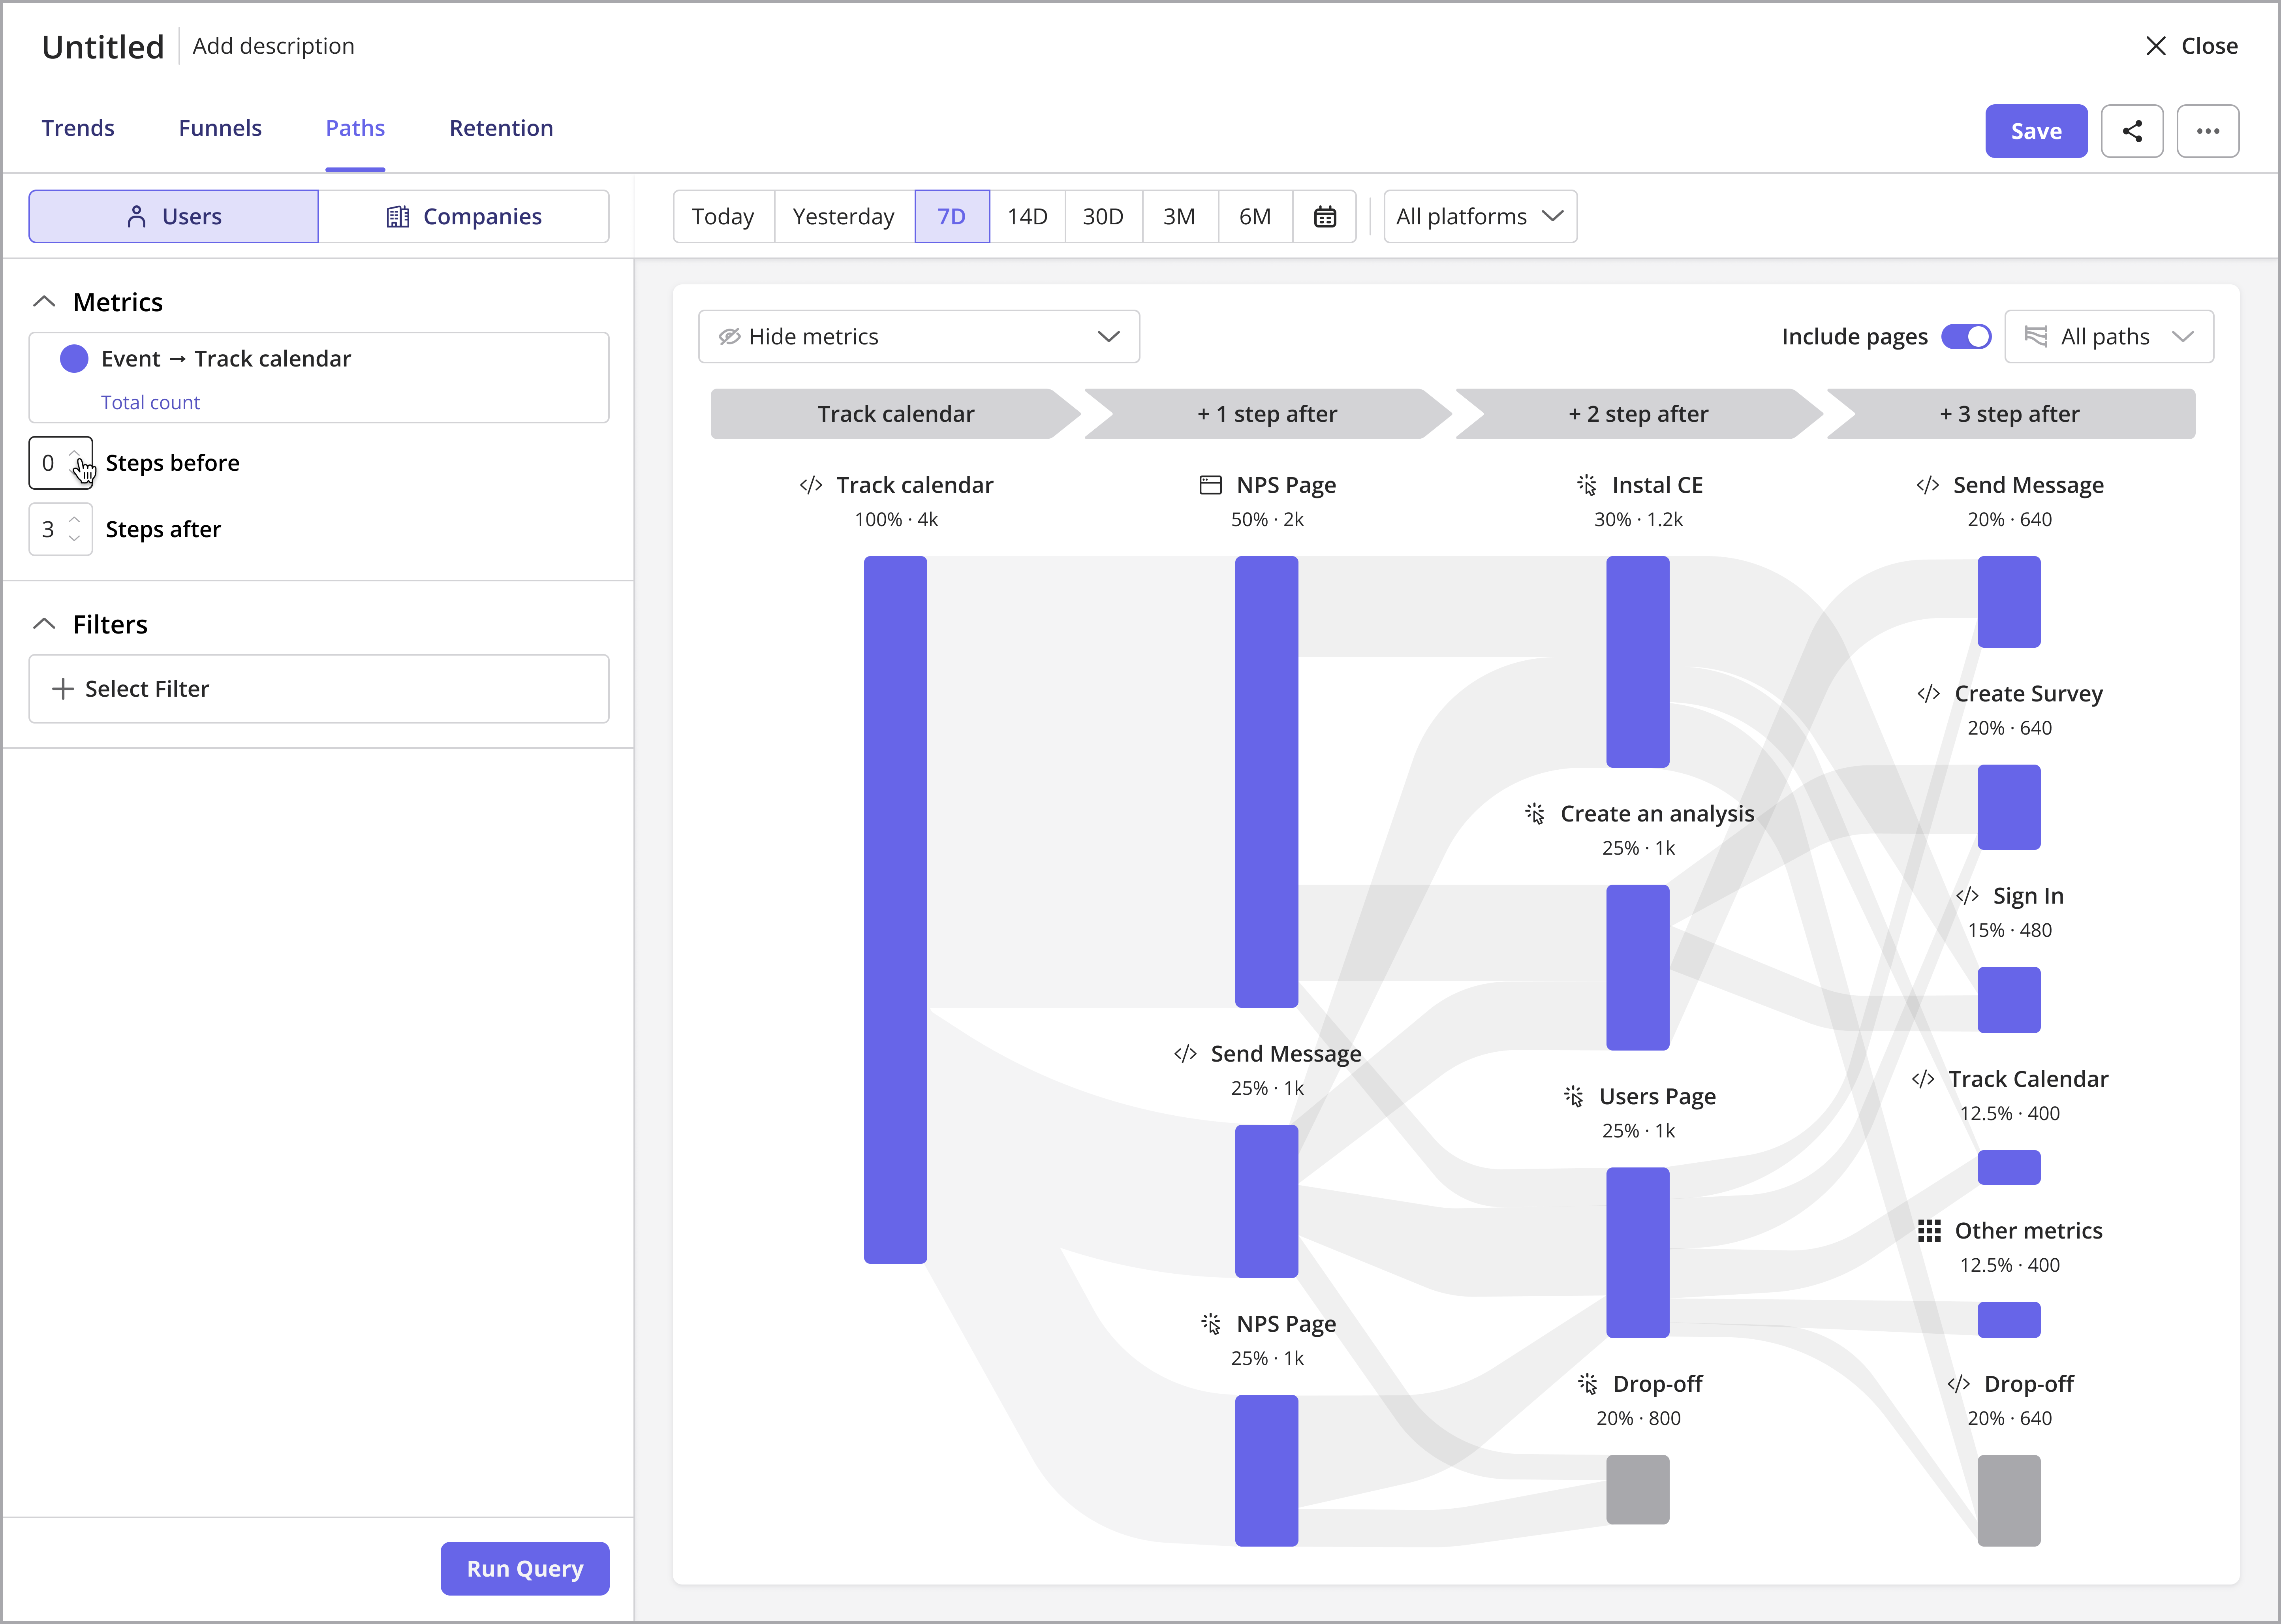
Step 7: Review Your Analytics
You’ve launched experiences. Now it’s time to measure impact. Inside the Analytics tab, you’ll find:- Trends: see how features and events are used over time, and by whom
- Funnels: measure how users convert through key journeys, from signup to activation
- Paths: visualize the routes users actually take through your product
- Retention: track who keeps coming back, and why
Step 8: Customize Your Workspace
As your team scales, you’ll want to set up your workspace properly:- Invite team members and assign roles: individually, in bulk via CSV, or automatically with SSO and SCIM
- Use staging vs. production environments to test before going live
- Add custom themes to your flows to match your product’s look and feel
- Set audience rules for different flows per environment
Explore What’s Next
You’ve got the basics down. Here’s what you might explore next:- A/B testing your flows to find what converts best
- Creating onboarding paths for different personas
- Setting goals to track flow impact against KPIs
- Building a resource center that lives inside your app
Need Help Along the Way?
We’ve got your back:- Reach out through chat support from the Resource Center within the Userpilot web app or email at support@userpilot.com.
- Book a free onboarding session if you want a guided setup.