Documentation Index
Fetch the complete documentation index at: https://docs.userpilot.com/llms.txt
Use this file to discover all available pages before exploring further.
This feature is only available for Growth and Enterprise plans.
Create your Resource Center
To begin, navigate to the Resource Center page in your Userpilot dashboard and click “Edit Resource Center”.Home
The home tab is where the content of the widget is created as well, including a header title and a description subtitle. The “Turn on Home” option allows you to toggle this tab on or off. In the header section, you can select the header and subtitle for your resource center widget. Additionally, you can utilize personalization, enabling you to choose a property where the corresponding value will display in live mode.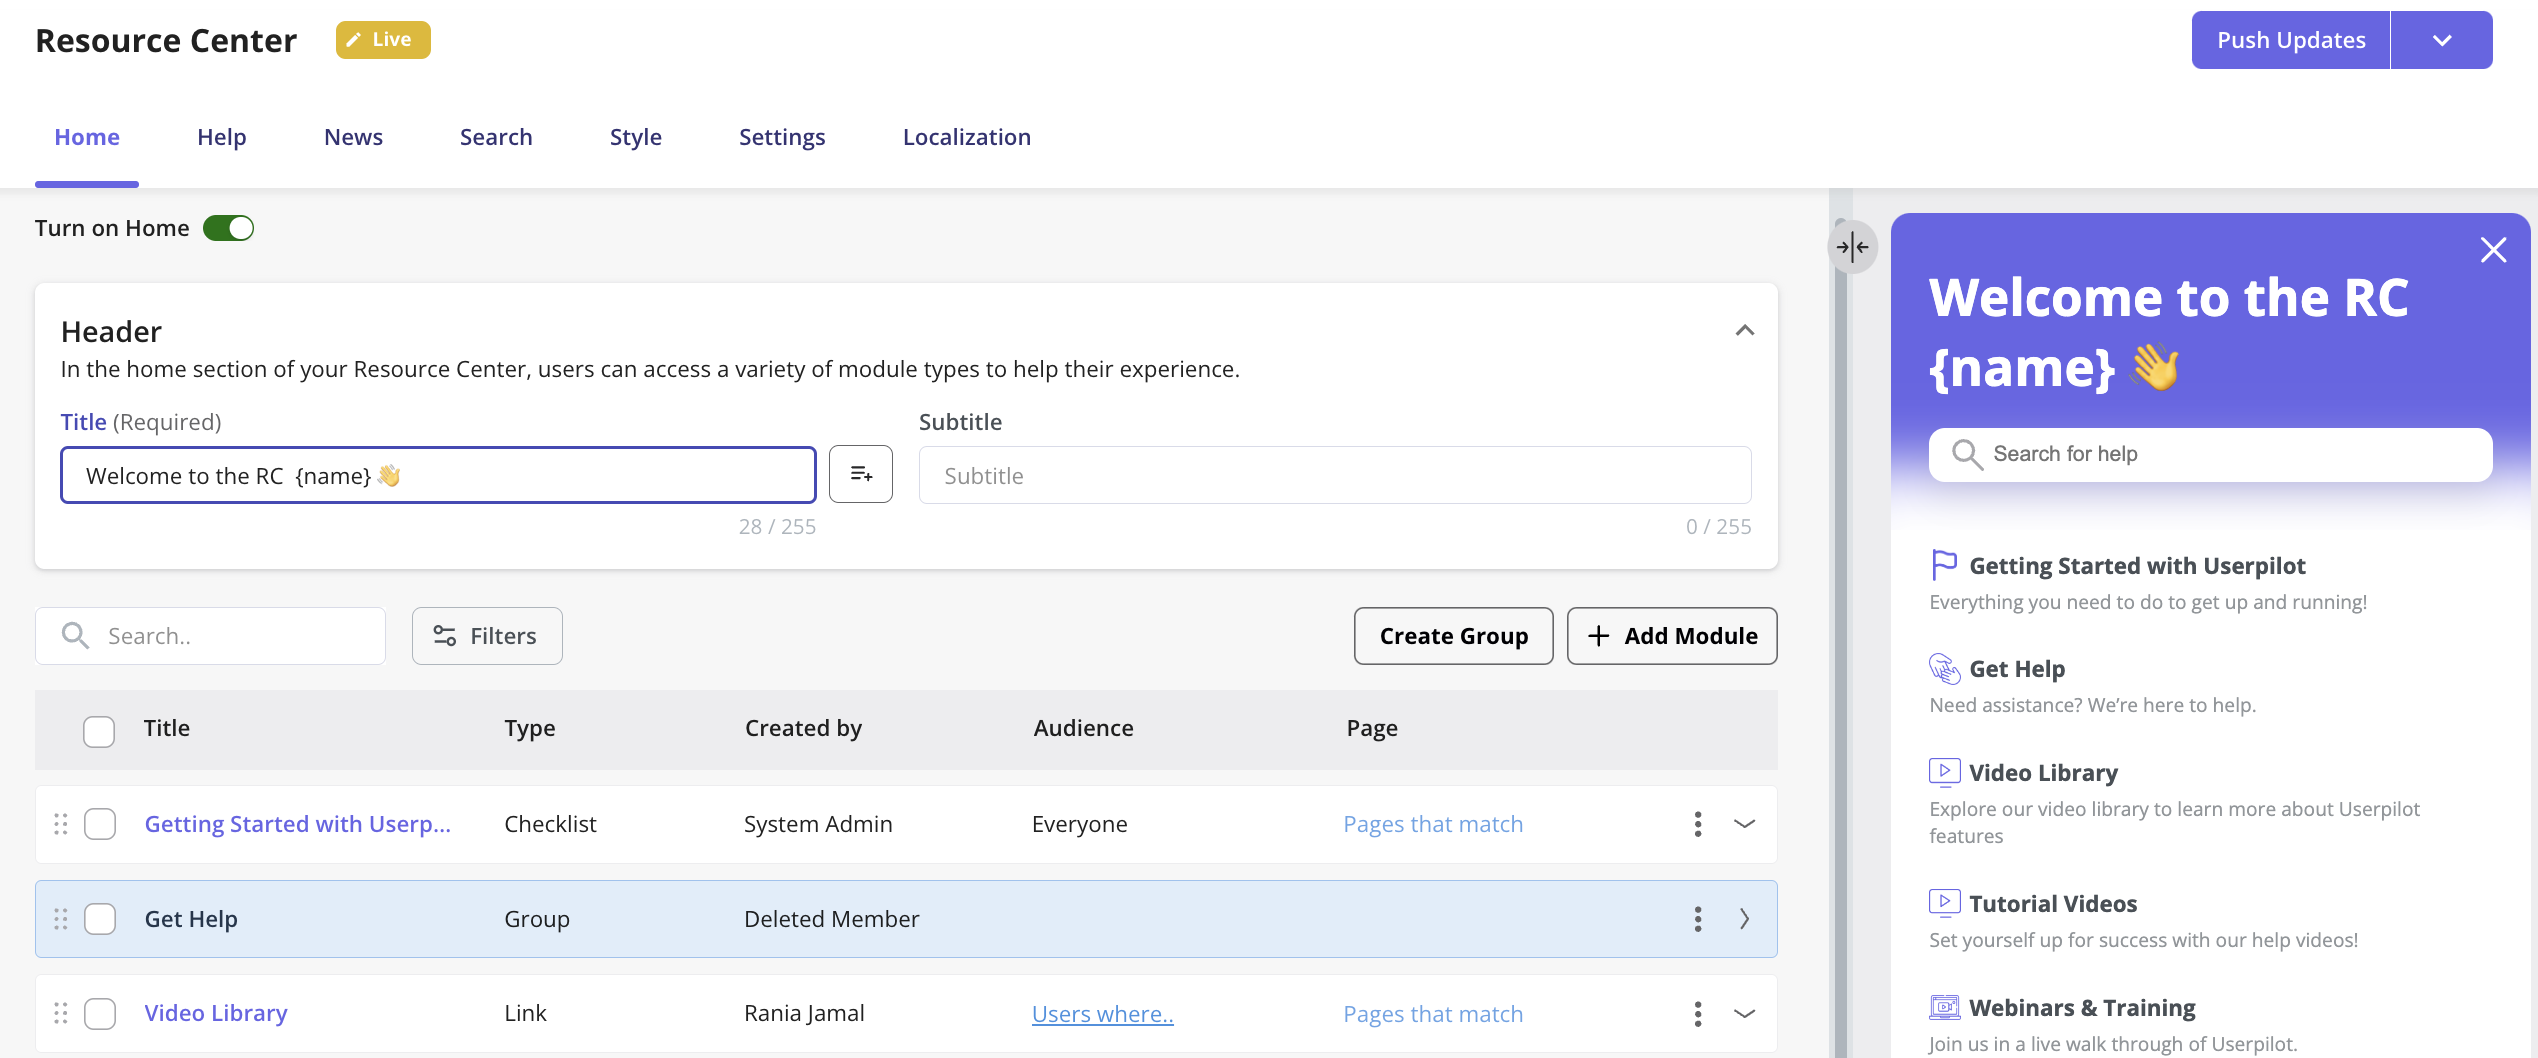
1. Add a Module
Clicking the “Add Module” button will prompt a dropdown menu to appear, offering the following options:Userpilot Content
- Flow — Add a single flow that consists of a single or a sequence of steps
- Checklist — Add a Checklist pattern that consists of a set of tasks
- Surveys: Add a survey to gather the users’ feedback
Link
Send your end-users to external URLs such as your knowledge baseVideo
Embed a video to provide visualized assistanceCustom Javascript
Add your own customized JS function that can be used to access custom content such as triggering a chat widget.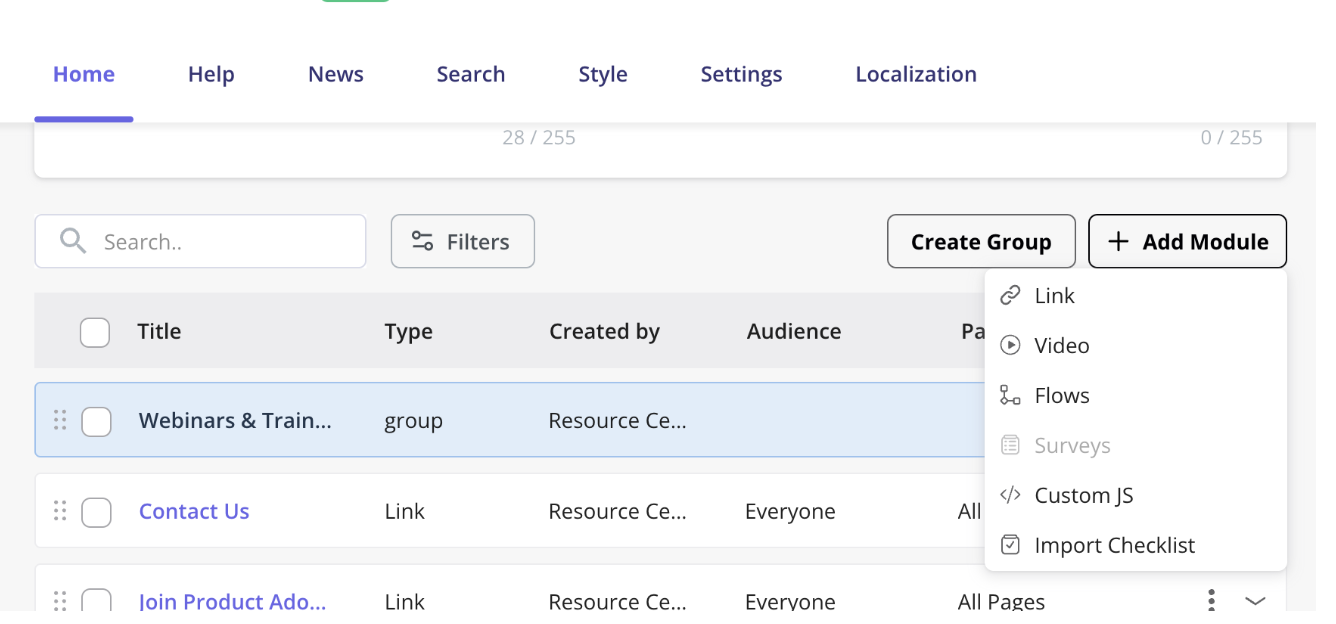
2. Set up the Targeting
Targeting in the Resource Center is set up on a module level, so you can specify which content you’d like to appear for specific users or on specific pages.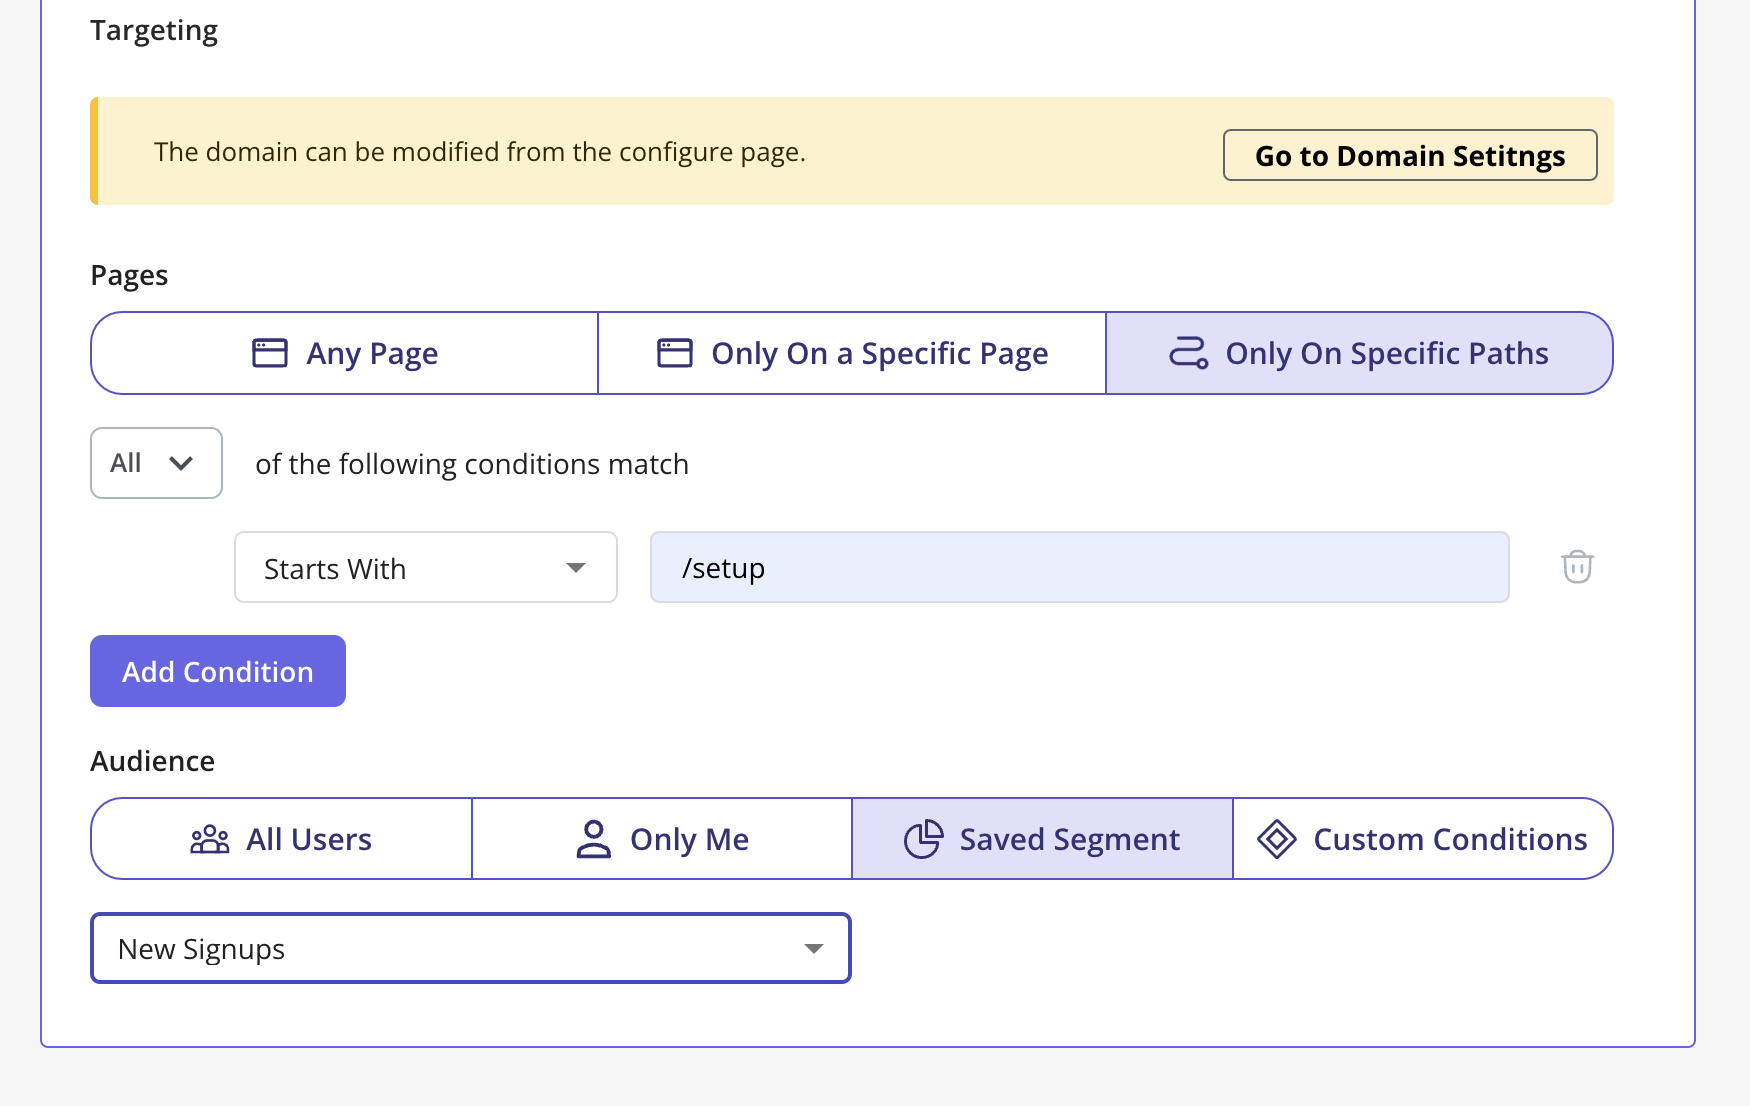
3. Create a Group
You can group to combine different modules to be listed in one section simply by clicking on the “Create Group”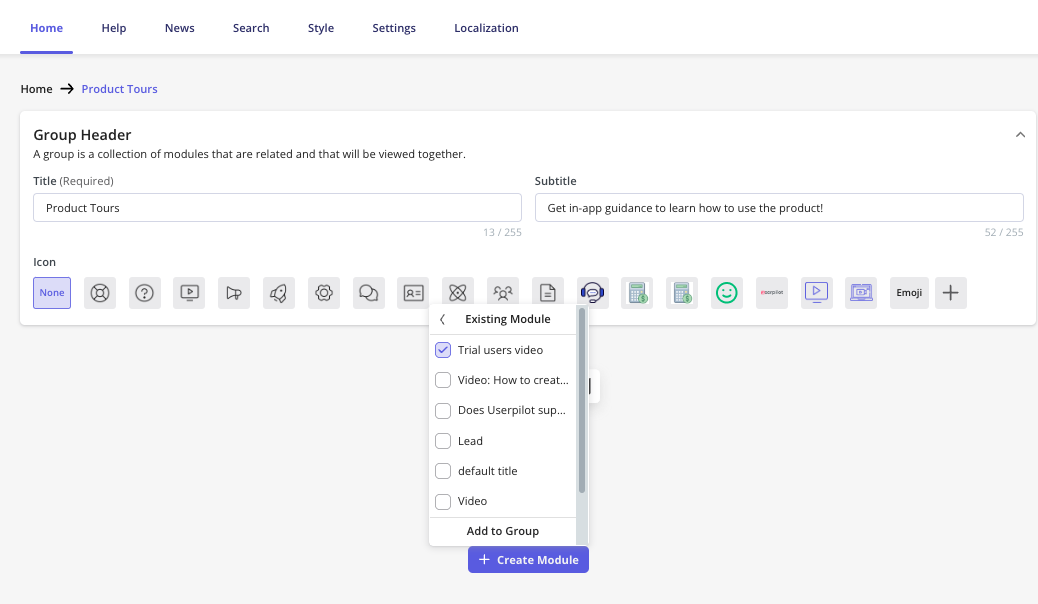
FAQs
Can I edit the targeting settings for multiple modules?
Can I edit the targeting settings for multiple modules?
Absolutley, you can mult-select modules then click on “Import page/audience settings”. Then select which module you’d like to import the settings from and it will be applied to the selected ones.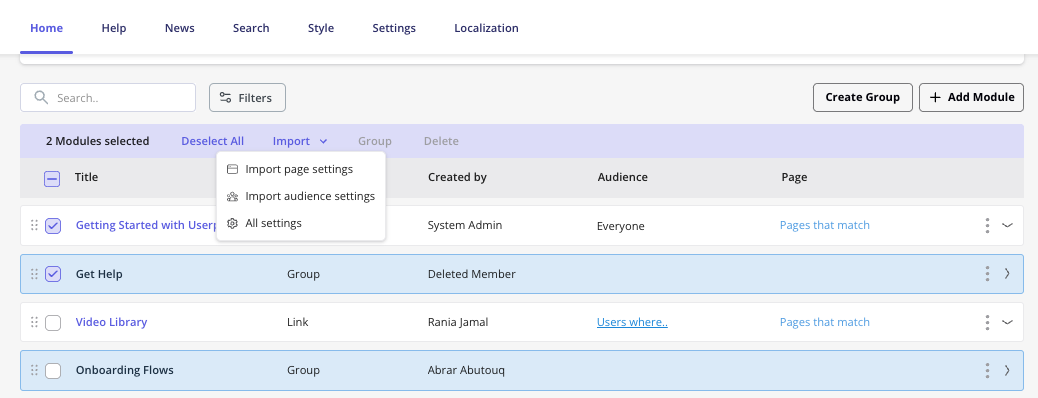
Help
The Resource Center has a search function that includes searching both the Resource Center content as well as any external knowledge base. You can adjust the search functionality from the Search tab.You can currently only specify a domain to retrieve documents from; adding a specific page or URL is not yet supported. - The search feature now supports returning results from a password-secured knowledge base
- Zendesk
- Salesforce
- HubSpot
- Freshdesk
- Intercom
- Document360
- Zoho Desk
How it works
First, you need to enable the search functionality, choose your desired search engine, and refine the search results by choosing a domain in which to search. Once enabled, a search bar will appear in the Resource Center widget.
Not all knowledge base articles will open inline.
- Salesforce, HubSpot, Freshdesk, Intercom, and Document360 articles will open inline.
- Google, Zendesk, and Zoho Desk articles will open in a new tab.
-
For the Salesforce articles to display, they would need to support the following keys:
- Title field: should be:
Title - Body field: should be either
BodyorArticle body - Description field: should be
Summary
- Title field: should be:
-
If you’re using the Google search engine, you’ll have to make sure that your site is Google-indexed. To check if your site has been indexed by Google, enter the URL of your domain with
site:before it - i.e.site:docs.userpilot.com. -
To retrieve your articles without issues from Document360 into the Userpilot Resource Center, ensure that the X-Frame options toggle under the Security settings is turned off.

- If your web app uses Content Security Policy (CSP) that would prevent search results from being returned, you will need to whitelist the domain https://playground.userpilot.io.
- Search engines optimize the performed searches based on factors such as the users’ geographical location. This might lead to different results than the ones returned to Userpilot and displayed in the Resource Center.
News
The News tab will help you create and share posts with your end users, so they can stay updated on new releases and receive important information. After adding a header for the News tab, you’ll encounter a “Create Post” button. Clicking this button opens a new tab where you can compose the post and configure its audience settings.
Each post has its own audience settings, allowing you to customize triggering for specific users.The “Live” feature at the top of the “Create Post” page enables you to either publish the article for users or keep it in draft mode.


If you’d like to send general feedback or suggestions for this feature, please reach out to us at support@userpilot.com.