Overview
Workflows in Userpilot allow you to design and automate multi-step user journeys across your product. Using a drag-and-drop builder, you can connect content, data updates, and logic into a single, easy-to-understand sequence — complete with branching conditions, time delays, and automatic property updates. Whether you’re guiding new users through onboarding or re-engaging customers at key moments, Workflows lets you orchestrate the right experience at the right time.Workflows are only available for Growth and Enterprise plans.
Use cases
- Build guided onboarding journeys: Create step-by-step onboarding experiences that adapt based on user actions, progress, or attributes.
- Drive feature adoption: Trigger targeted flows, tooltips, or checklists after users complete key milestones or engage with specific features.
- Automate lifecycle communication: Send surveys, emails, or in-app messages at strategic moments, including delayed follow-ups days or weeks after an event.
- Personalize user experiences: Branch journeys dynamically based on user behavior, company data, or engagement with previous content.
- Track and update user data automatically: Trigger events or update user properties as users progress through a workflow to keep data accurate and actionable.
- Improve retention and re-engagement: Reconnect with inactive users through time-based nudges, reminders, or contextual experiences.
- Coordinate cross-channel journeys: Combine in-app content with email and mobile experiences to create cohesive, multi-touch user journeys.
- Experiment and optimize journeys: Visualize dependencies between steps to identify bottlenecks, test variations, and continuously improve outcomes.
Get started
To get started, simply navigate to the Workflows page from the navigation bar — here, you’ll see a table of all your created Workflows or have the option to create a new one.Define your Start and Exit Settings
Before building your workflow steps, you’ll need to configure the start and end settings. These settings determine who enters the workflow, when they enter, and when they exit.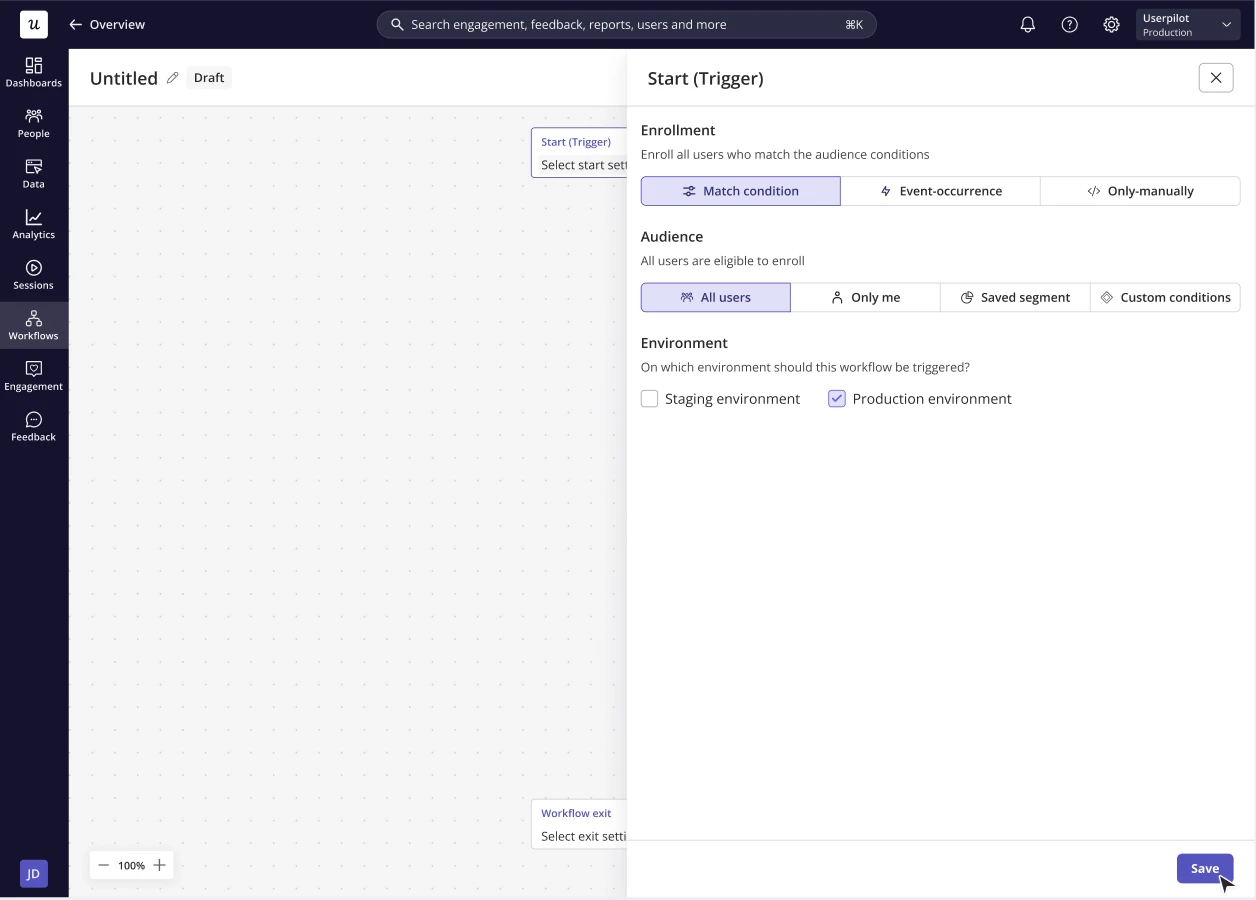
1. Define start settings
Start settings control how users are enrolled into the workflow. Enrollment options Choose how users should enter the workflow:- Match condition — Users are enrolled automatically once they meet the defined audience conditions.
- Event occurrence — Users enter the workflow immediately after performing a specified event.
- Only-manually — Users are added after triggering manually through other Userpilot content, a permalink or programatically.
- All Users: Any identified user will be enrolled.
- Only Me: Only enrolls users who have access to your Userpilot account (useful for testing).
- Saved Segment: Use a predefined user segment to enroll a specific group.
- Custom Conditions: Create a targeted subset of users by setting specific rules.
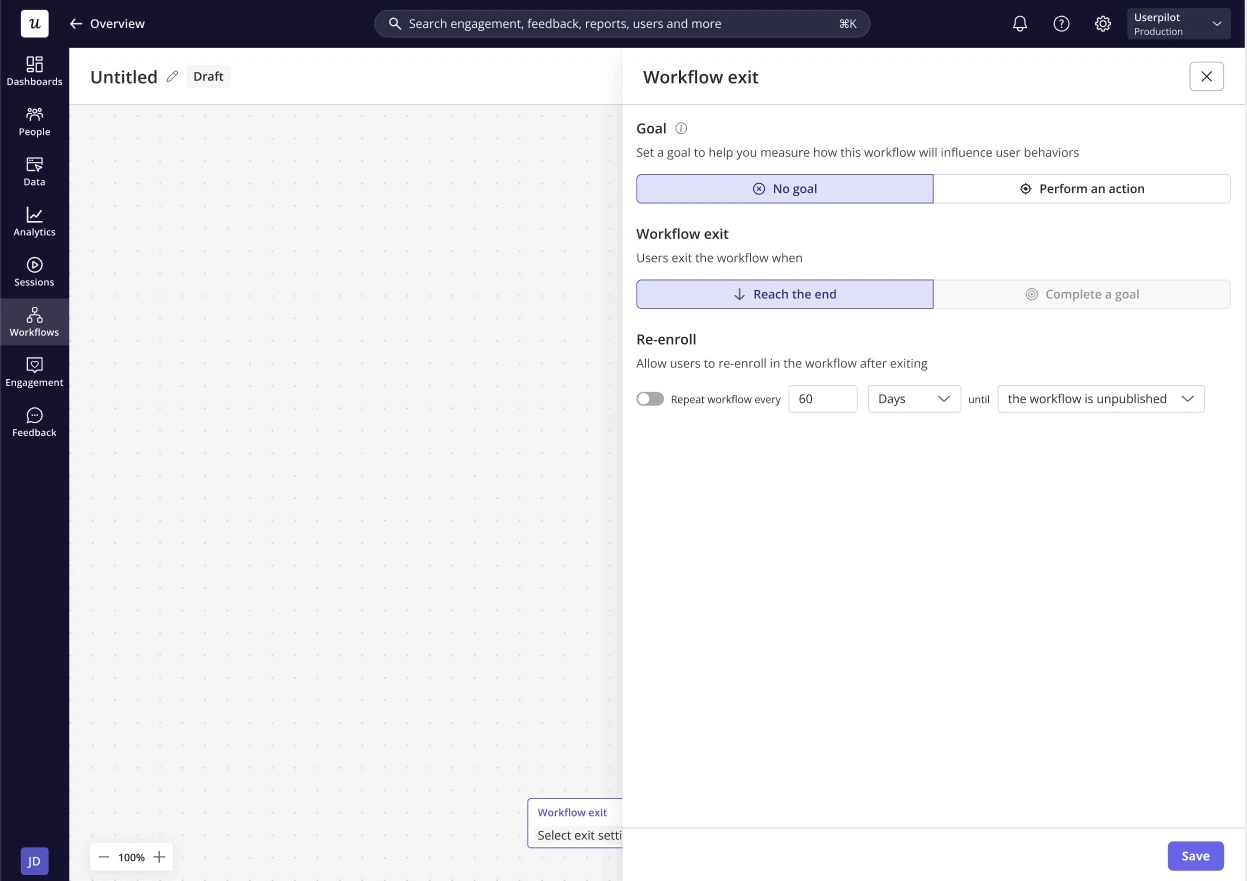
2. Define exit settings
Exit settings determine when a user exits the workflow and whether they can enter again in the future. Goal: Define a goal to measure how your flow impacts user behavior and track key interactions. Workflow exit rules: Choose when users should exit the workflow:- Reach the end — Users remain in the workflow until they move through the final step.
- Complete a goal — Users exit as soon as they achieve the defined goal, even if they haven’t reached the final step.
Build your workflow
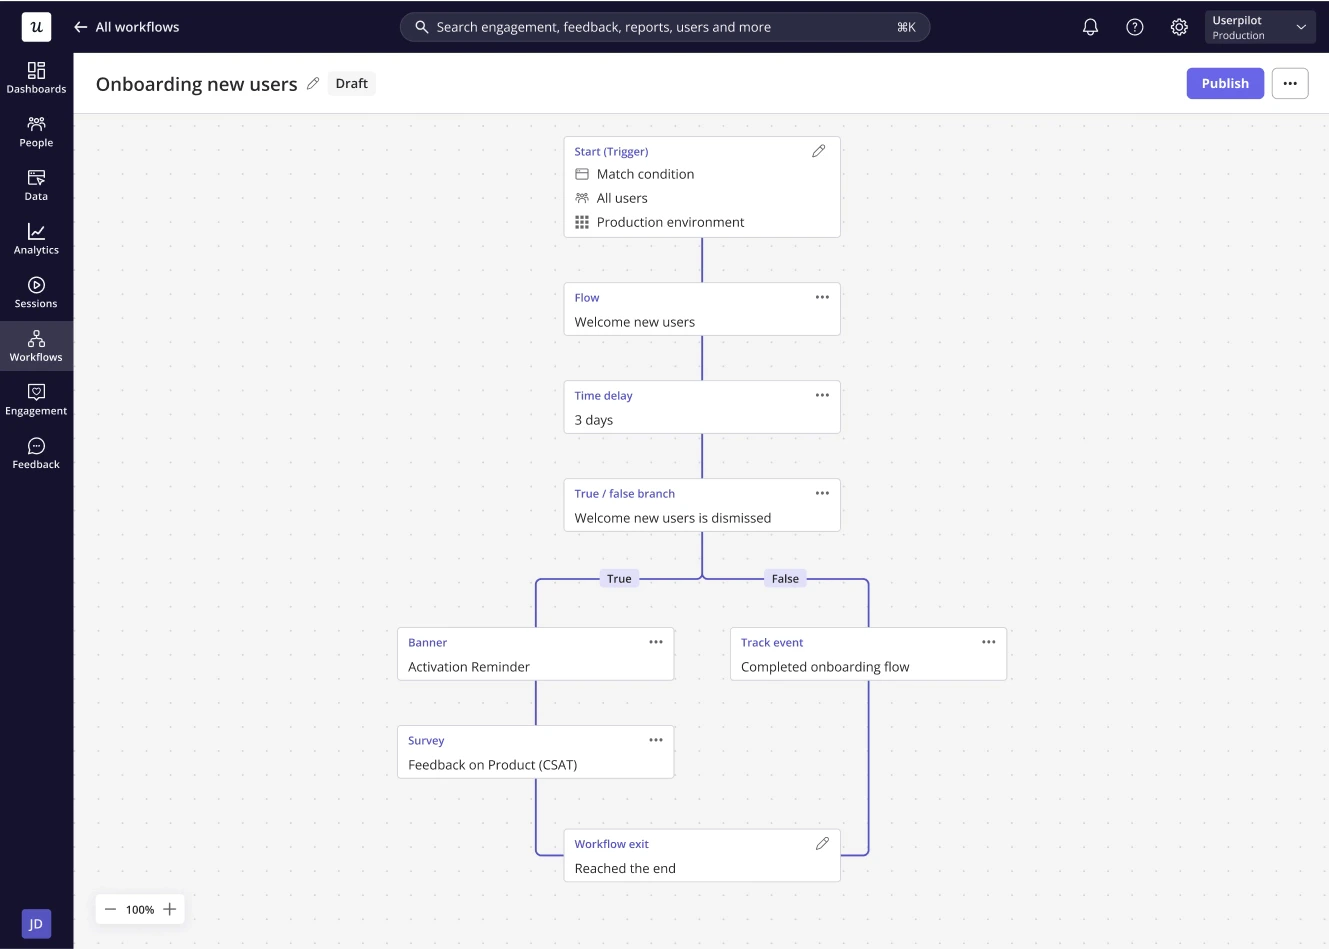
Begin designing the workflow itself by adding steps to the canvas. Workflow steps define what happens after a user enters the workflow and allow you to create structured, behavior-driven journeys.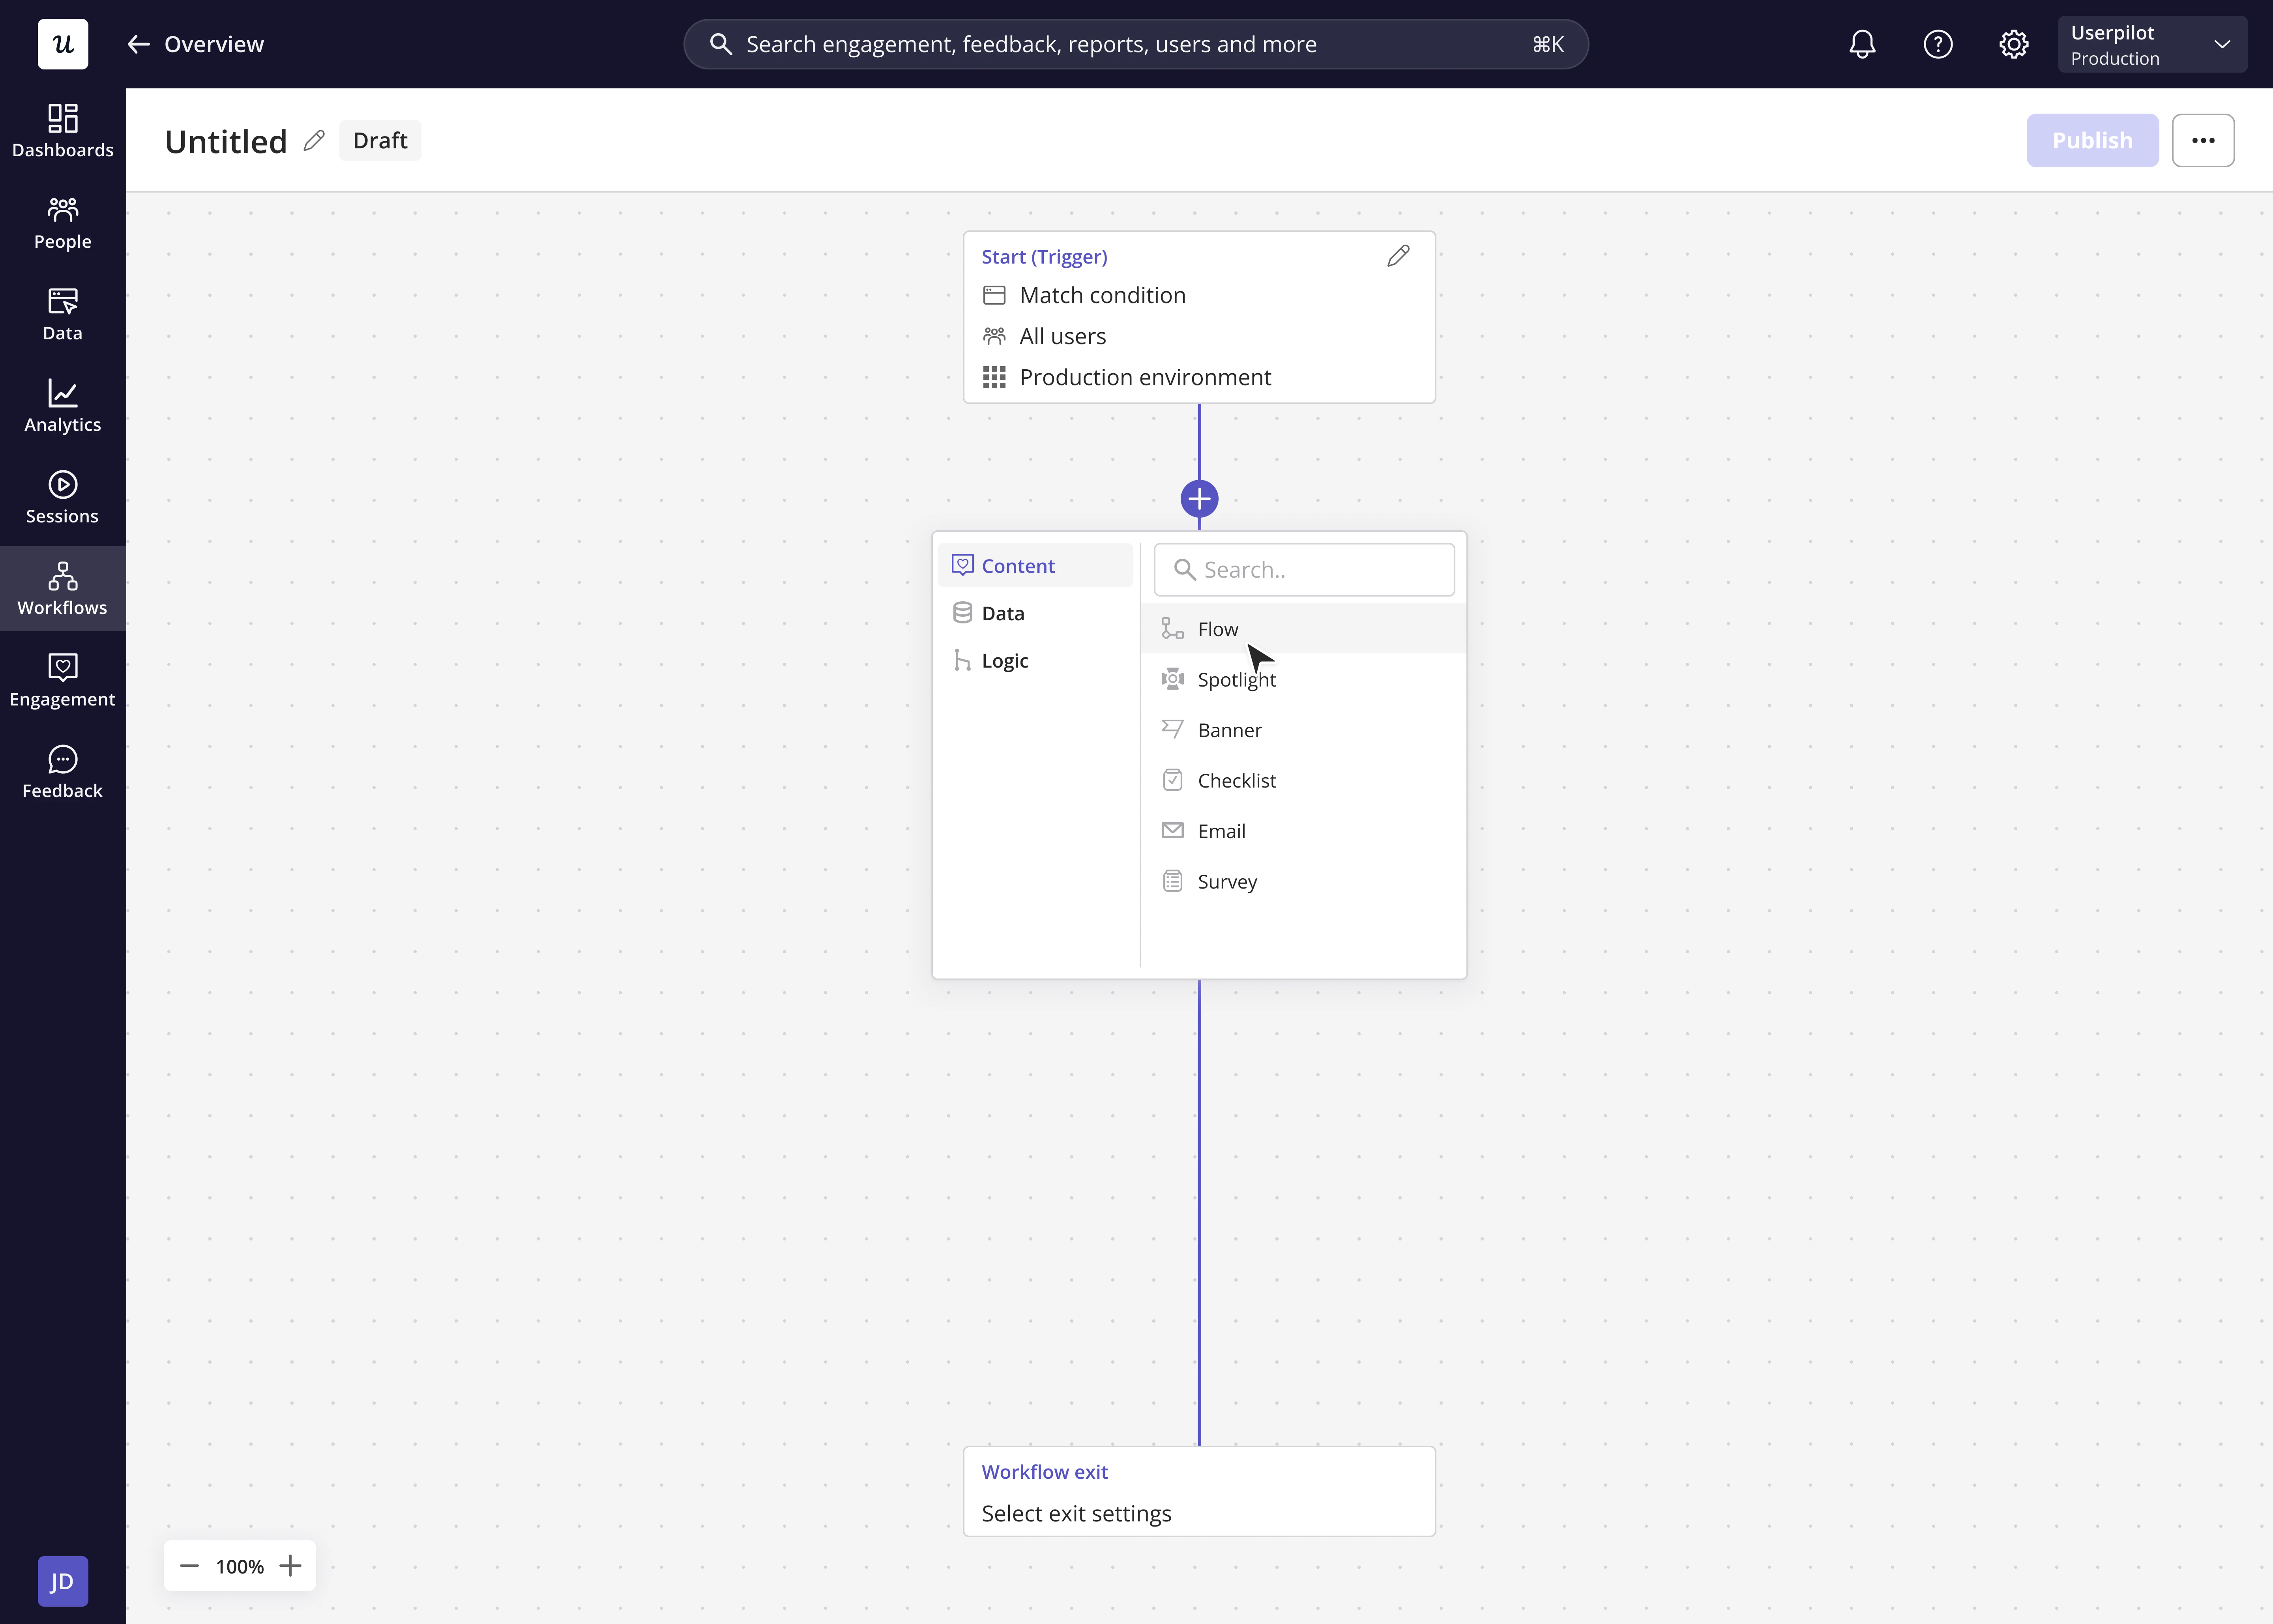
1. Content steps
Content steps allow you to trigger user-facing experiences at specific points in the workflow. These steps help you guide, educate, or engage users throughout their journey. You can trigger Flows, Spotlights, Banners, Checklists, Emails or Surveys.- Create New or Clone: Decide whether to build your content from scratch or duplicate an existing experience. When cloning, all content and configuration settings are copied from the original, (except for environment and audience, which are controlled by the workflow’s start settings).
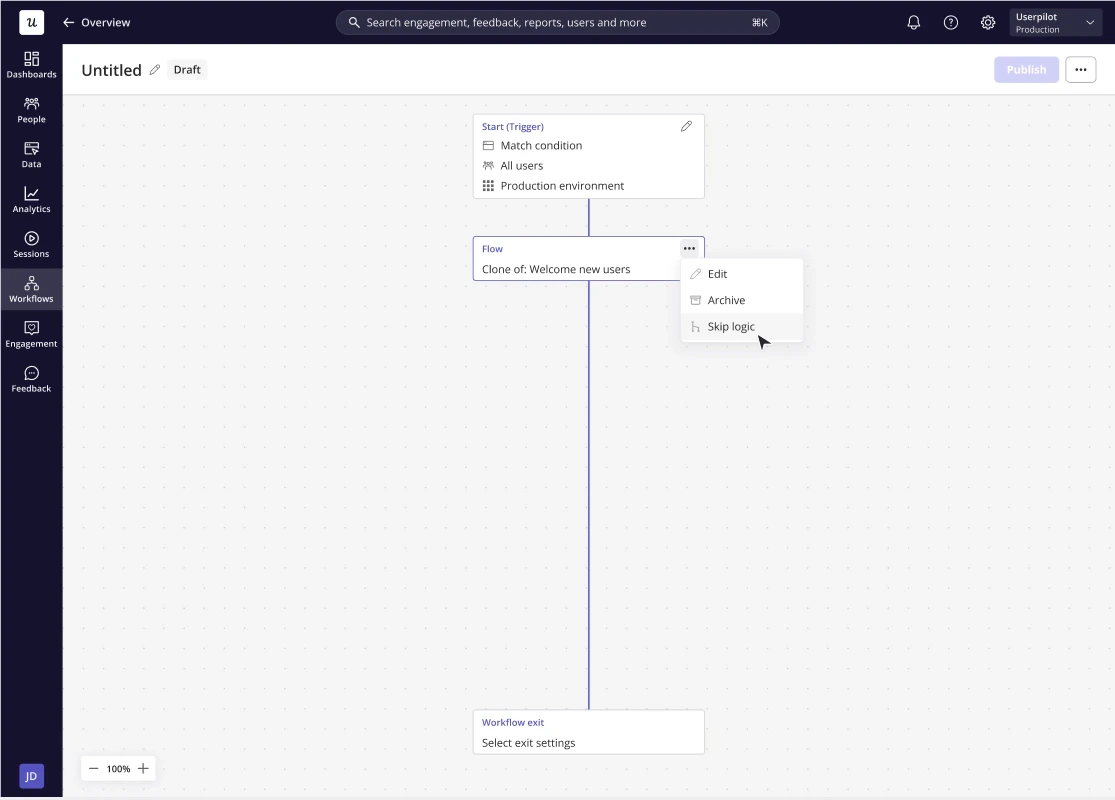
- Skip logic: From the step node’s ‘More actions’ menu, you can configure skip logic to move users to the next step if the content isn’t triggered within a defined time period.
2. Logic steps
Logic steps control the flow and timing of the workflow. They help you create personalized paths and ensure users move through the journey in the intended order.- True / False branches — Split the workflow into different paths based on conditions such as user data or behaviour, company data, segments, or content engagement.
- Time delays — Pause the workflow before the next step occurs for the user. Delays can be set for a specific duration (minutes, hours, days, weeks, or sessions) or until a specific date and time.
3. Data steps
Data steps allow you to trigger backend actions without showing user-facing content. These steps help you keep your data accurate and track workflow progress.- Track event — Send an event when a user reaches a specific point in the workflow.
- Update property — Update a user property with a predefined value when the step is reached.
