Overview
Userpilot’s translation feature allows you to seamlessly translate your flows into different languages without rebuilding them. With a single click, you can quickly localize your content to reach a broader global audience.This feature is only available for Growth and Enterprise plans.
Use Cases
- Support for non-English speakers: Simplifies flow creation for non-English users.
- Global audience reach: Deliver the same content in multiple languages for a wider reach.
- Easy localization: Tailor content for users from different regions by translating flows.
Setting Up Your Language Localization Parameter
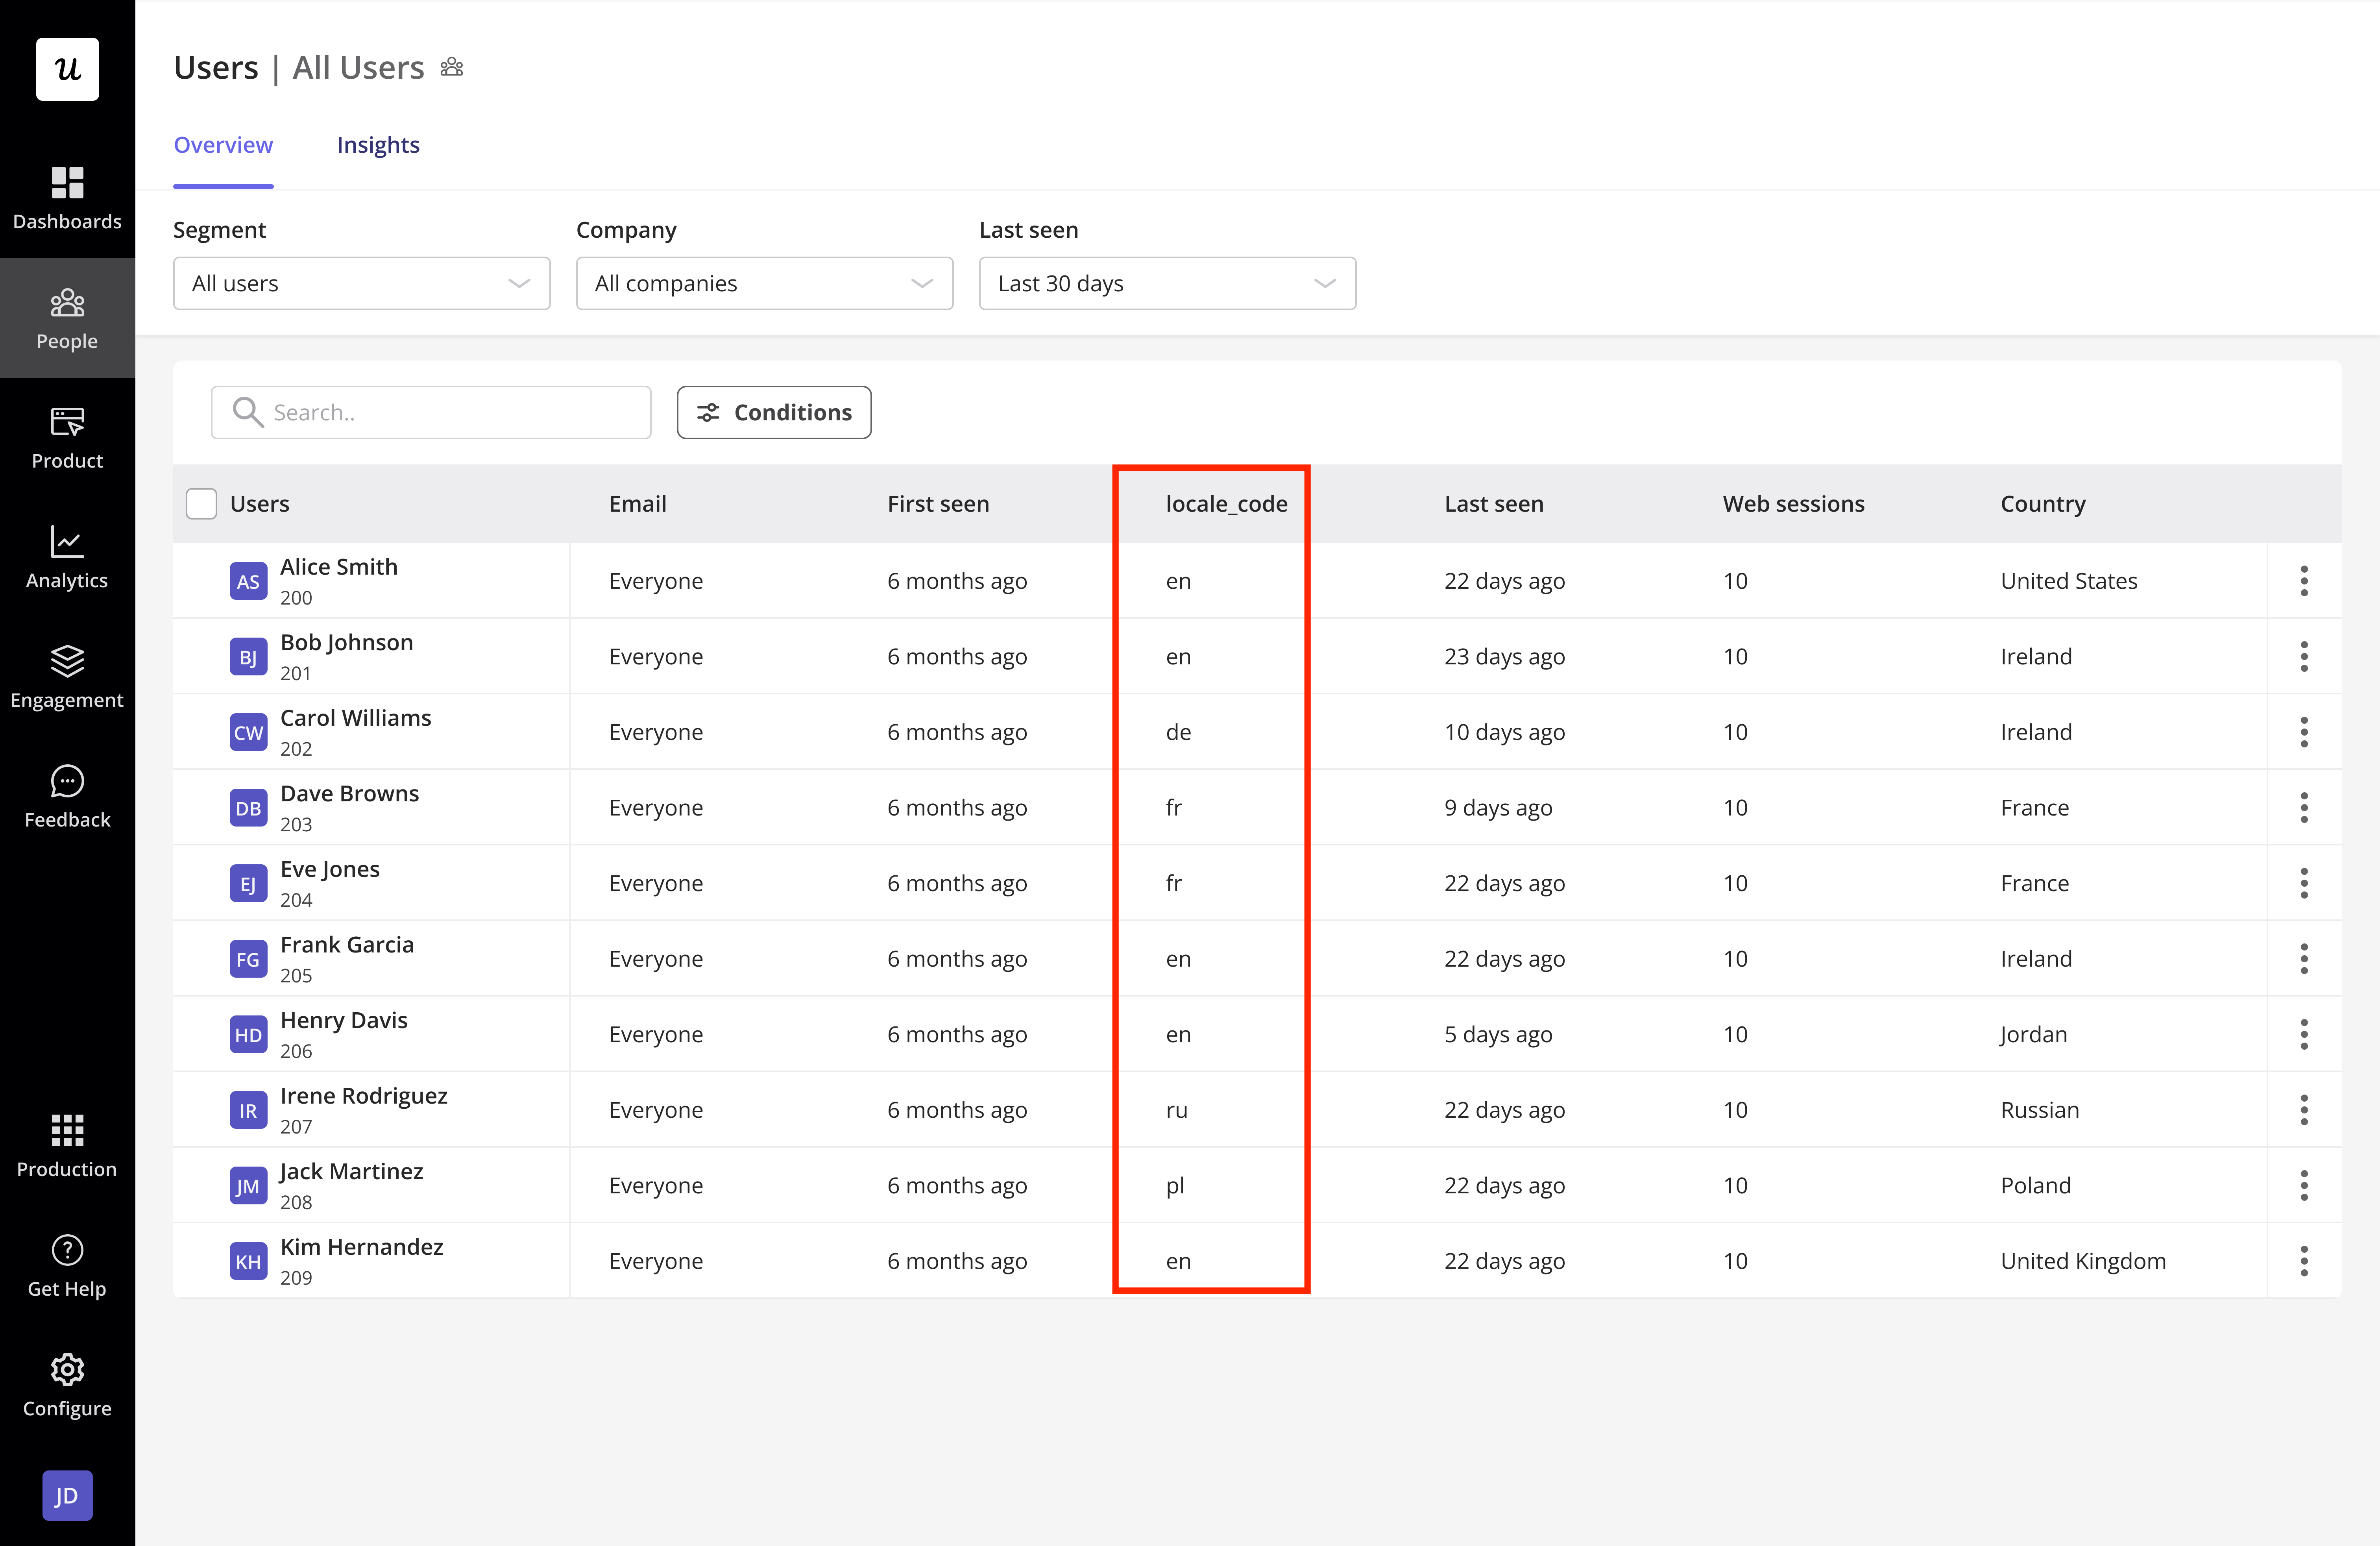
Userpilot determines which language to show based on the language localization parameter. This can be configured under the Localization tab in account settings. You can either use a custom property (locale_code) sent via your installation or the default property Browser_Language that tracks the user’s browser language. Ensure the language follows the ISO 639-1 code standards (e.g., en, fr, nl).
Types of Localization
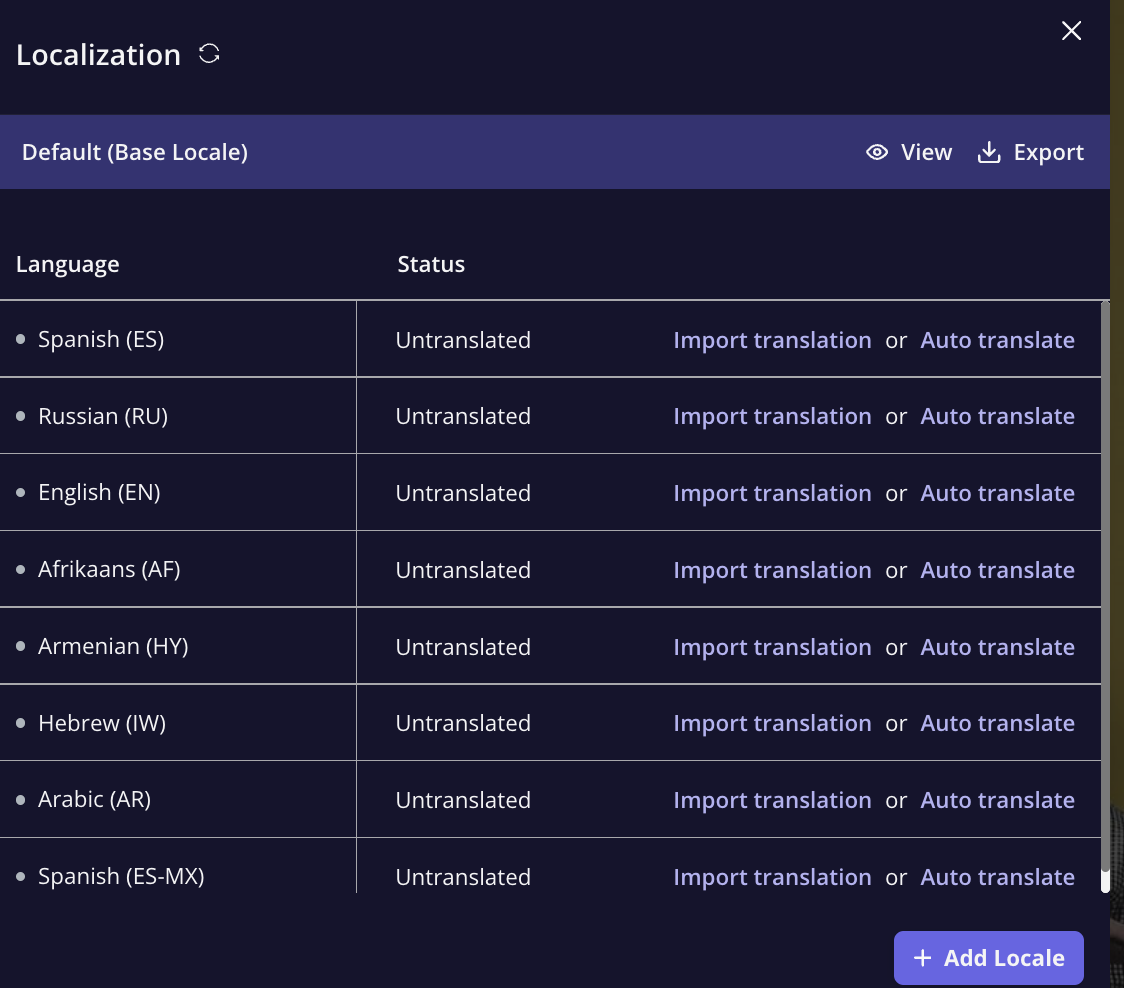
Once the localization parameter is set, access the flow via the Chrome extension builder, click the localization icon, and select the language to translate. Choose one of the following translation methods: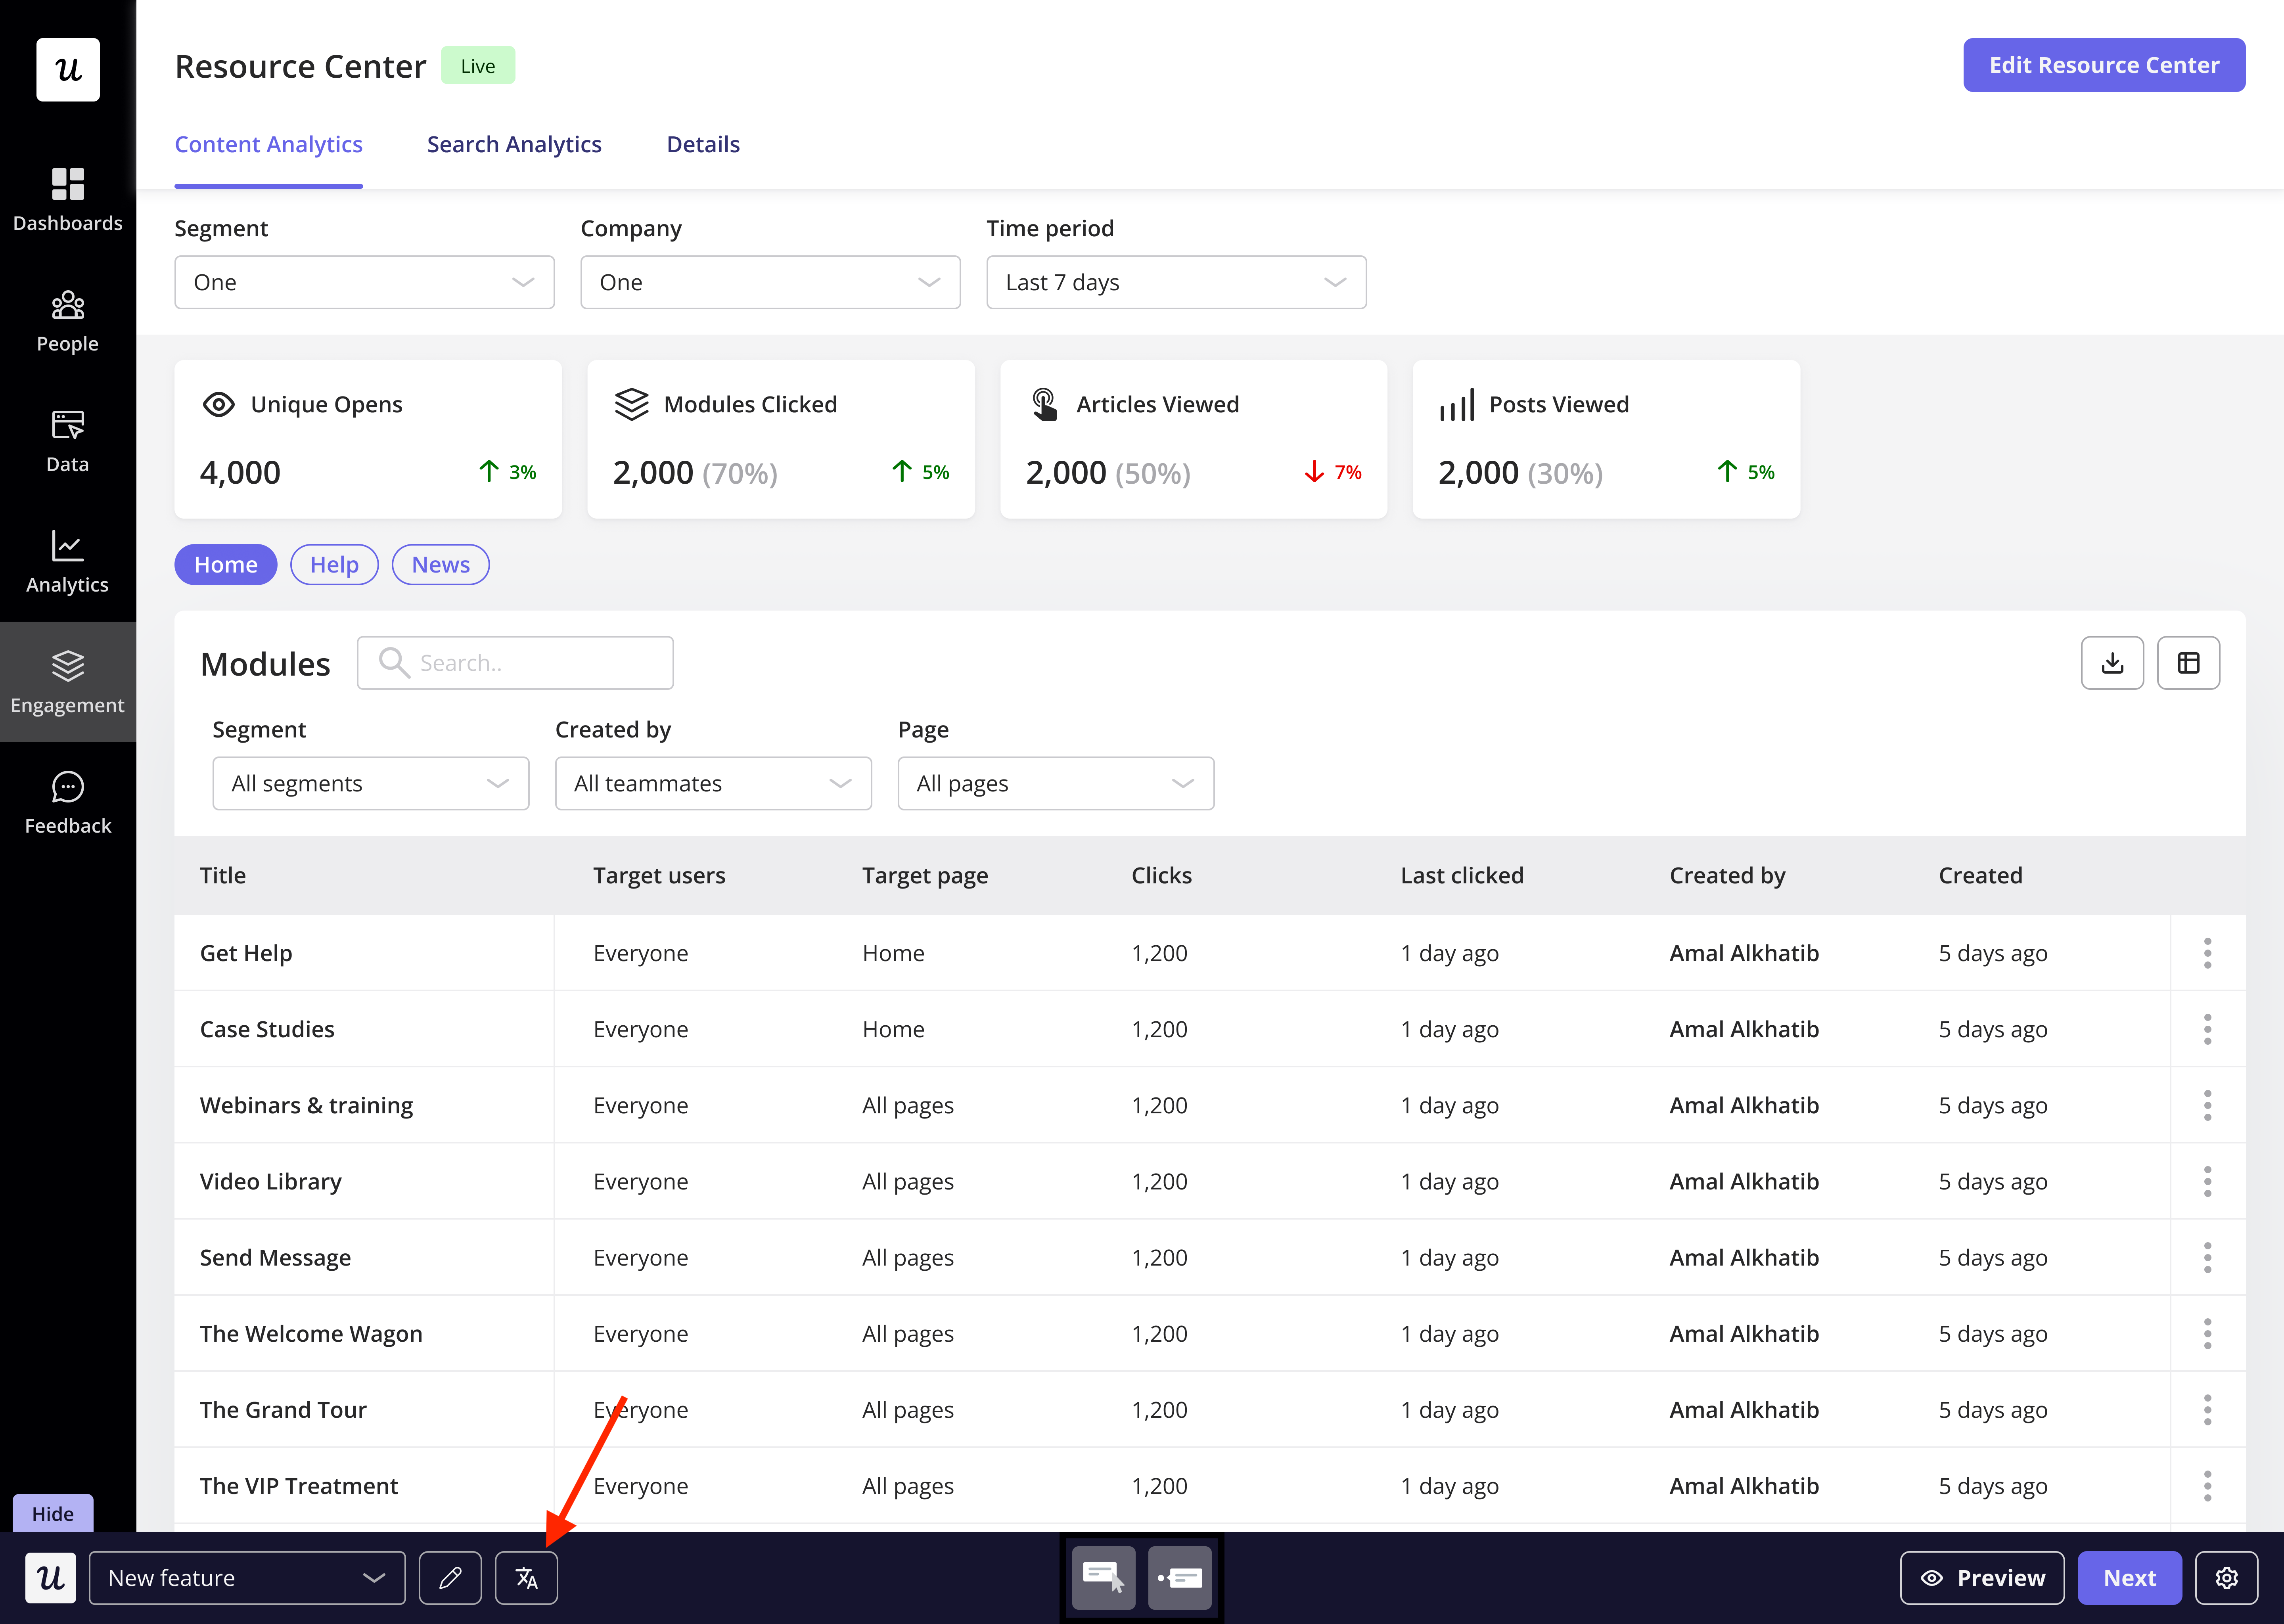
- Automated Translation: Userpilot uses AI to automatically translate your content into the selected language(s).
- Manual Translation: Export your content as a CSV or XLIFF file, have it translated by your team, and then re-upload it to Userpilot.
Step-by-Step Localization Guide
Automated Localization
- Create the content: Begin by building the flow in your base language (this will be the default language for translation).
- Translate: Click on the localization icon and select the language(s) to auto-translate. Review the translated content by clicking “View.”
- Edit translations: You can edit any translated text by clicking on the text section.
- Preview and publish: Before publishing, preview the content to ensure the translation looks good. Once satisfied, click “Publish.”
When you edit content in the default language after enabling a translation, a green dot will turn orange. Click “Re-translate” to update the translation.
Manual Localization
- Build content: Complete your content in the desired language before enabling manual localization.
- Export: Click the export button to download the CSV file with your content.
- Translate: Enter the translations into the “Target” column. Media content will be left blank (ensure you keep those blank lines).
- Import and preview: Import the translated CSV and preview the content to ensure it displays correctly.
- Publish: Once satisfied, toggle the “Live” option for the language and hit publish.
FAQs
Can I switch between automated and manual translations after starting?
Can I switch between automated and manual translations after starting?
No, switching between the two translation methods will erase previous translations, so choose your method wisely before starting.
What happens if I don’t follow the ISO 639-1 language code?
What happens if I don’t follow the ISO 639-1 language code?
The translation may not work as expected, so it’s crucial to use the correct codes for proper localization.
How do I handle media content during manual localization?
How do I handle media content during manual localization?
Media content will be exported as blank lines in the CSV. Leave these blank lines when translating.