Overview
Userpilot allows you to create flows that span multiple pages using the Page Change step. This feature ensures a seamless user experience when guiding users through a multi-page journey. While we generally recommend creating separate flows per page, Page Change steps help maintain continuity when necessary.Use Cases
- Onboarding Flows: Guide new users across multiple pages for a complete onboarding experience.
- Feature Walkthroughs: Showcase features that require user interaction on different pages.
- Multi-Step Processes: Assist users in completing forms, or multi-step actions across different URLs.
- User Education: Provide tooltips or modals across various sections of an app without breaking the flow.
Adding a page change step
Here are the step-by-step instructions to add a page change step between your flow steps.- Create the first part of your flow on the initial page.
- Navigate to the URL where the flow should continue.
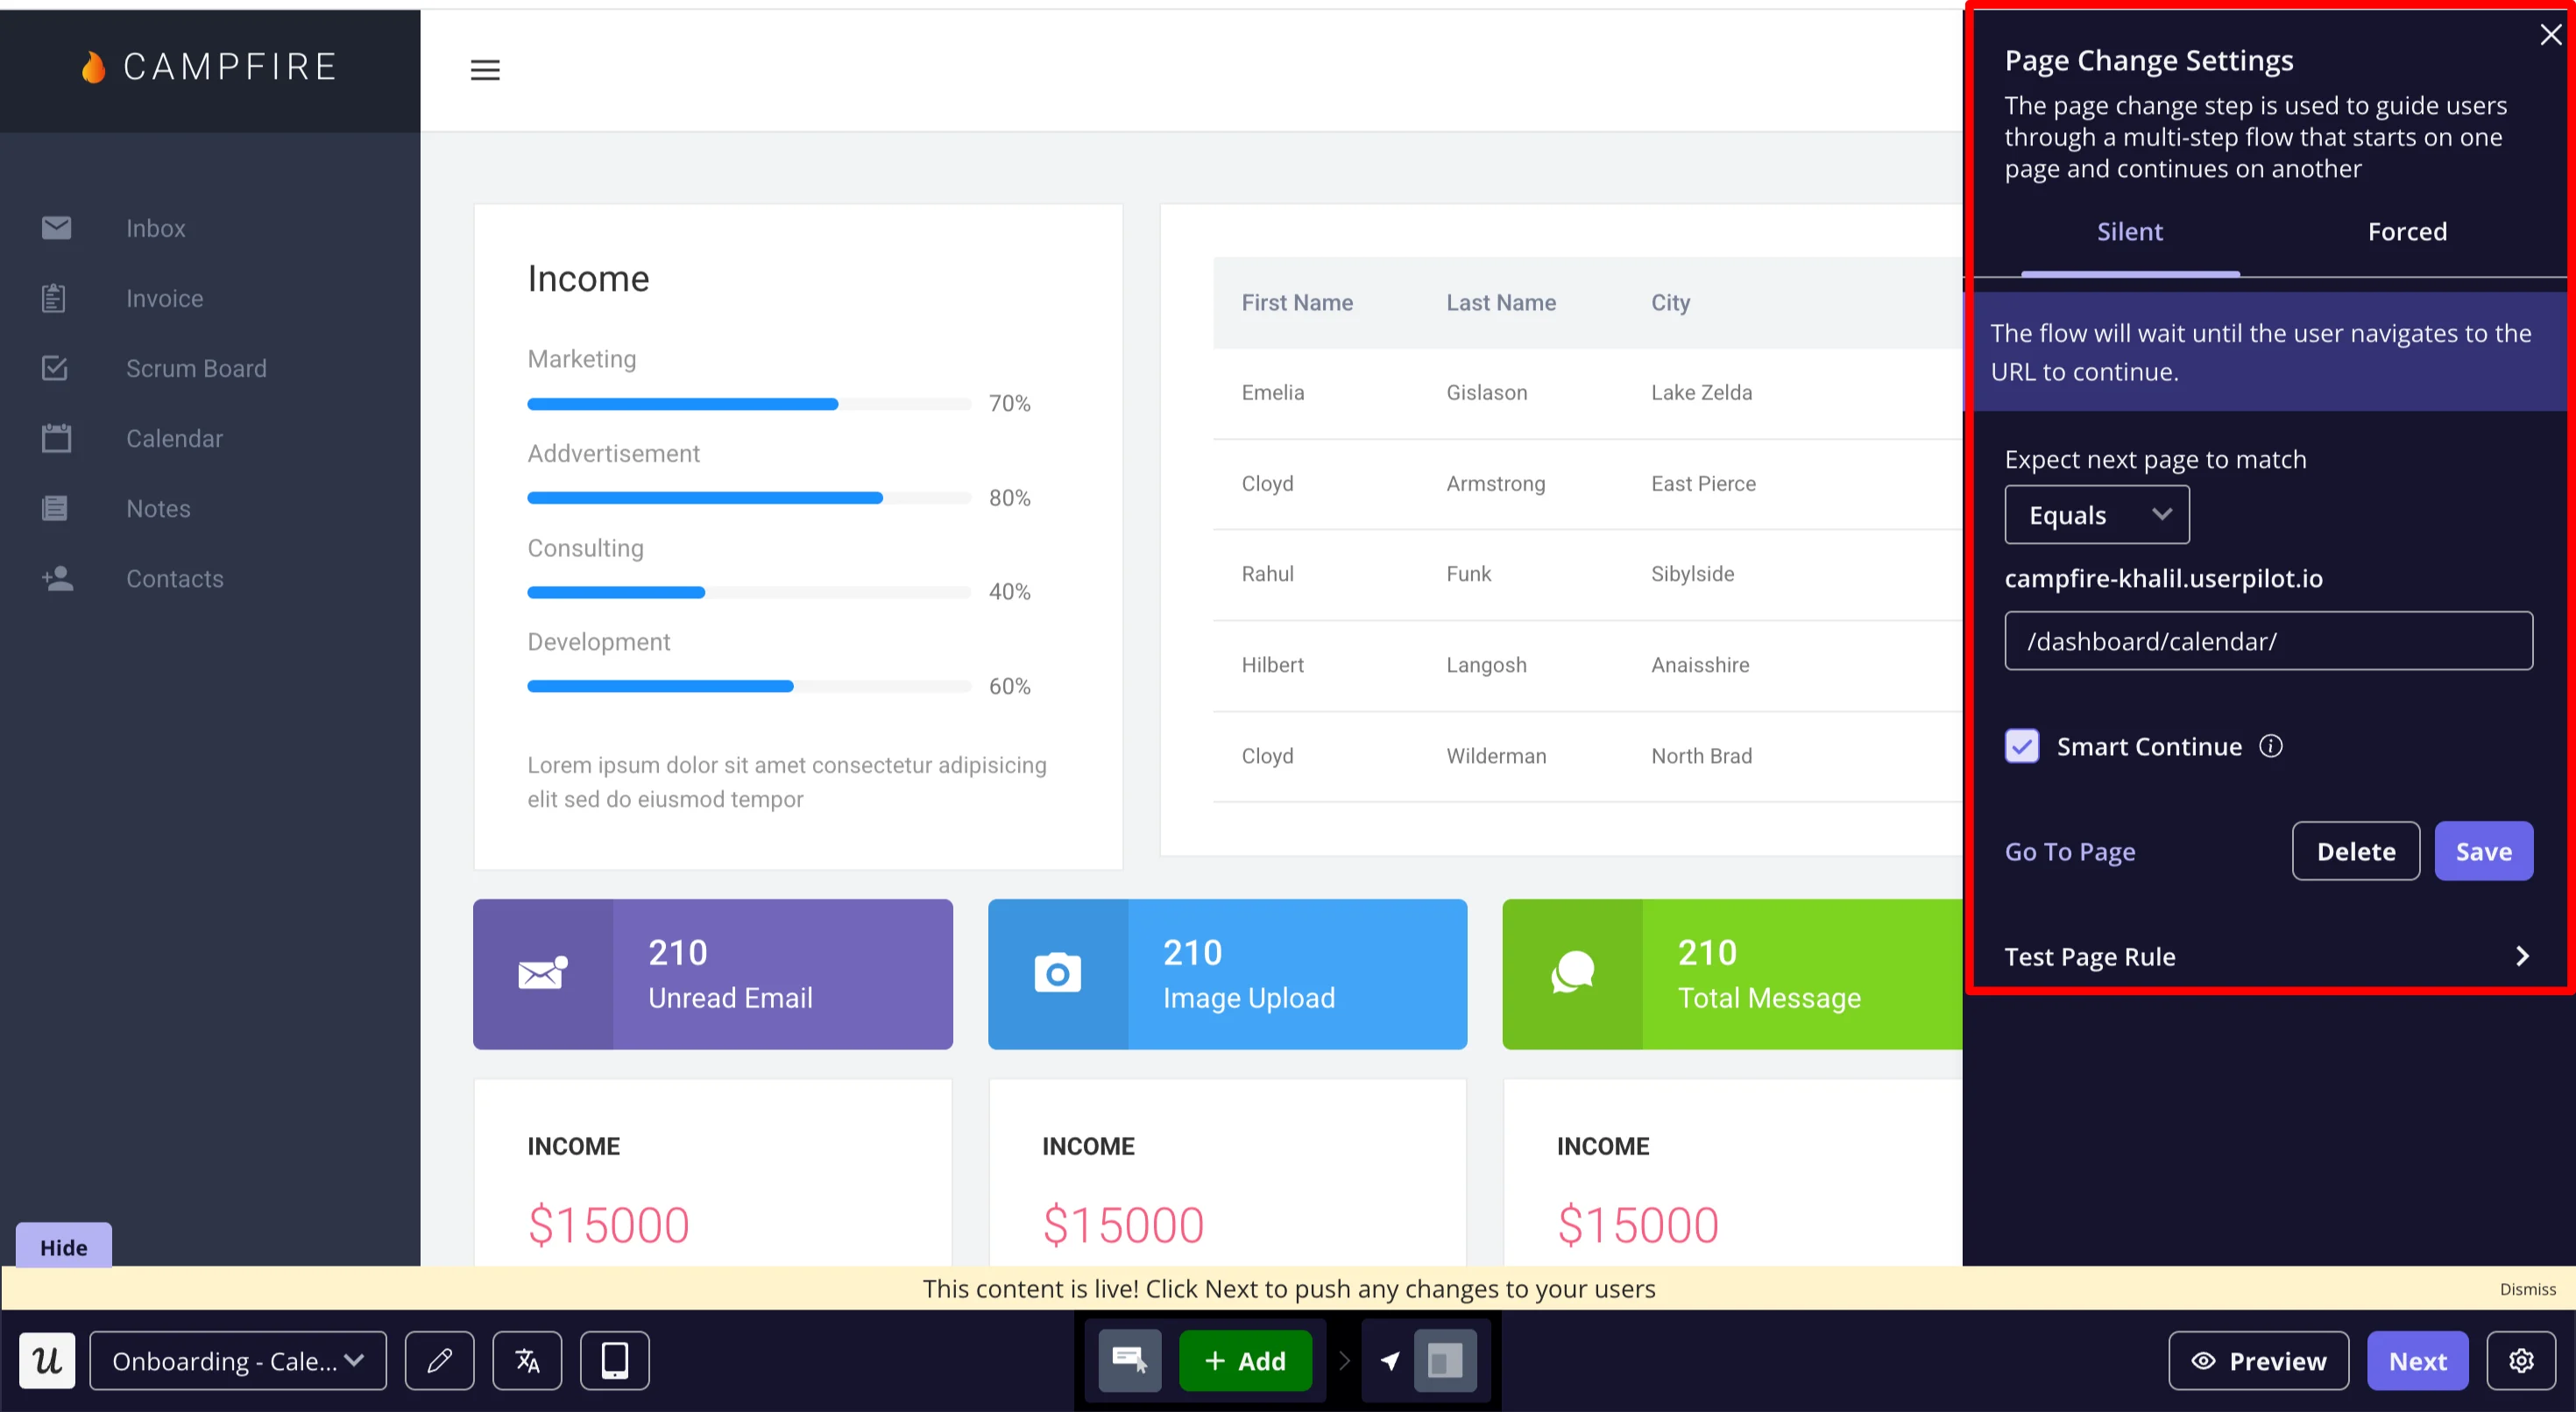
- Click on Add Page Change in the flow editor.
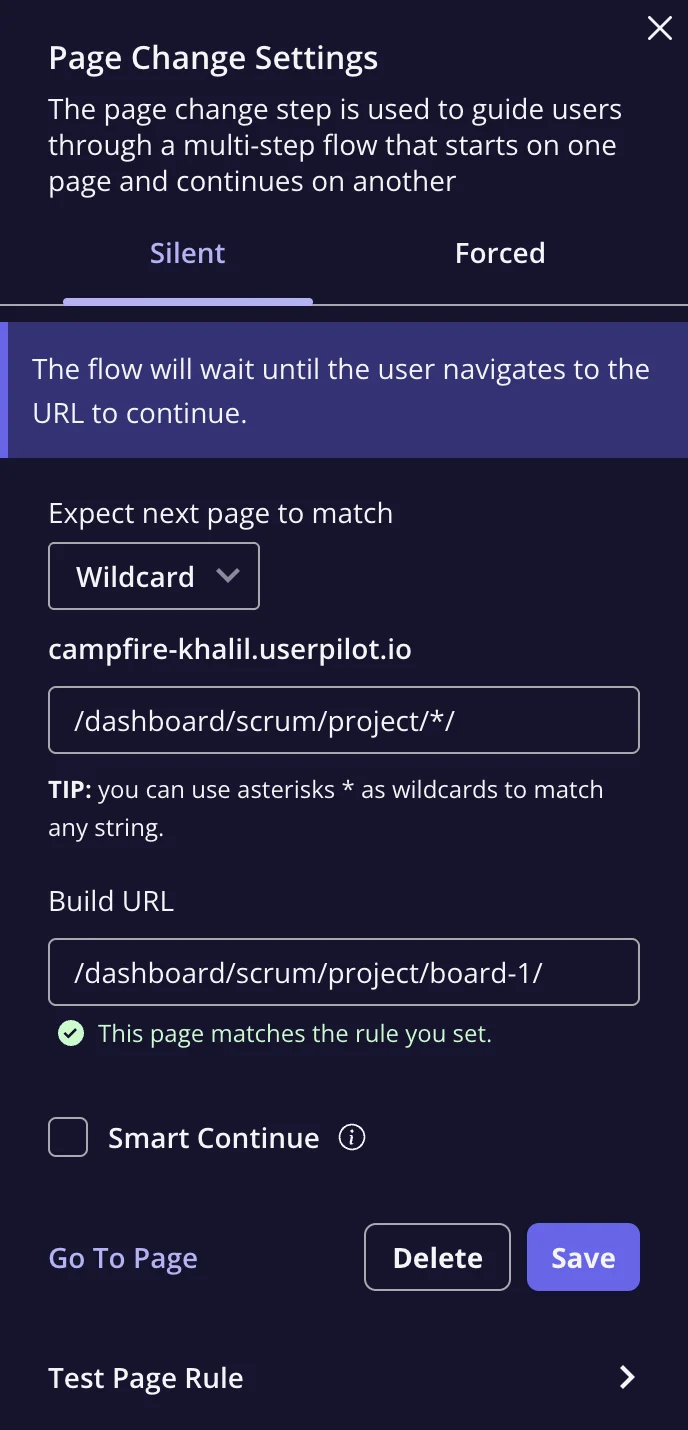
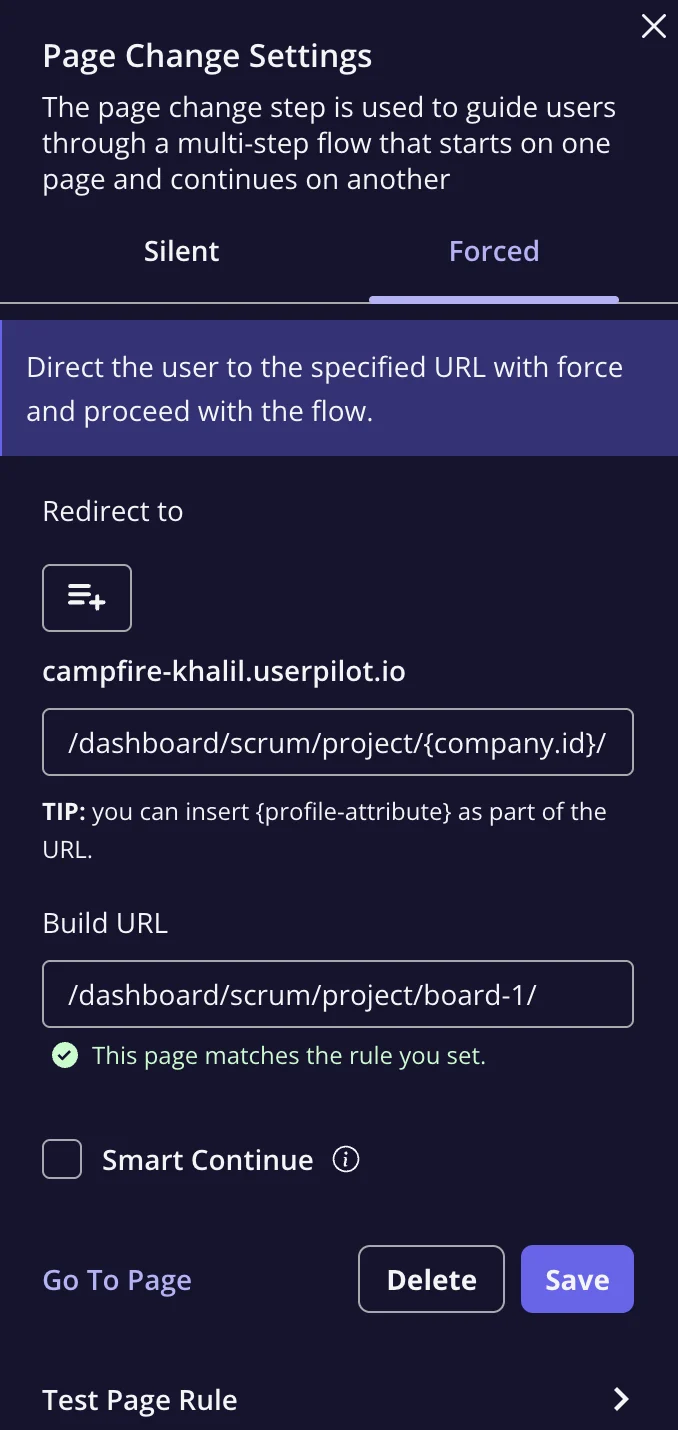
- Configure the page change as Silent or Forced.
- Save and test your flow.
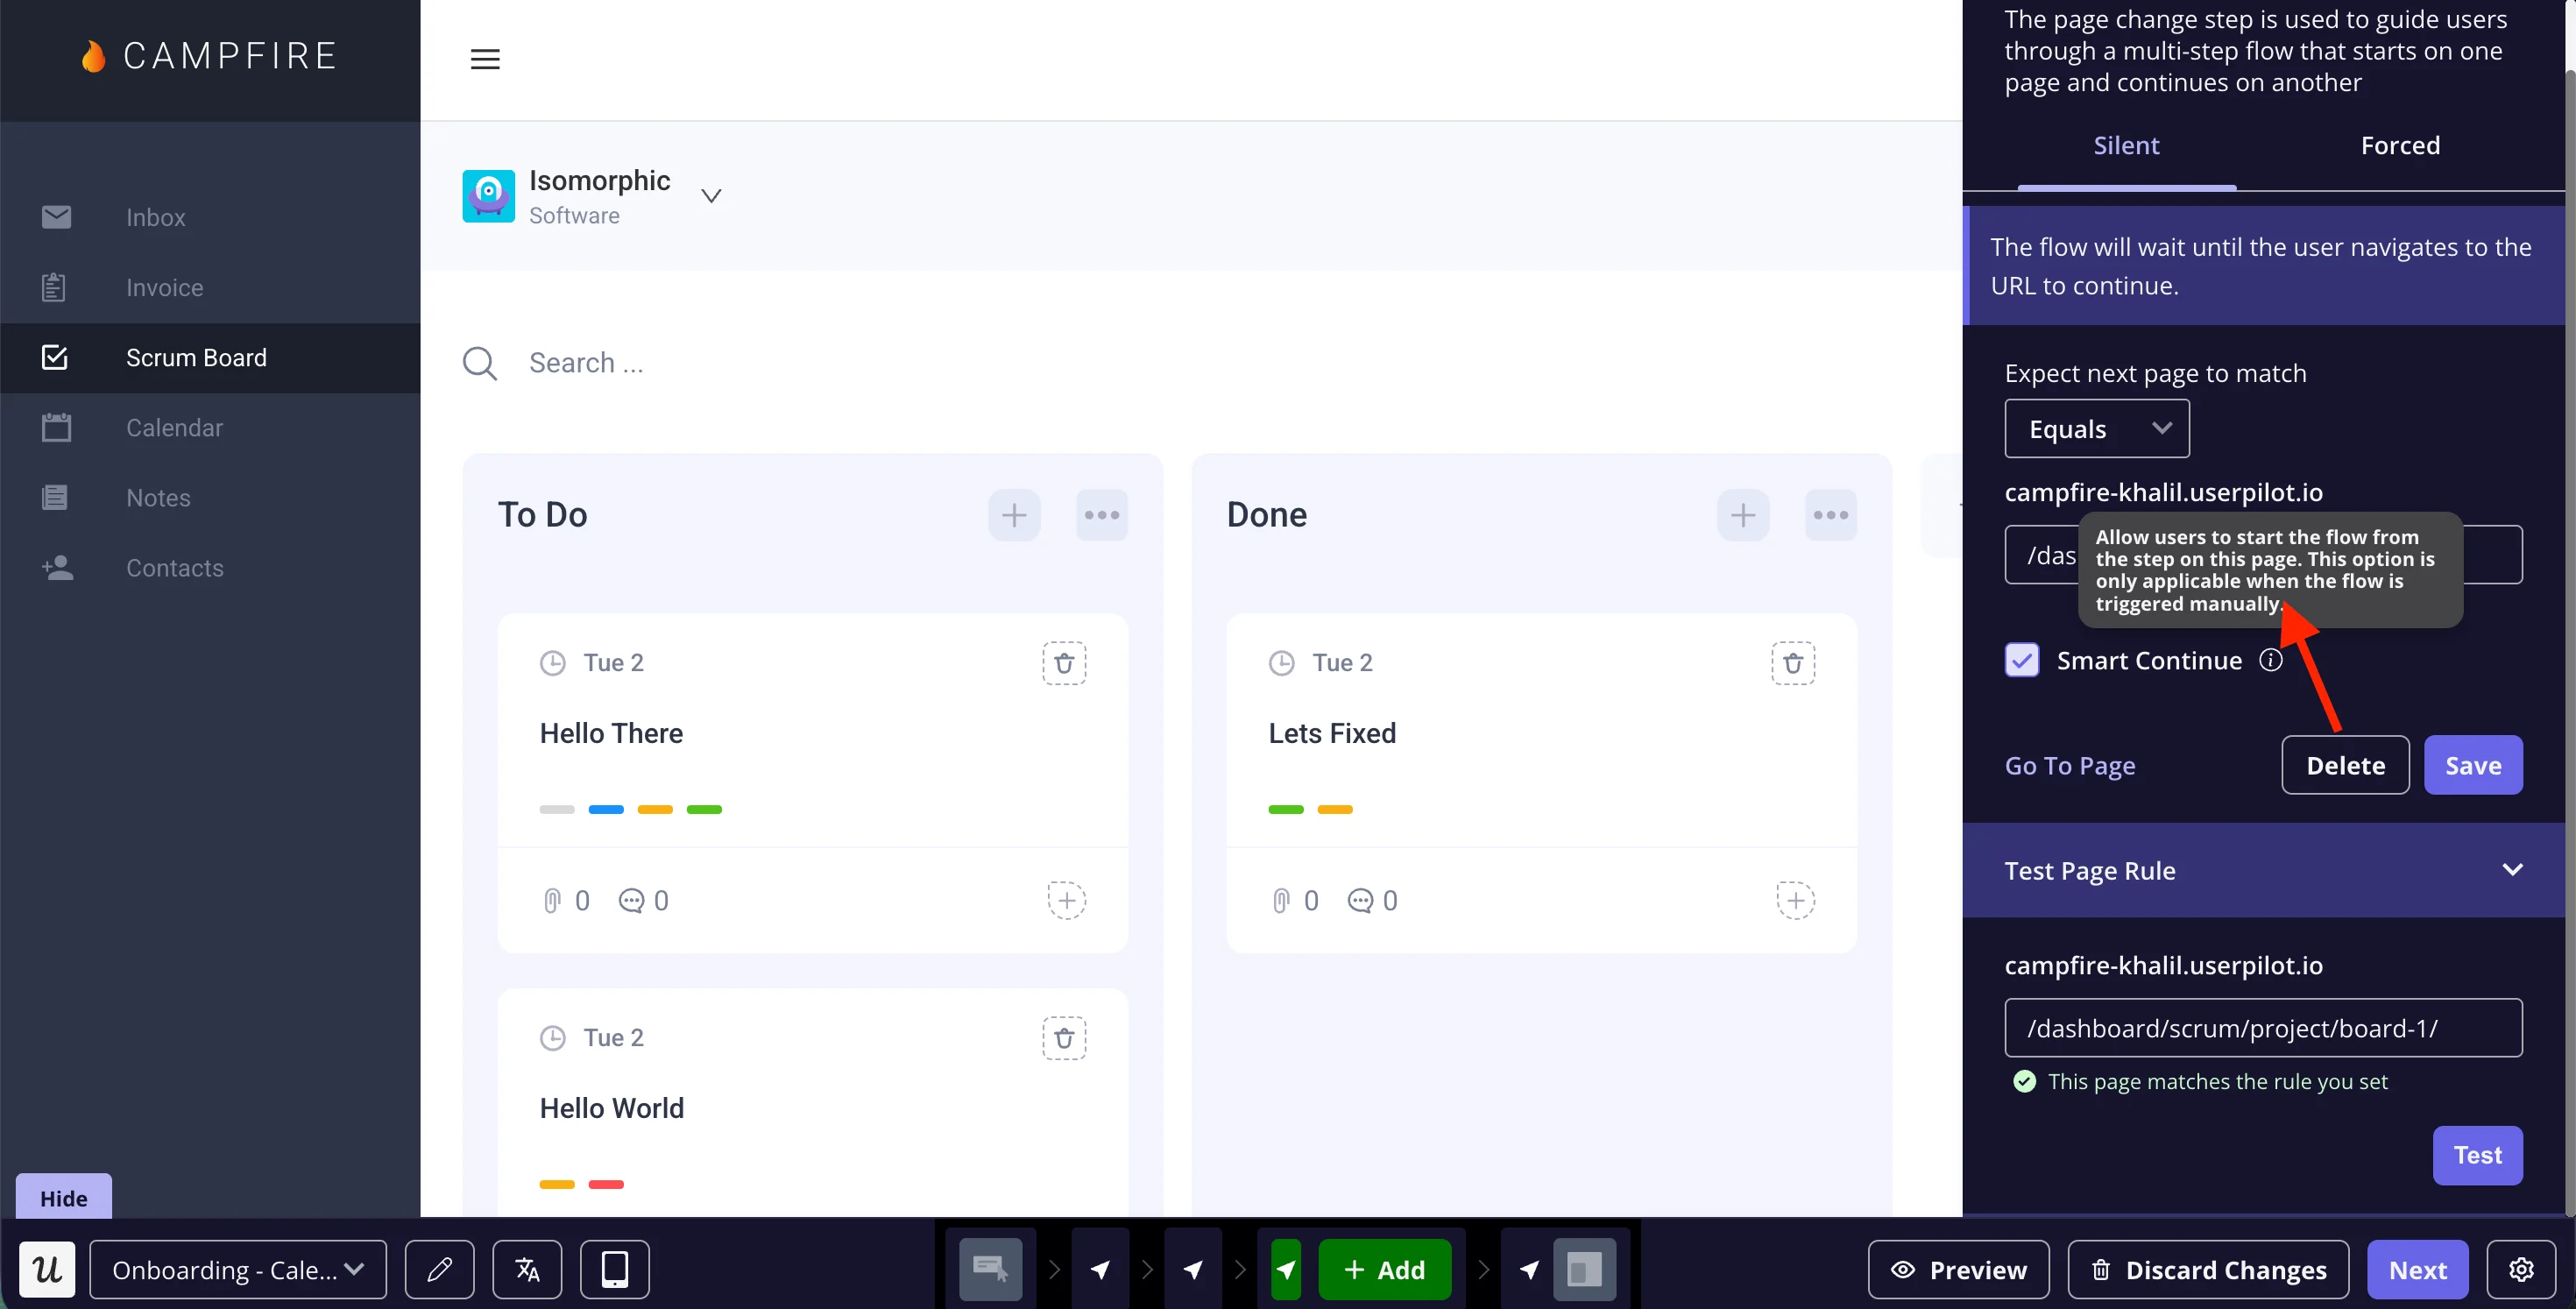
Silent vs. Forced Page Changes
- Silent Page Change: The flow waits for the user to navigate to the URL on their own before continuing.
- Forced Page Change: The system automatically redirects the user to the specified URL and continues the flow.
Wildcards (*): Replace dynamic sections with an asterisk in Silent page changes (e.g.,/dashboard/scrum/project/*/).
- User Attributes: For Forced page changes, replace the dynamic part with a user attribute already passed via the Userpilot script (e.g.,
/dashboard/scrum/project/{company.id}/).
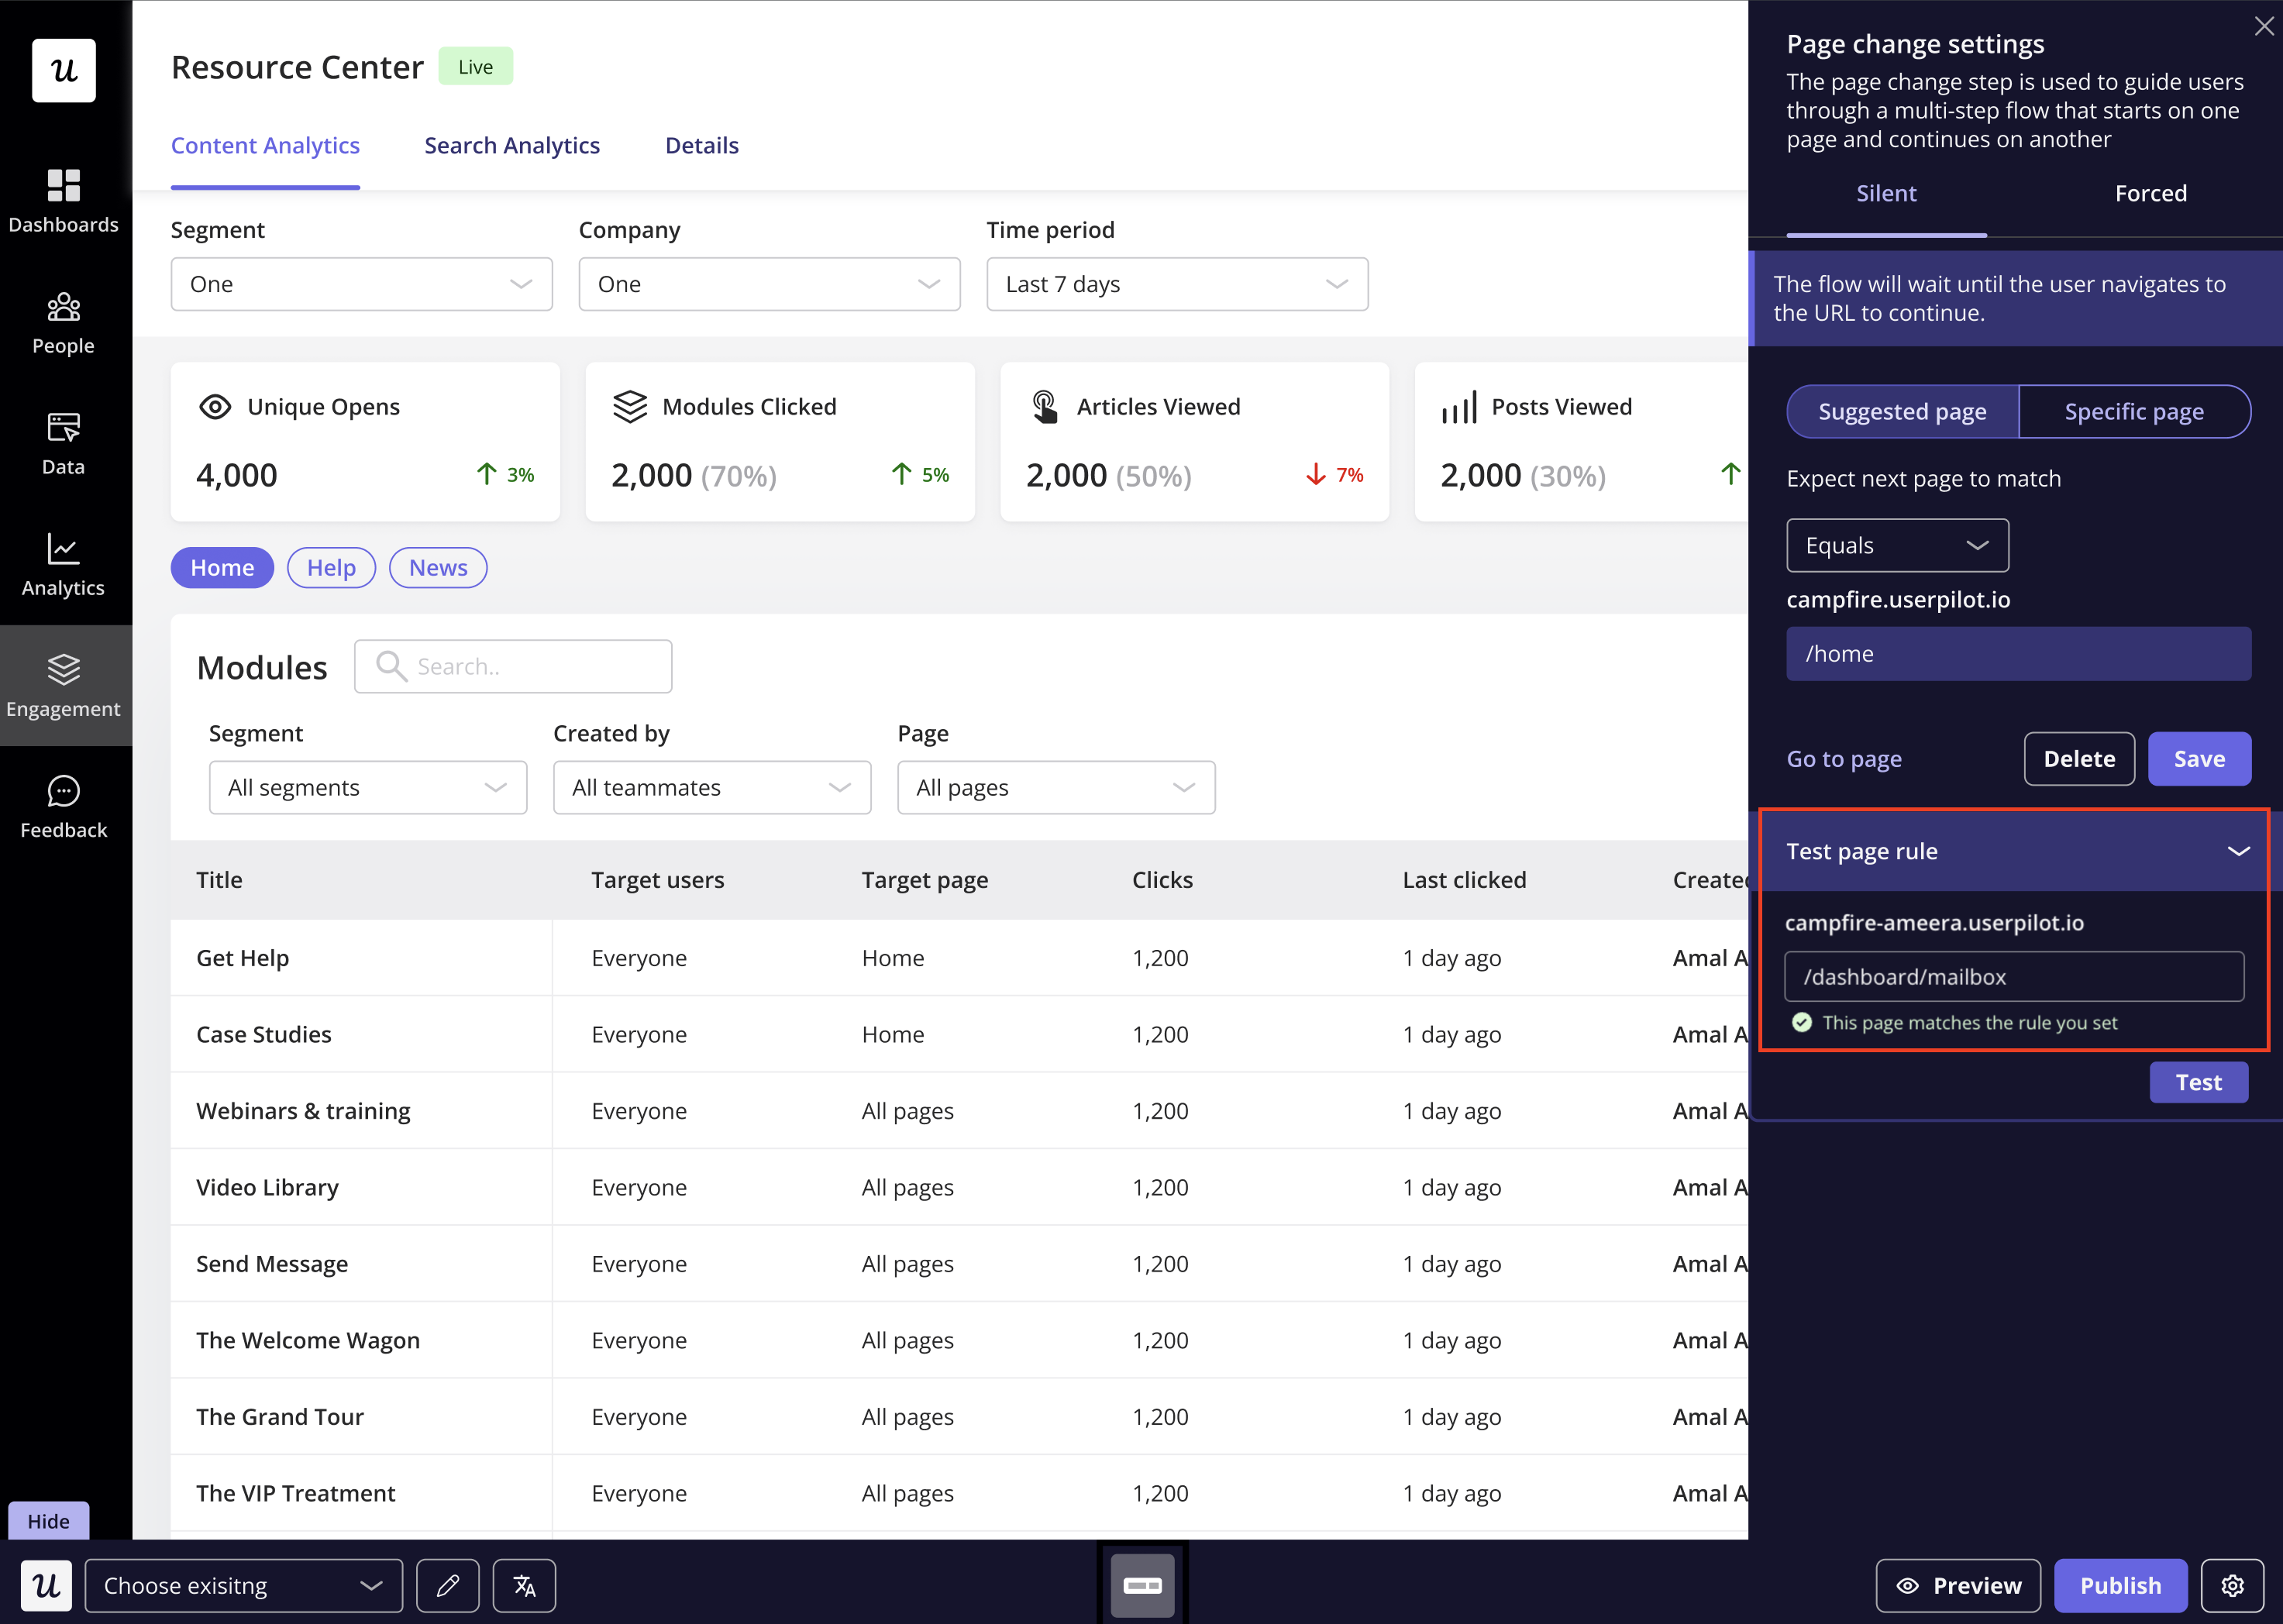
Testing your page change rule
To verify that your Page Change step is configured correctly:- Expand the Test Page Rule in the page change editor.
- Enter the URL path you want to validate.
- Click on the Test to check if it matches the expected settings.
Smart Continue
The Smart Continue feature allows users to resume a flow from the step where they left off, ensuring a smoother experience without restarting from the beginning.How it works
- When enabled, users who leave and return to the page will continue from the last completed step.
- This option is available under the Page Change step in the flow settings.
- By default, Smart Continue is disabled. You can enable it as needed.
It only applies to manually triggered flows and does not affect flows triggered automatically.
How to enable smart continue
- Navigate to the flow settings.
- Locate the Page Change step.
- Check the “Smart Continue” option to activate it.
- Save and publish your changes.
FAQs
Can I use Page Change steps for single-page applications (SPAs)?
Can I use Page Change steps for single-page applications (SPAs)?
Yes, you can. If the URL does not change when navigating between pages, trigger a fake reload and set the Page Change step to activate on that fake reload URL configured by your dev team.
Is it normal to encounter a small delay when there is a page change in my flow?
Is it normal to encounter a small delay when there is a page change in my flow?
Yes, loading delays after a page change are normal. That’s because flows are designed with two display features:
- stop running after a page change
- start running once a page is fully loaded