Documentation Index
Fetch the complete documentation index at: https://docs.userpilot.com/llms.txt
Use this file to discover all available pages before exploring further.
Overview
Net Promoter Score (NPS) surveys help measure customer loyalty by asking users how likely they are to recommend your product. Userpilot provides flexible settings to target, trigger, and localize NPS surveys based on user behavior and preferences.Targeting an NPS
To control where and to whom the NPS survey appears
- Navigate to the Settings tab. Configure the following:
- Platform
- Web app: Select this option to target feedback collection specifically for your web app users.
- Mobile app: Select this option to target feedback collection specifically for your mobile app users.
- Environment
- Production: Triggers NPS in the live environment.
- Staging: Enables testing before deploying to production.
- Domain targeting
- All Domains (Default): Displays NPS on any site with Userpilot installed.
- Specific Domains:
- Matches: Exact domain match.
- Doesn’t Match: Exclude certain domains.
- Matches Regex: Use wildcards (*) for dynamic domains.
- Page targeting
- Any Page (Default): NPS survey appears across all pages.
- Specific Pages: Show NPS only on selected pages.
- Specific URL Paths: Target NPS based on URL structure.
- Audience Targeting:
- All Users (Default): Any identified user can see the survey.
- Only Me: Limits the NPS to your Userpilot account for testing.
- Saved Segment: Use pre-configured user segments.
- Custom Conditions: Define rules based on user attributes, company data, or product usage.
Triggering an NPS Survey
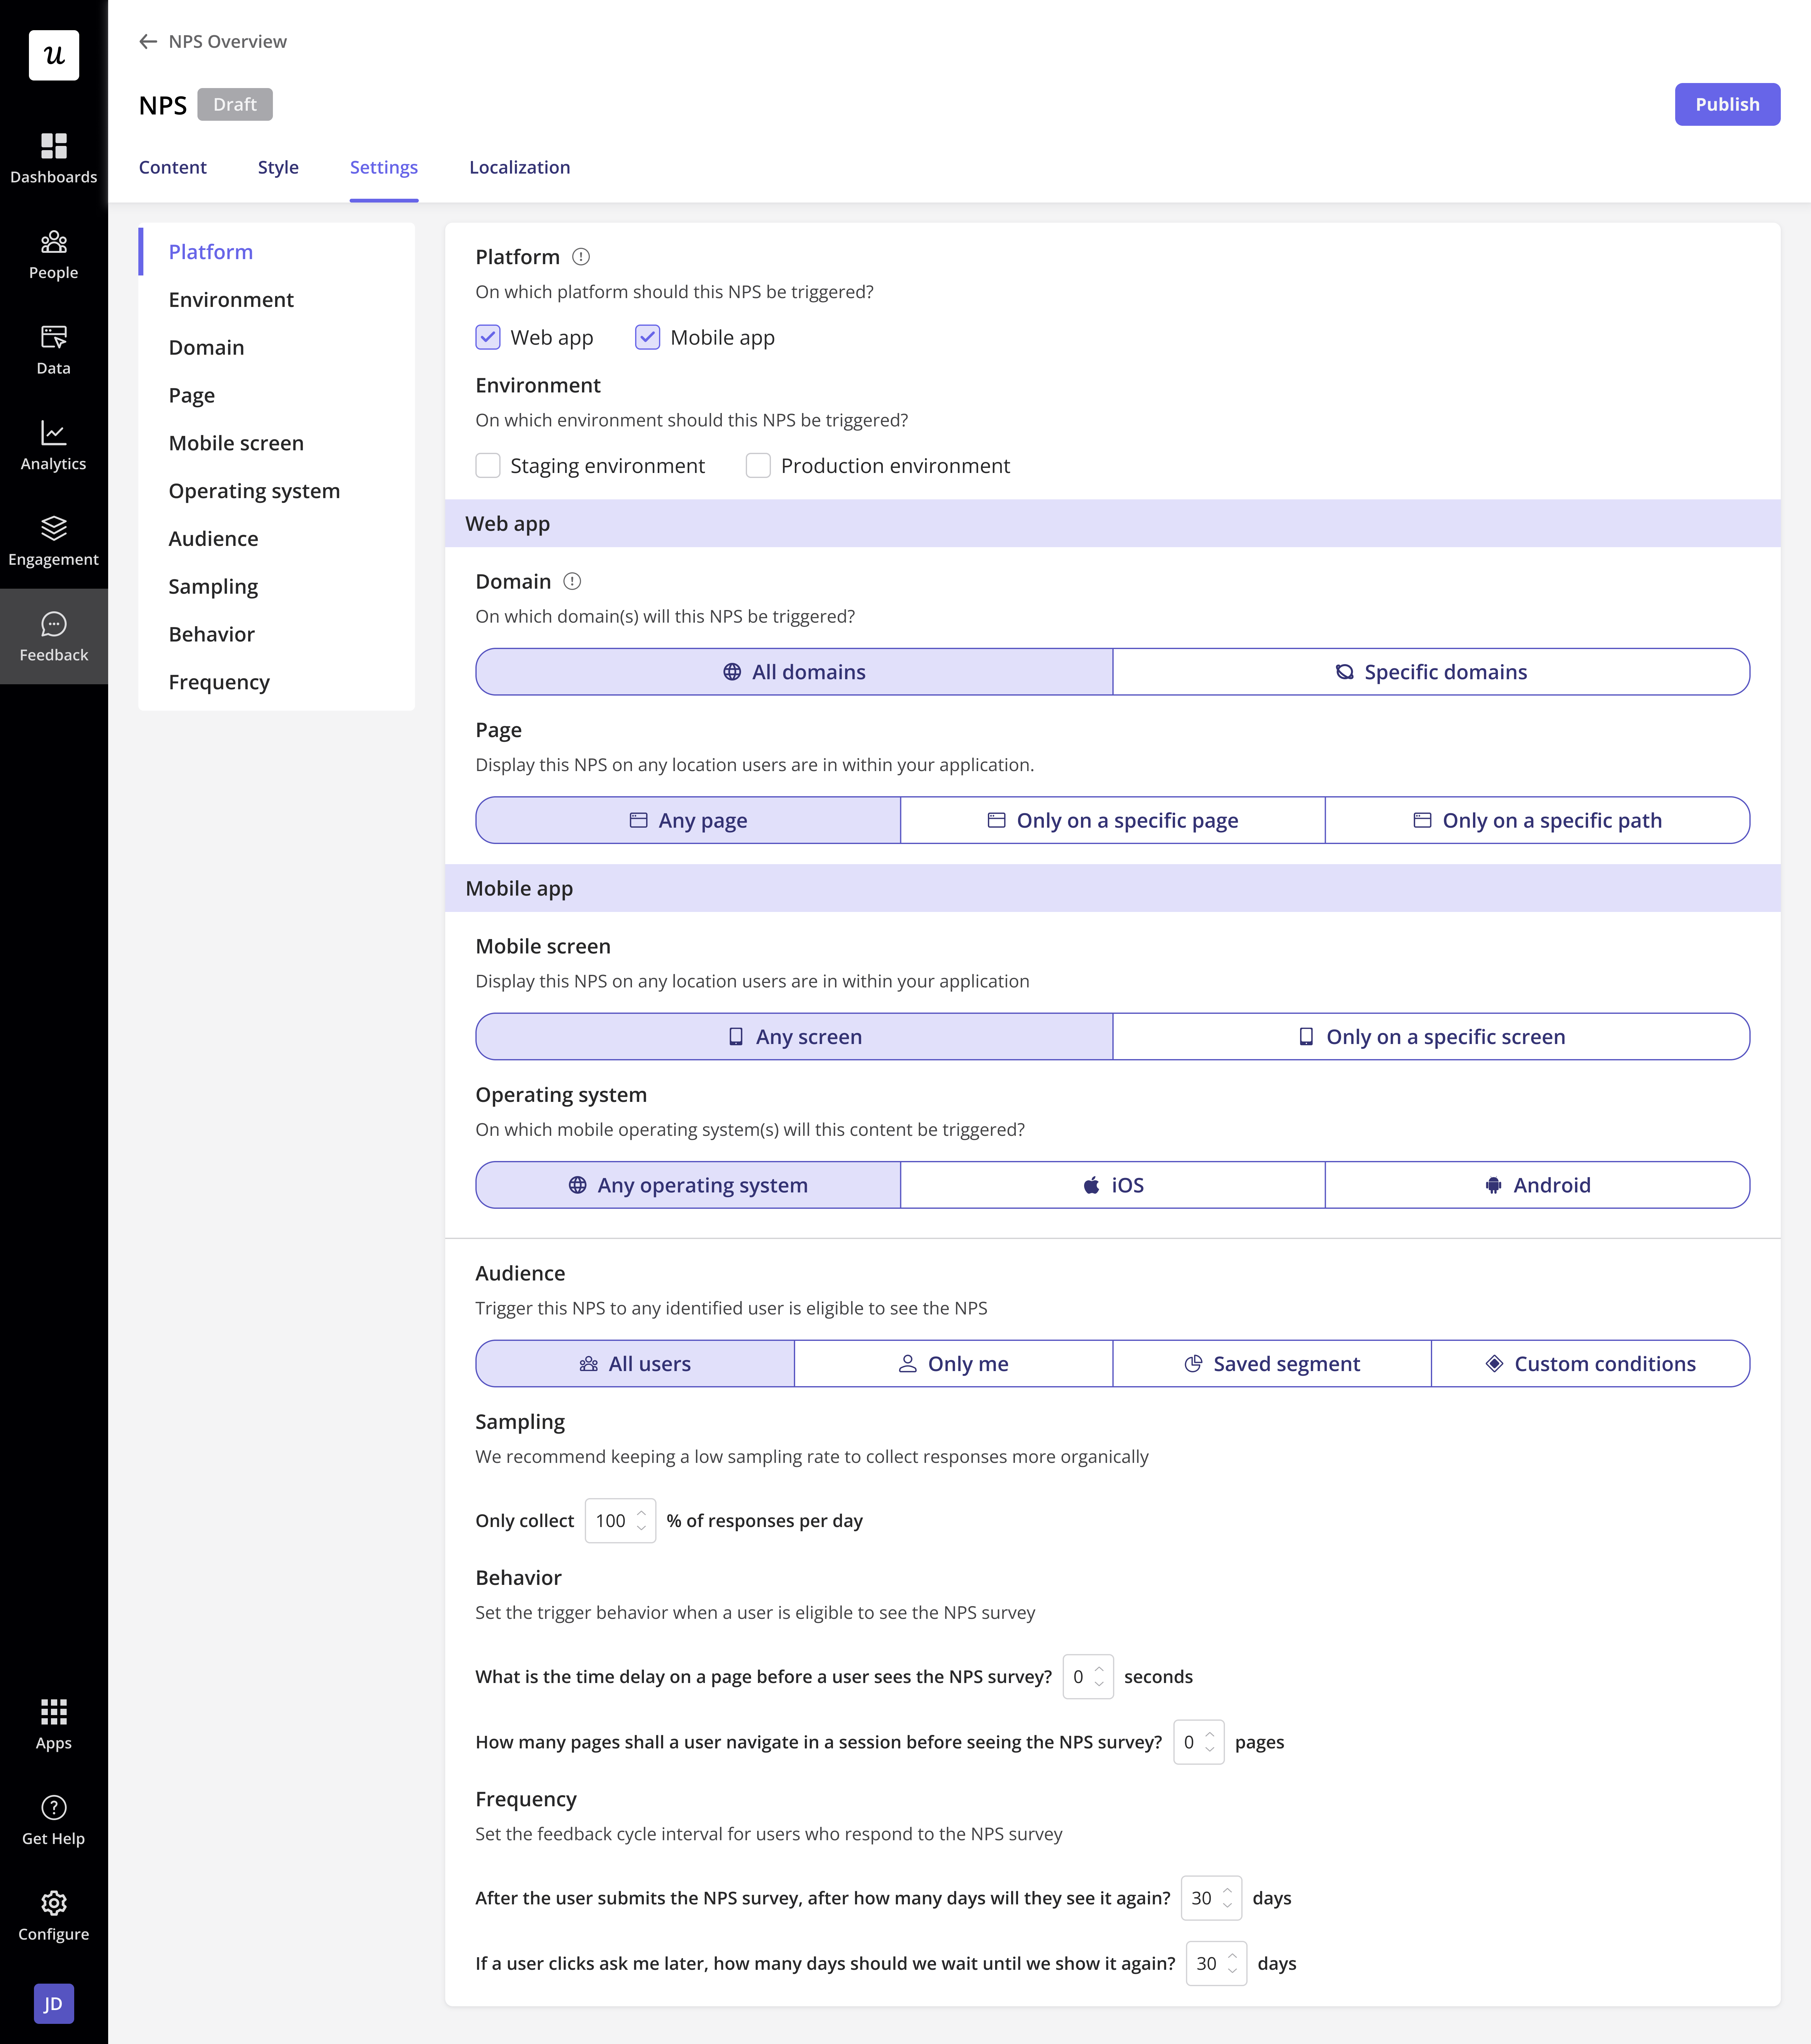
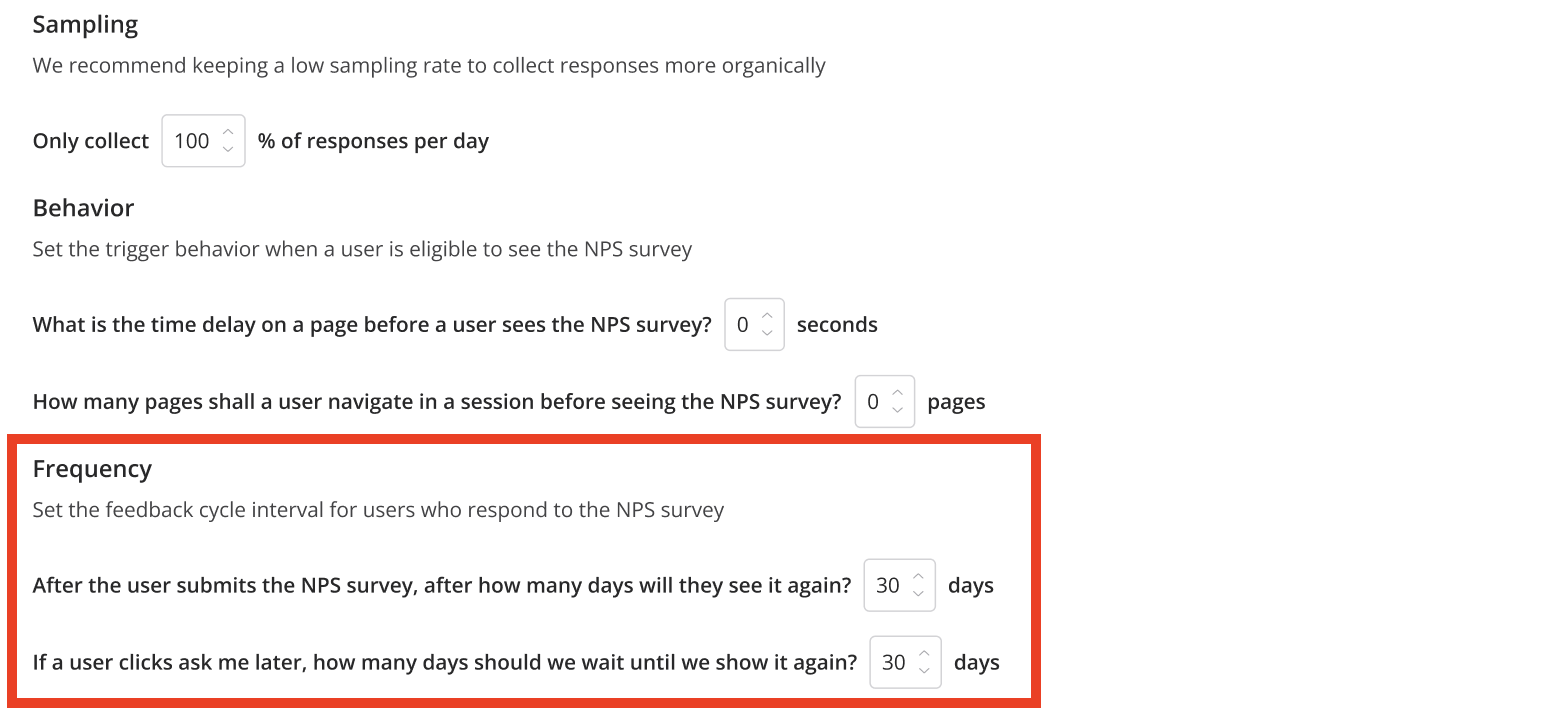
Sampling Rate
Control how often users see the NPS survey:- 100% Sampling: Every eligible user sees the survey.
- Lower Percentages: Reduces daily exposure for selective sampling.
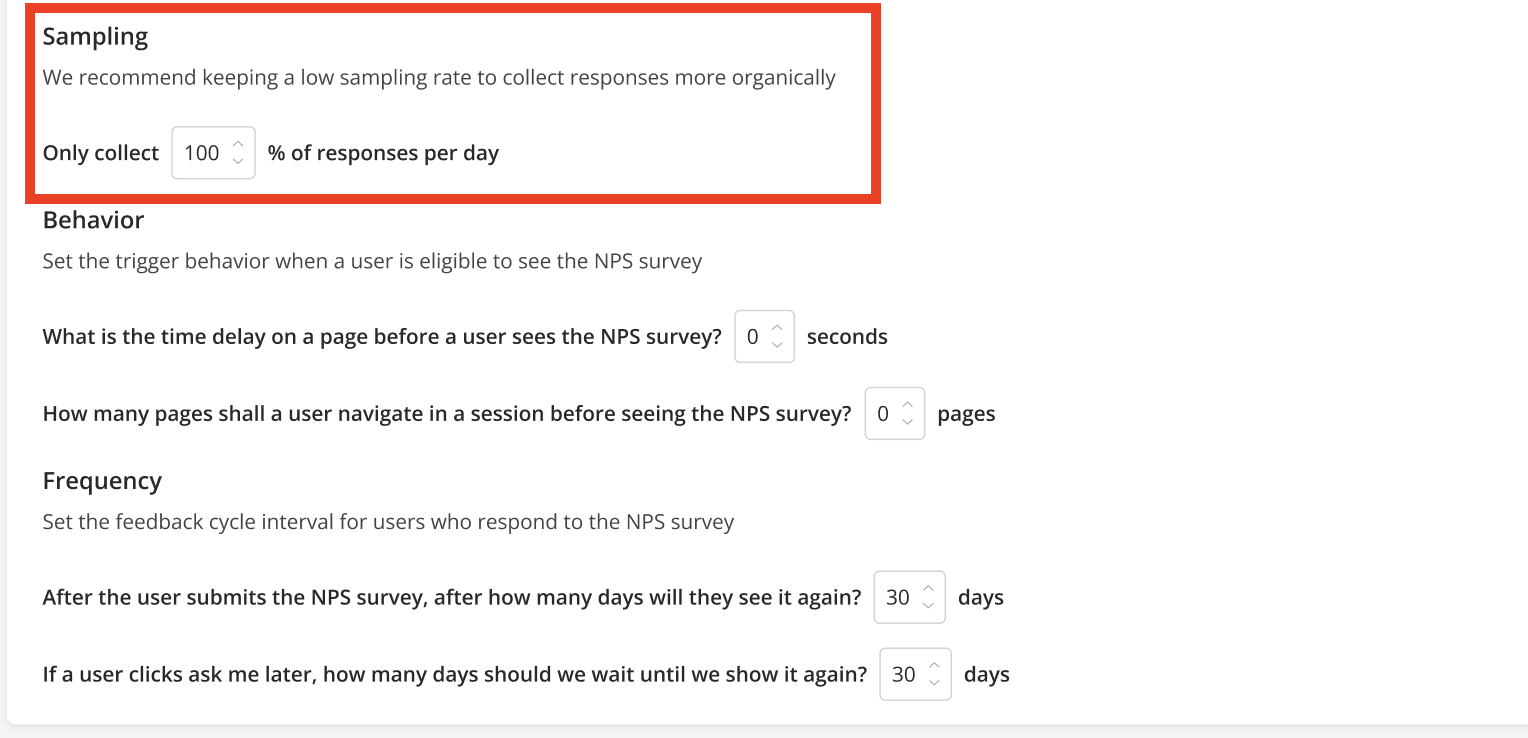
Behavioral triggers
Trigger NPS based on user activity:- Number of Page Visits before showing the survey.
- Time Spent on a Page before triggering the survey.
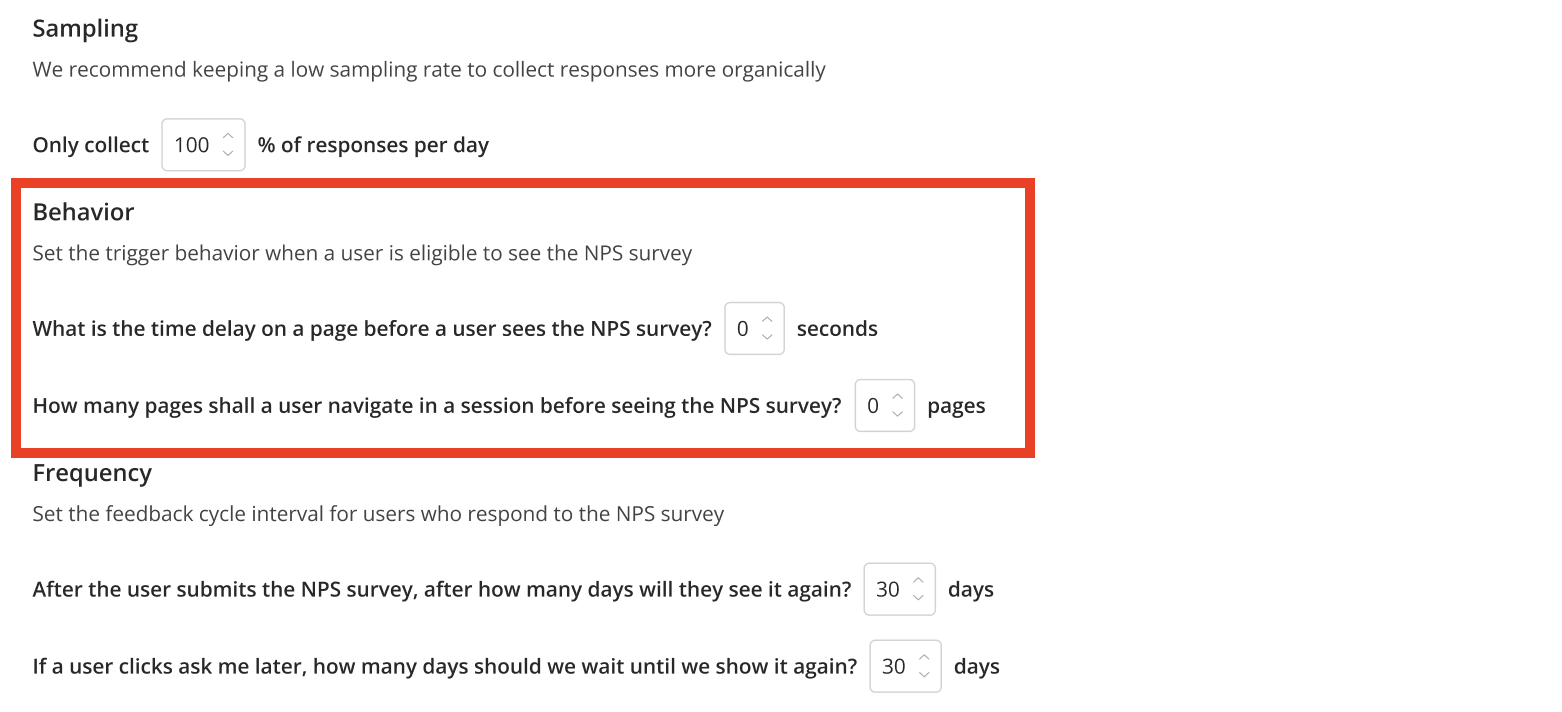
Frequency settings
Adjust how often users encounter the NPS survey:- Completed Users: Defaults to 90 days before reappearing (best practice: 60-90 days).
- “Ask Me Later” Clickers: Defaults to 7 days (best practice: 3-7 days).
Localizing NPS content
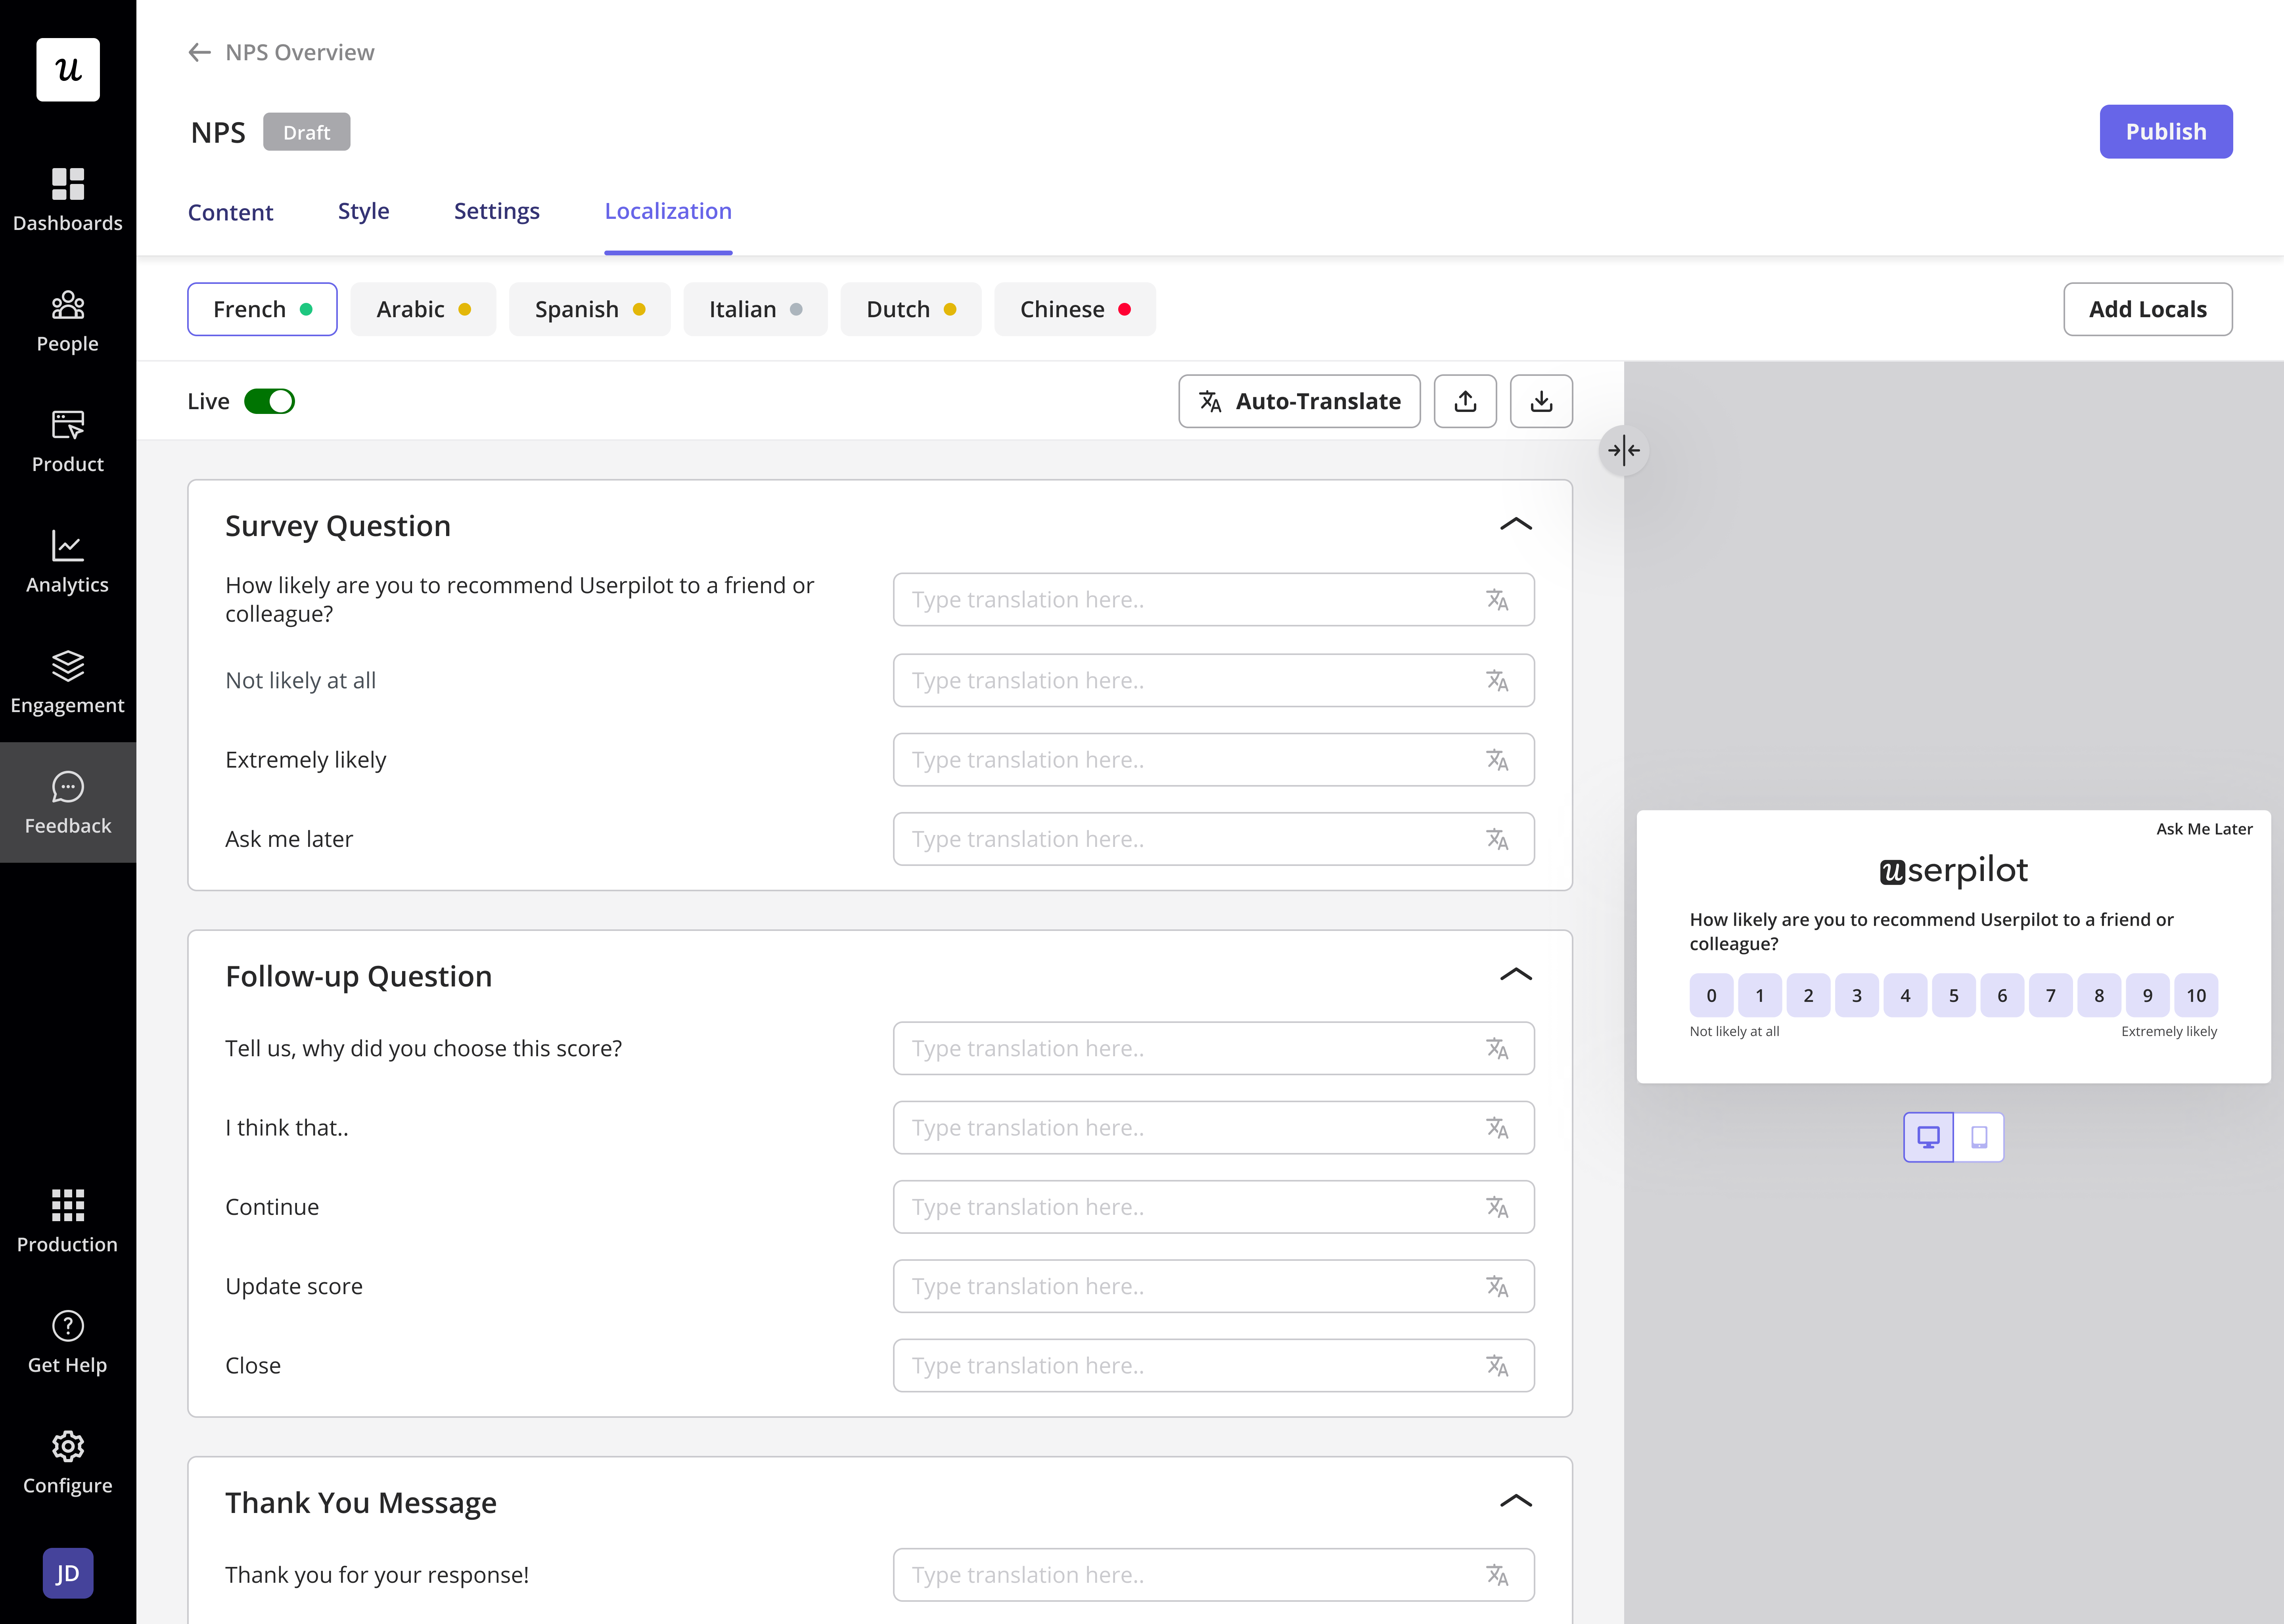
- If you are passing user properties, use the locale_code property following the ISO 639-1 standard.
- If no property is passed, Userpilot defaults to Browser_Language to detect the user’s browser setting.
Localization Methods
Automated Translation:
- Ensure locales are added in the Localization tab.
- Select the desired language and click Auto-Translate.
- Edit translations manually if needed.
- Toggle Live to activate the translation.
- Click Publish or Publish Updates.
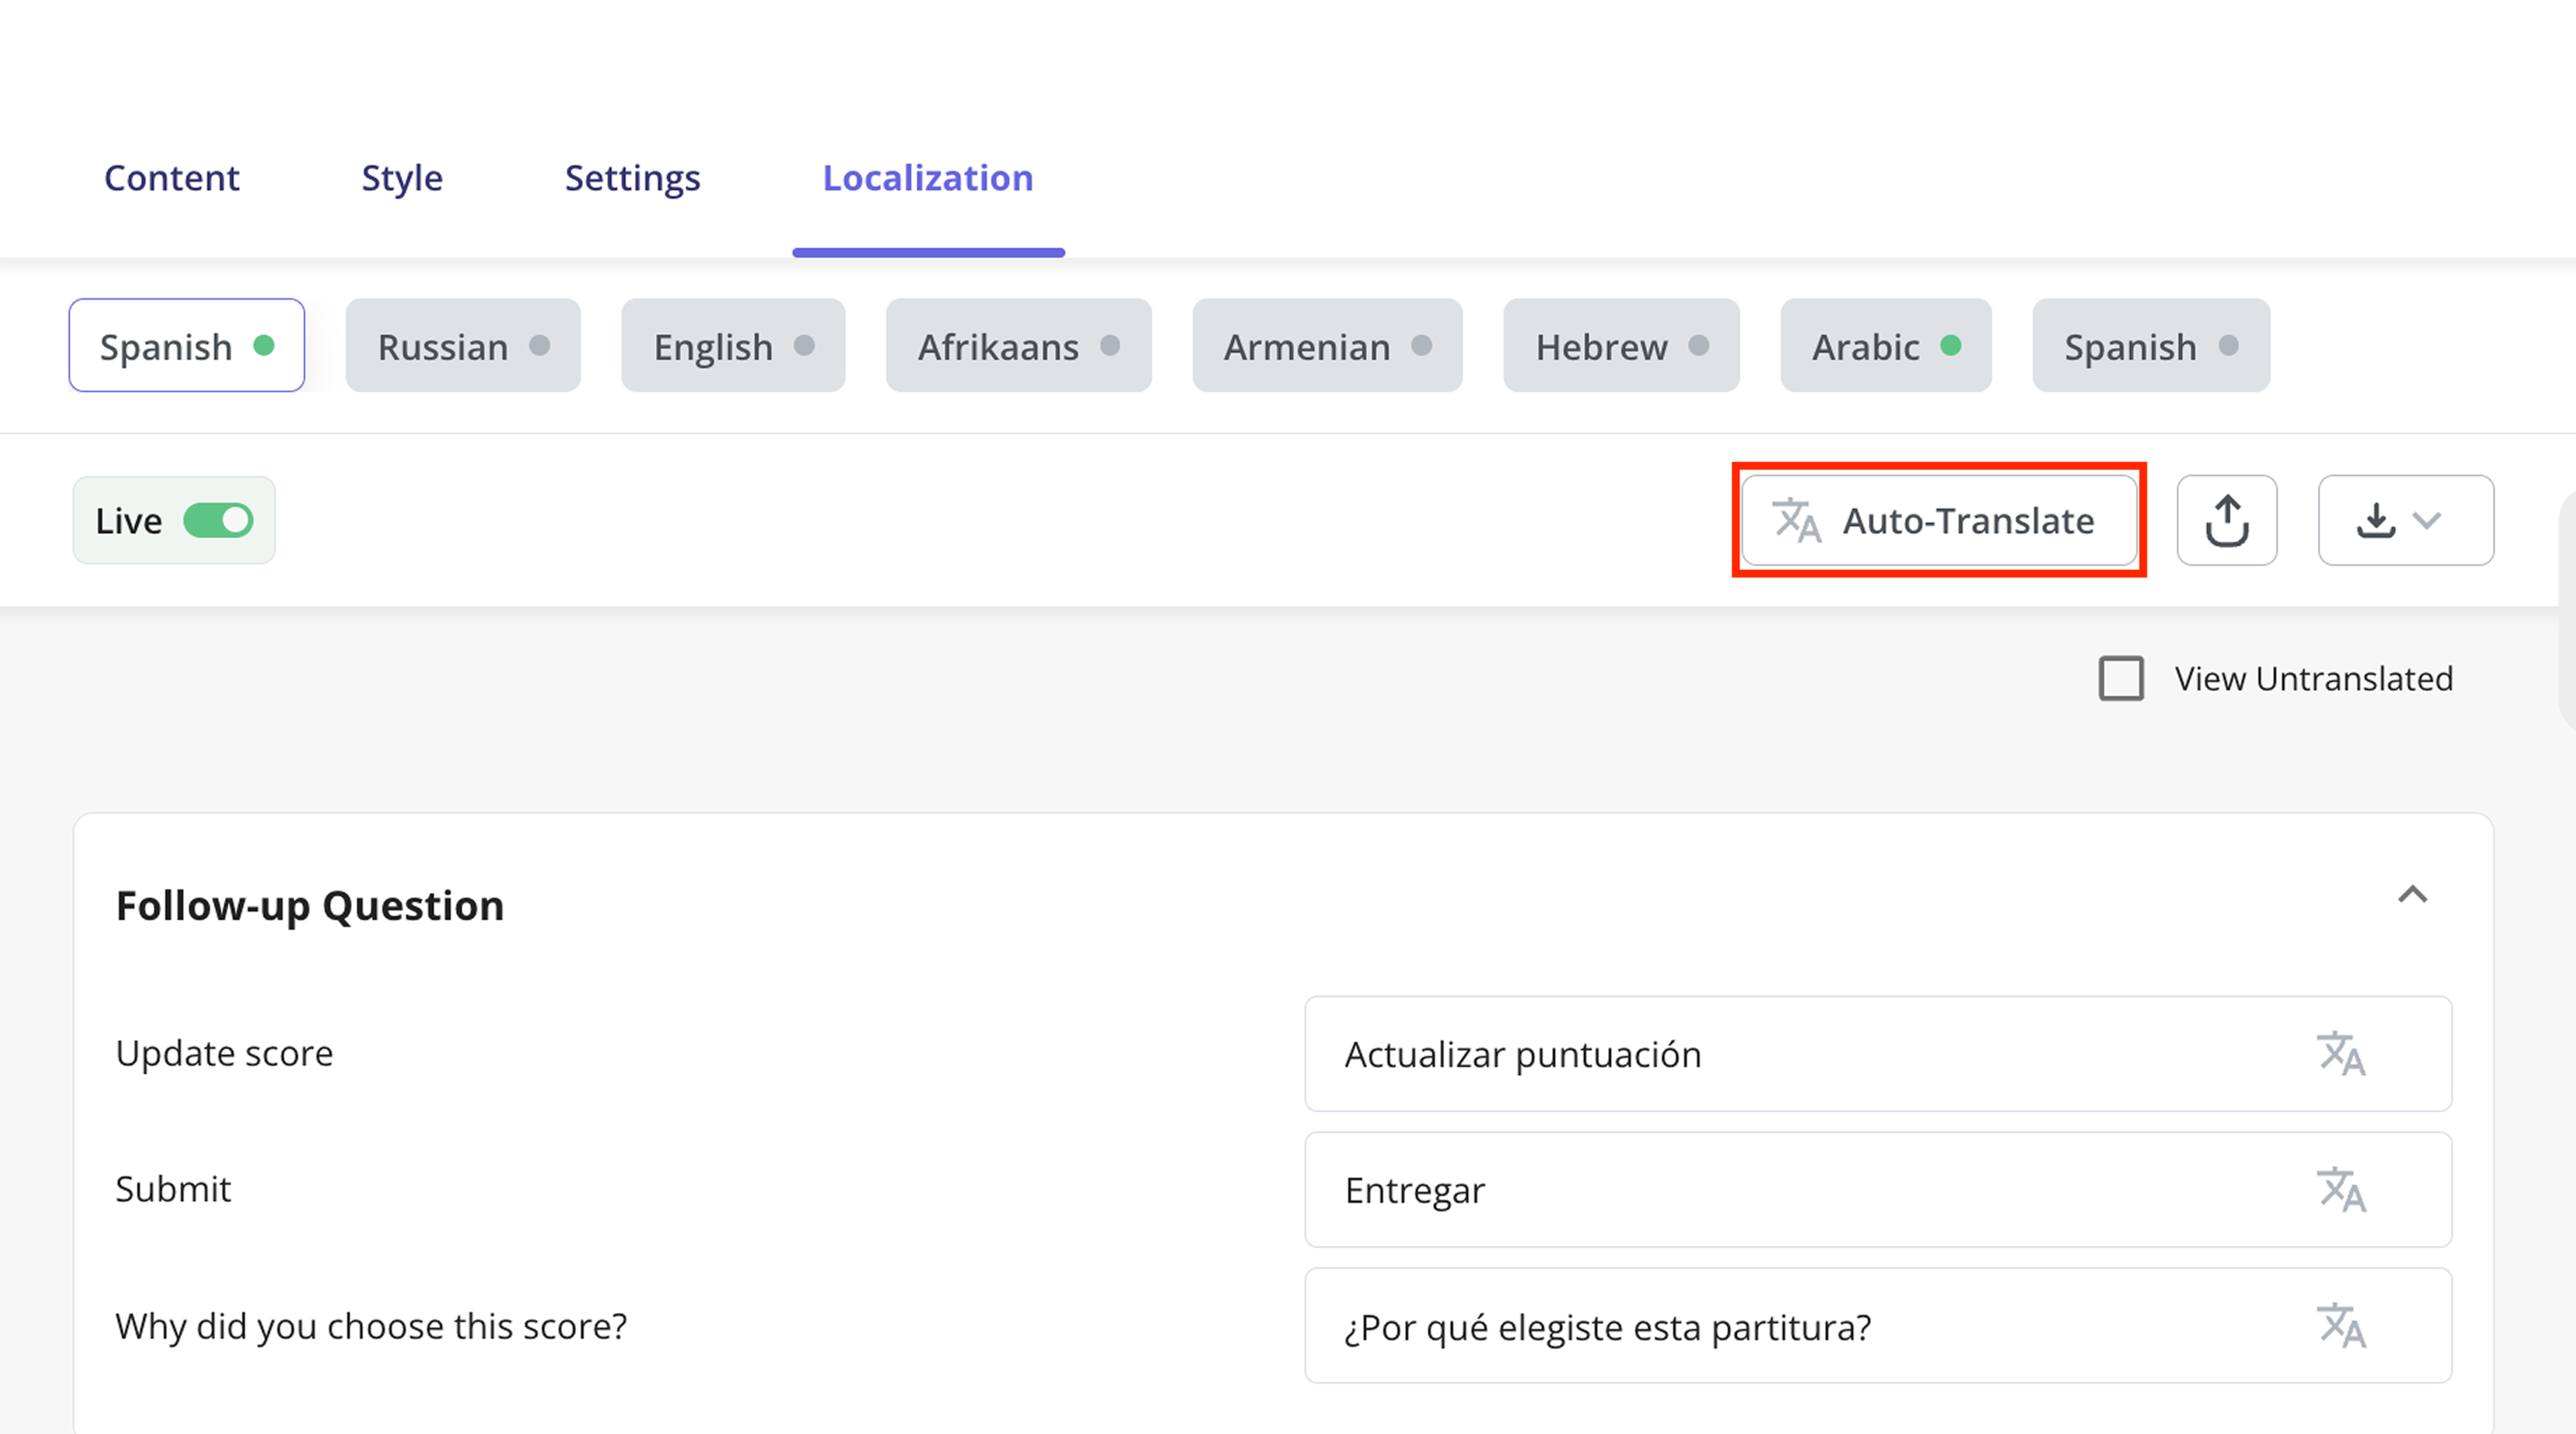
Manual Translation:
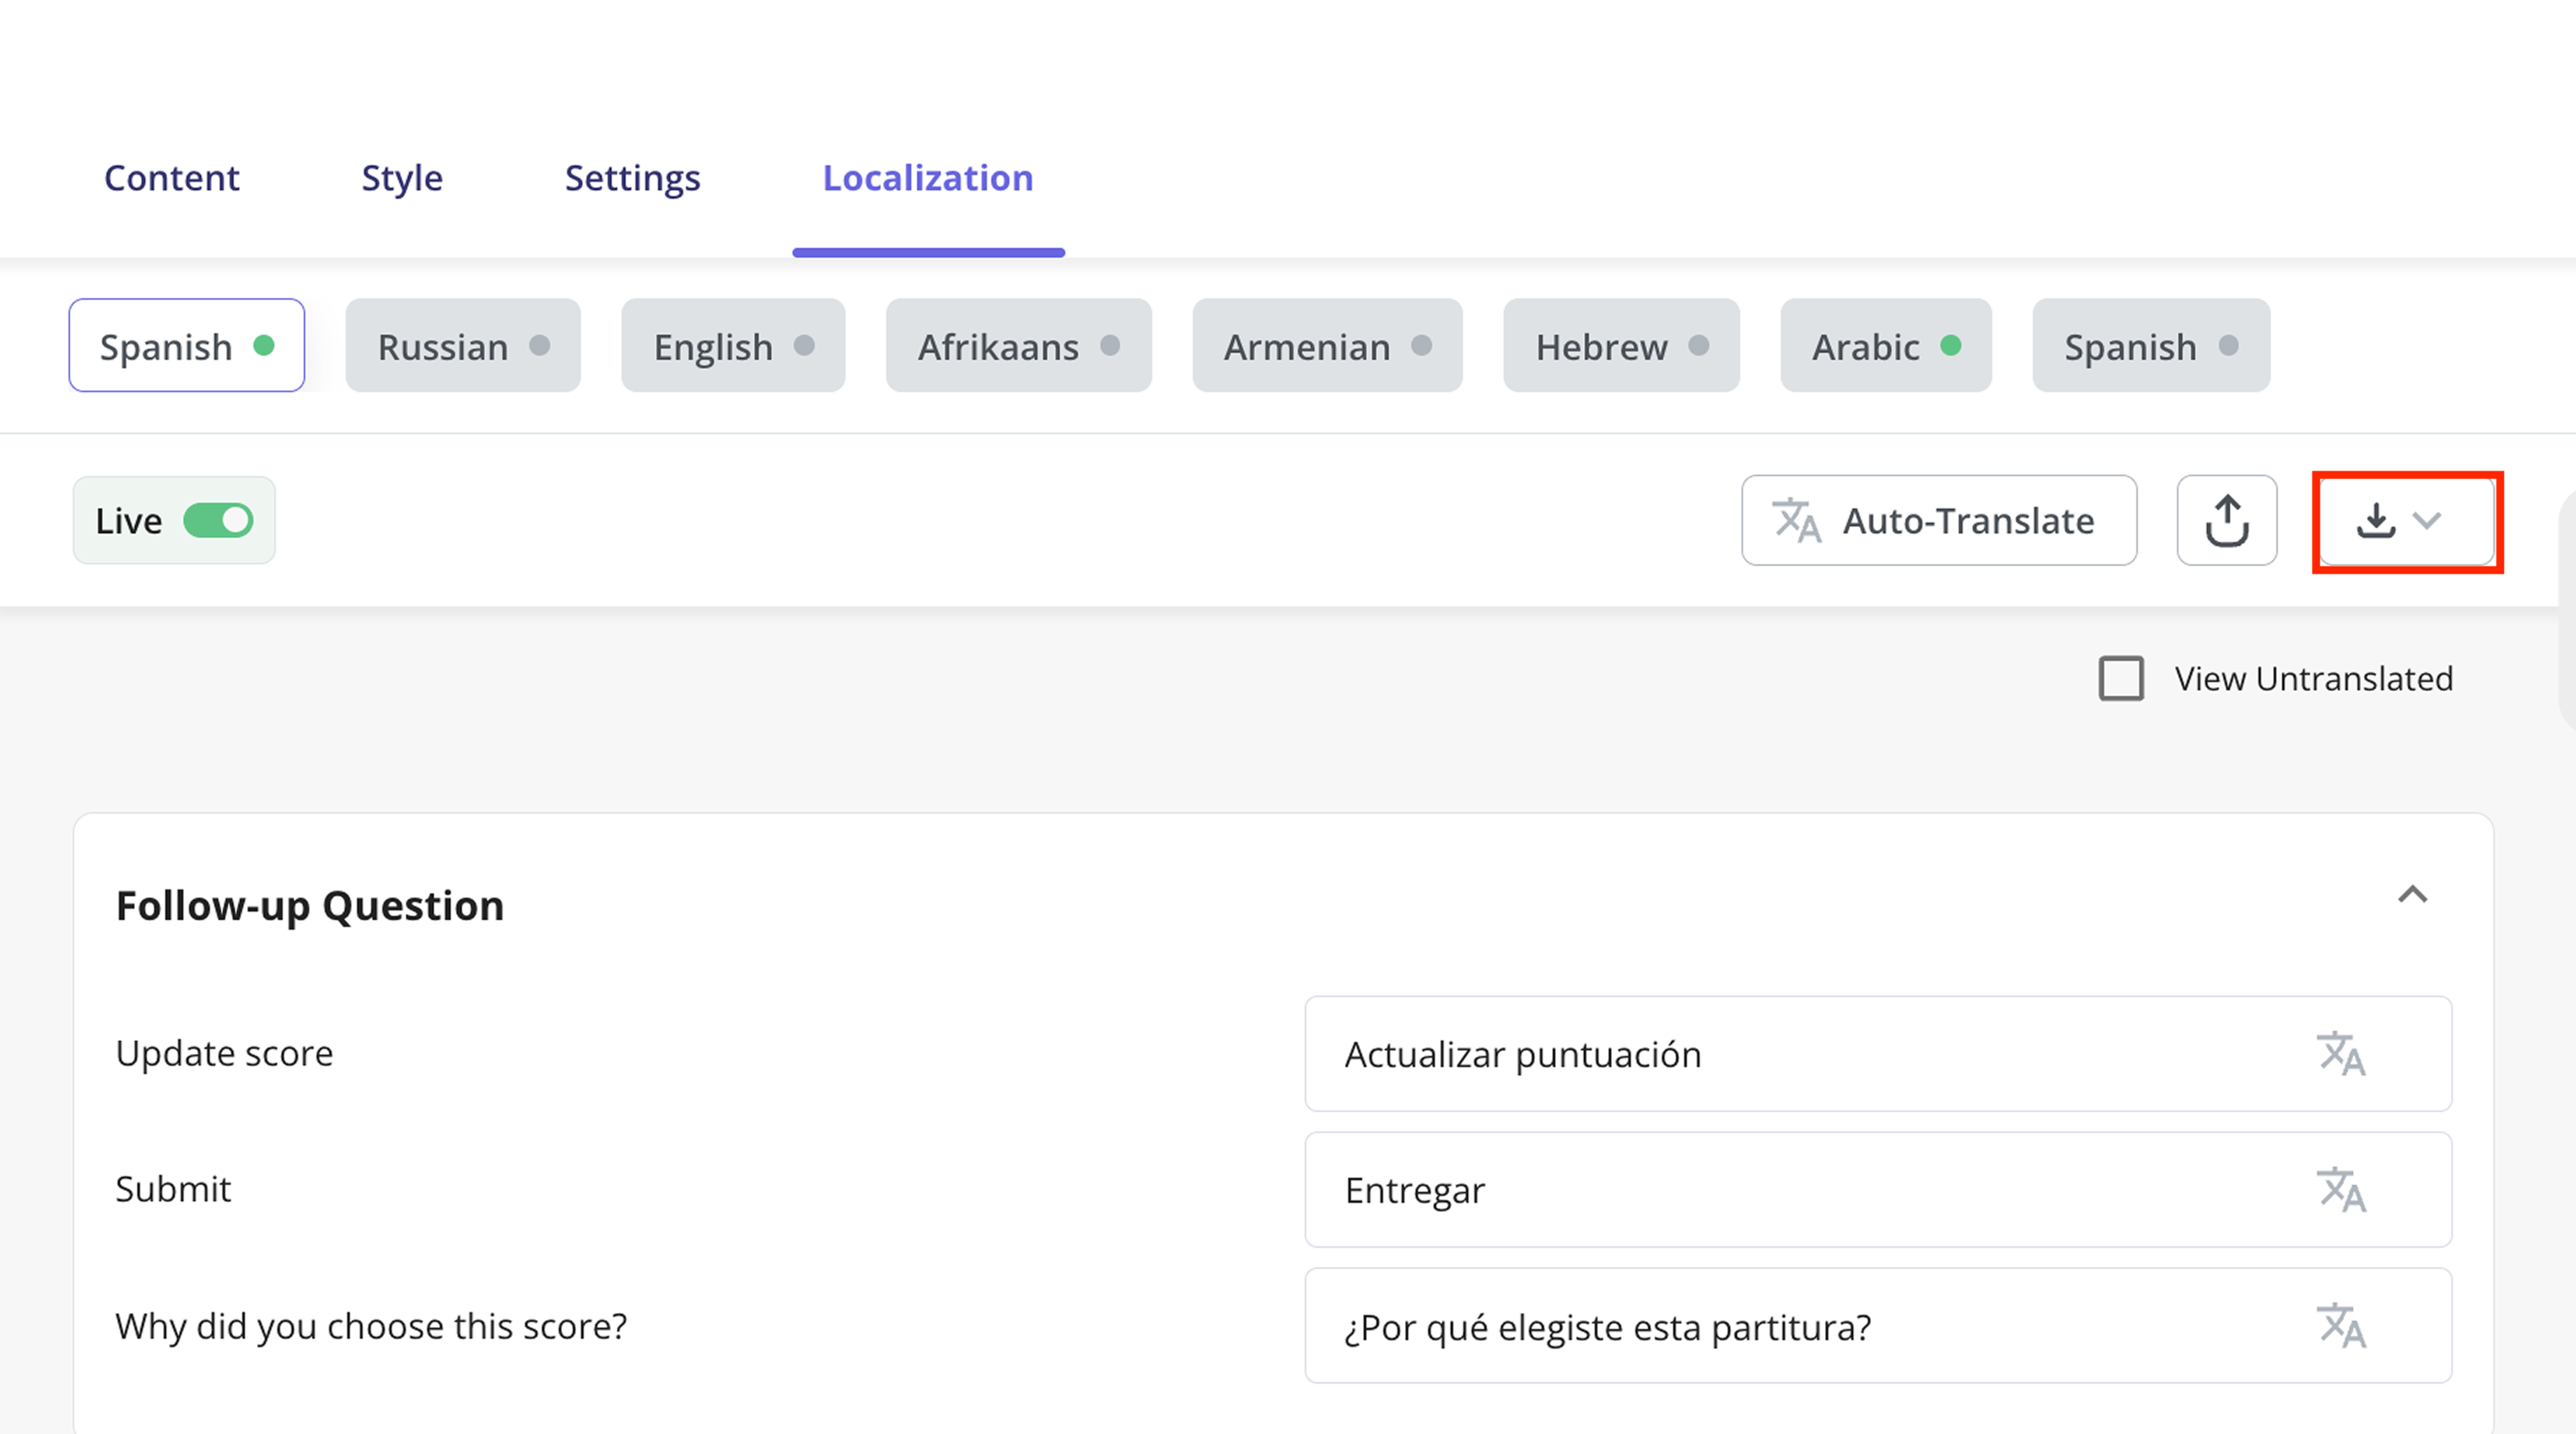
- Fully build your content before enabling manual localization.
- Export the translation file in CSV or XLIFF format.
- Enter translations into the Target column.
- Save the file as CSV UTF-8 (Comma delimited).
- Import the translated file back into Userpilot.
- Toggle Live to activate the translation.
-
Click Publish or Publish Updates.
.png?fit=max&auto=format&n=4bTZyxkEsWzJ39h7&q=85&s=8f0d805675ba1ff72d4a3605e2867a89)
Previewing and publishing
- Click Preview to test how the NPS looks.
- Adjust any final settings.
- Click Publish to deploy the NPS survey.
FAQs
How often should I show NPS surveys to users?
How often should I show NPS surveys to users?
The best practice is every 60-90 days for completed users and 3-7 days for those who clicked “Ask Me Later.”
What happens if I change the translation method from Automated to Manual?
What happens if I change the translation method from Automated to Manual?
The translated content cannot be retrieved after switching methods.
What’s the difference between a green dot and a yellow dot in the Localization tab?
What’s the difference between a green dot and a yellow dot in the Localization tab?
- A green dot means the translated survey is live and fully active for end users.
- A yellow dot means the translation is saved but not yet live, requiring publishing to take effect.
For any questions or concerns please reach out to support@userpilot.com