Overview
Mobile Push Notifications are a powerful way to proactively engage your app users outside the app. Use them to prompt action, deliver important updates, or re-engage inactive users directly on their device home screen. Unlike in-app messages (like carousels or slideouts), push notifications are delivered even when the user isn’t actively using your app. Push notifications are short, actionable messages sent to your mobile app users’ devices. They appear as standard OS-level notifications on iOS and Android. They help you reach users in real-time to share important updates, encourage app revisits, or prompt specific actions. Userpilot lets you create, target, schedule, and analyze push notifications for your mobile app users in just a few steps, all without writing code.Use Cases
- Drive adoption by telling users about new or improved app features.
- Send gentle nudges or incentives to users who haven’t opened the app in a while.
- Notify users about sales, special offers, or events.
- Remind users about unfinished tasks, upcoming renewals, or time-limited actions.
- Encourage new users to complete the setup steps or explore key features.
Prerequisite
To start sending push notifications to your end users, you’ll need to install the Userpilot script in your mobile application. Feel free to share the installation instructions with your engineering team, or reach out to our support team at support@userpilot.com if you encounter any issues during installation.
To start sending push notifications to your users, you’ll need to configure a few settings for both iOS and Android devices. You can learn more about this in this article.
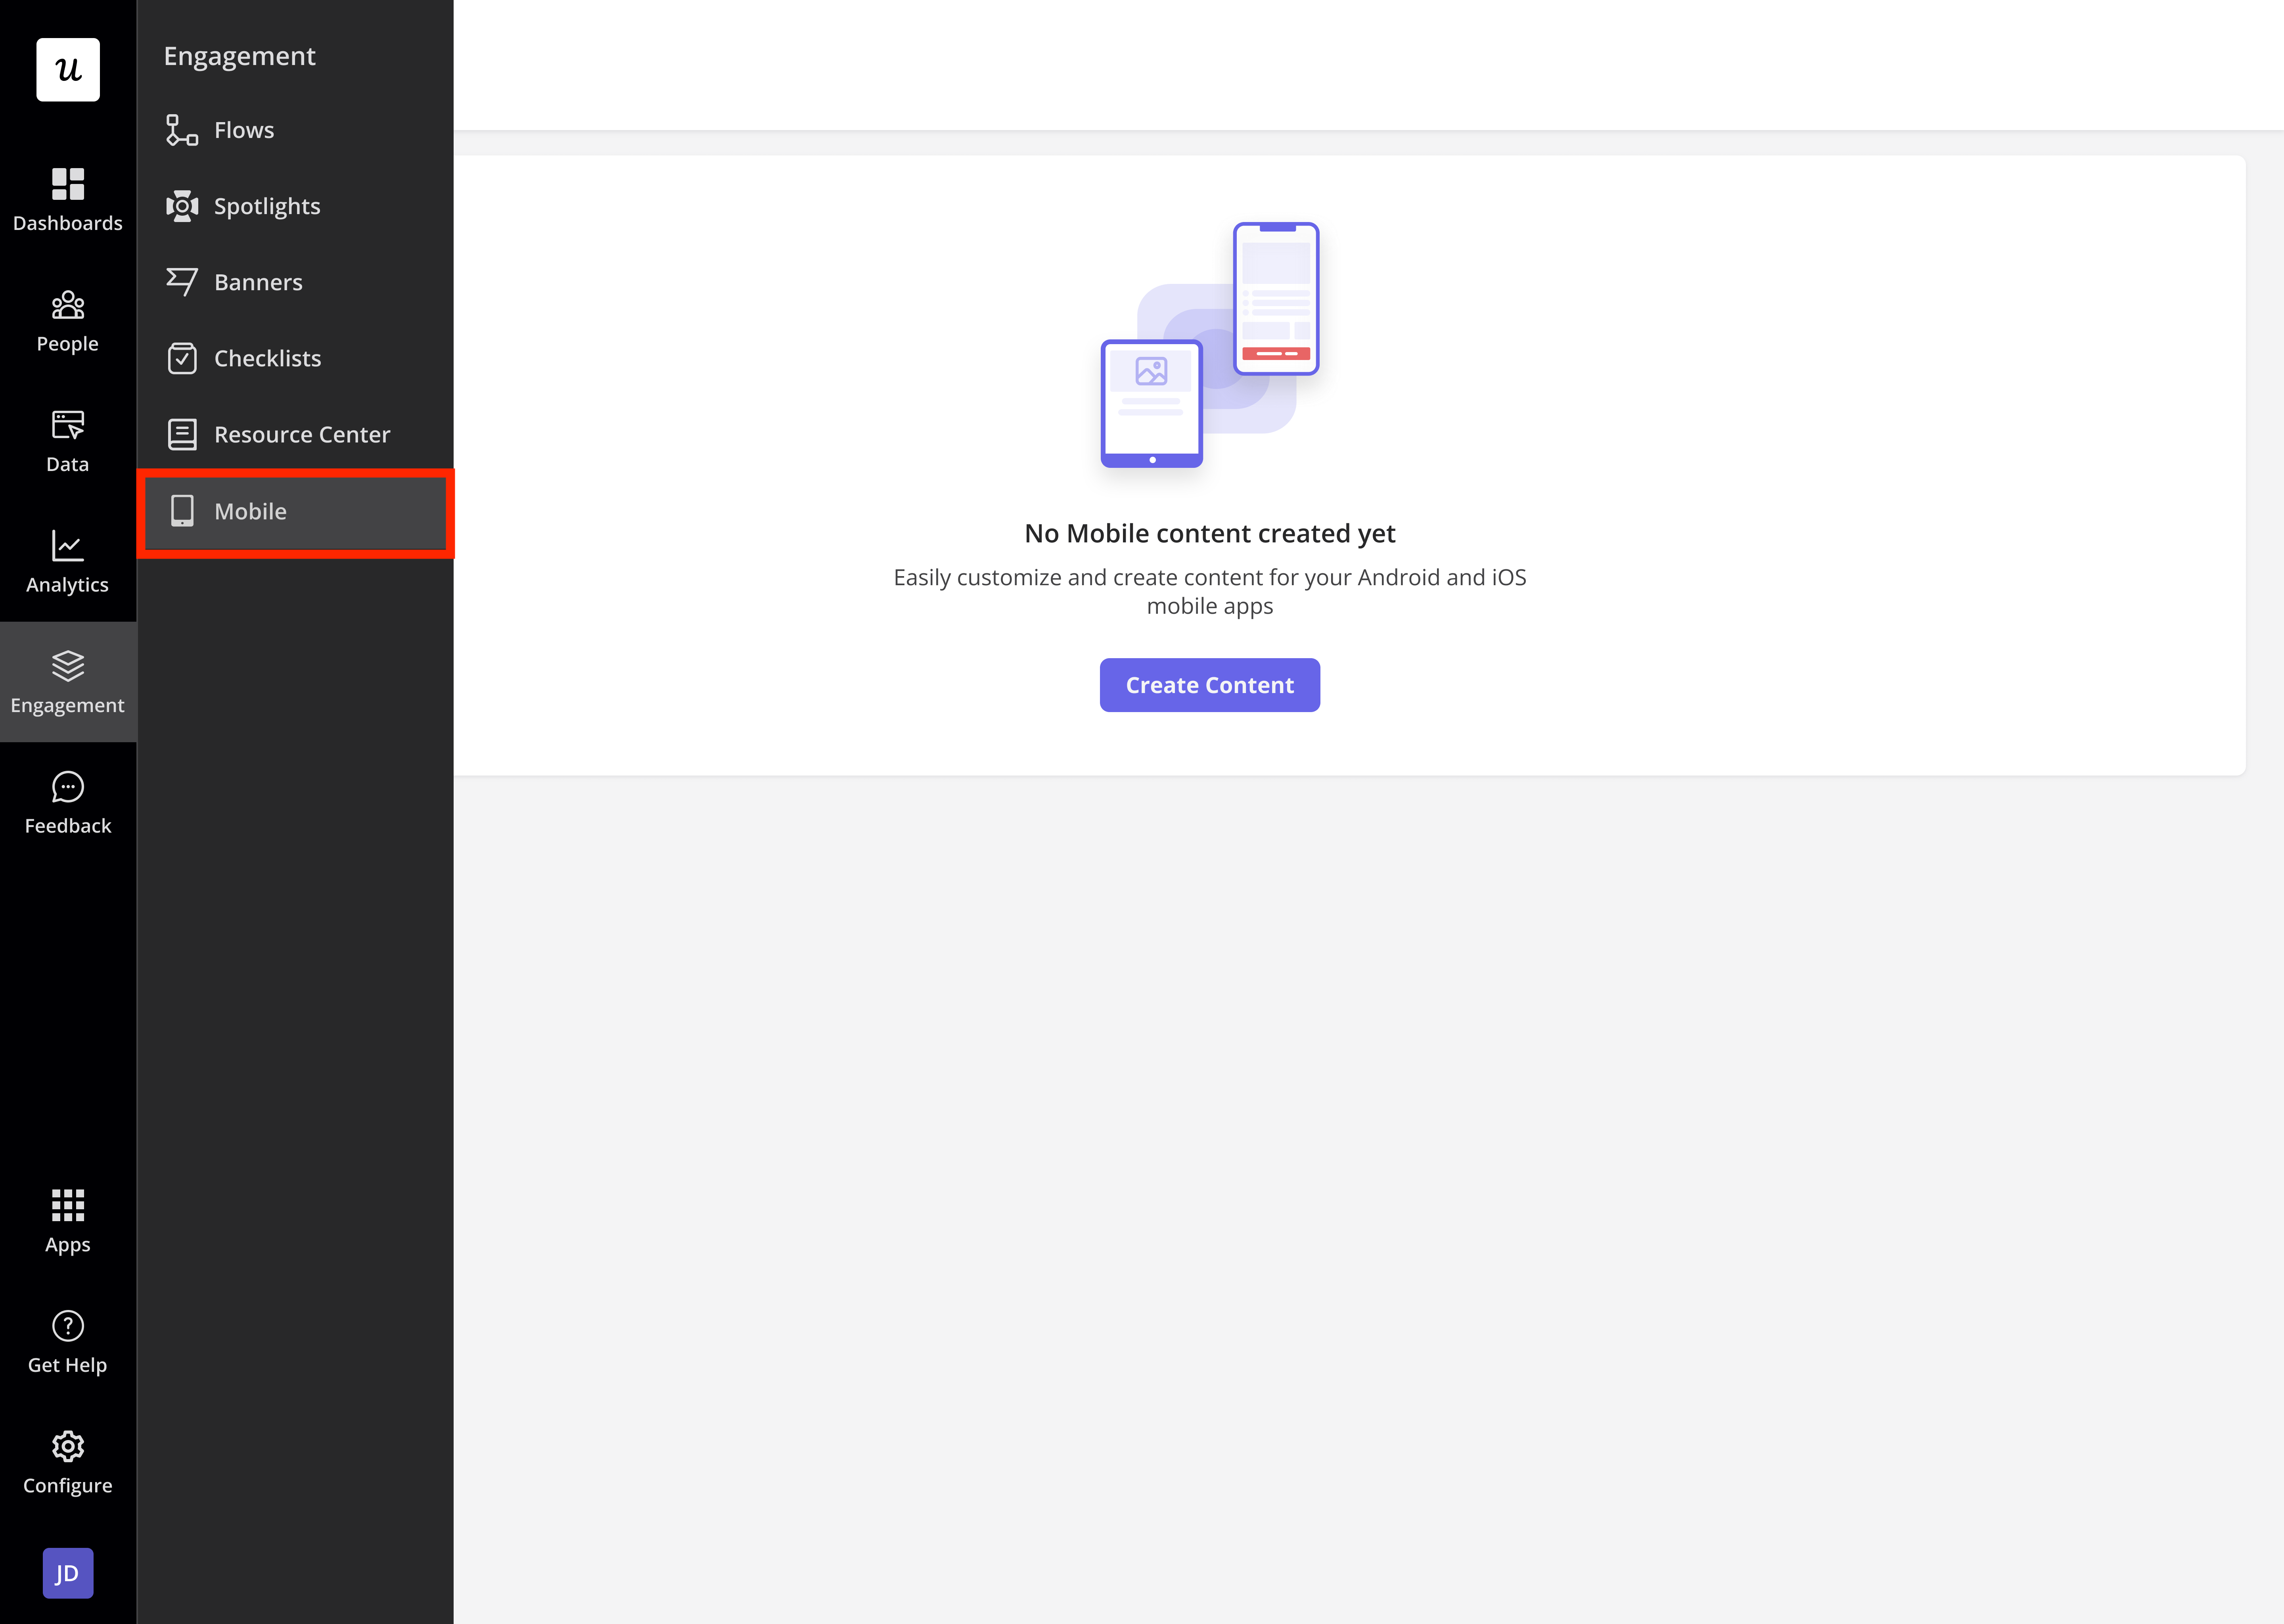


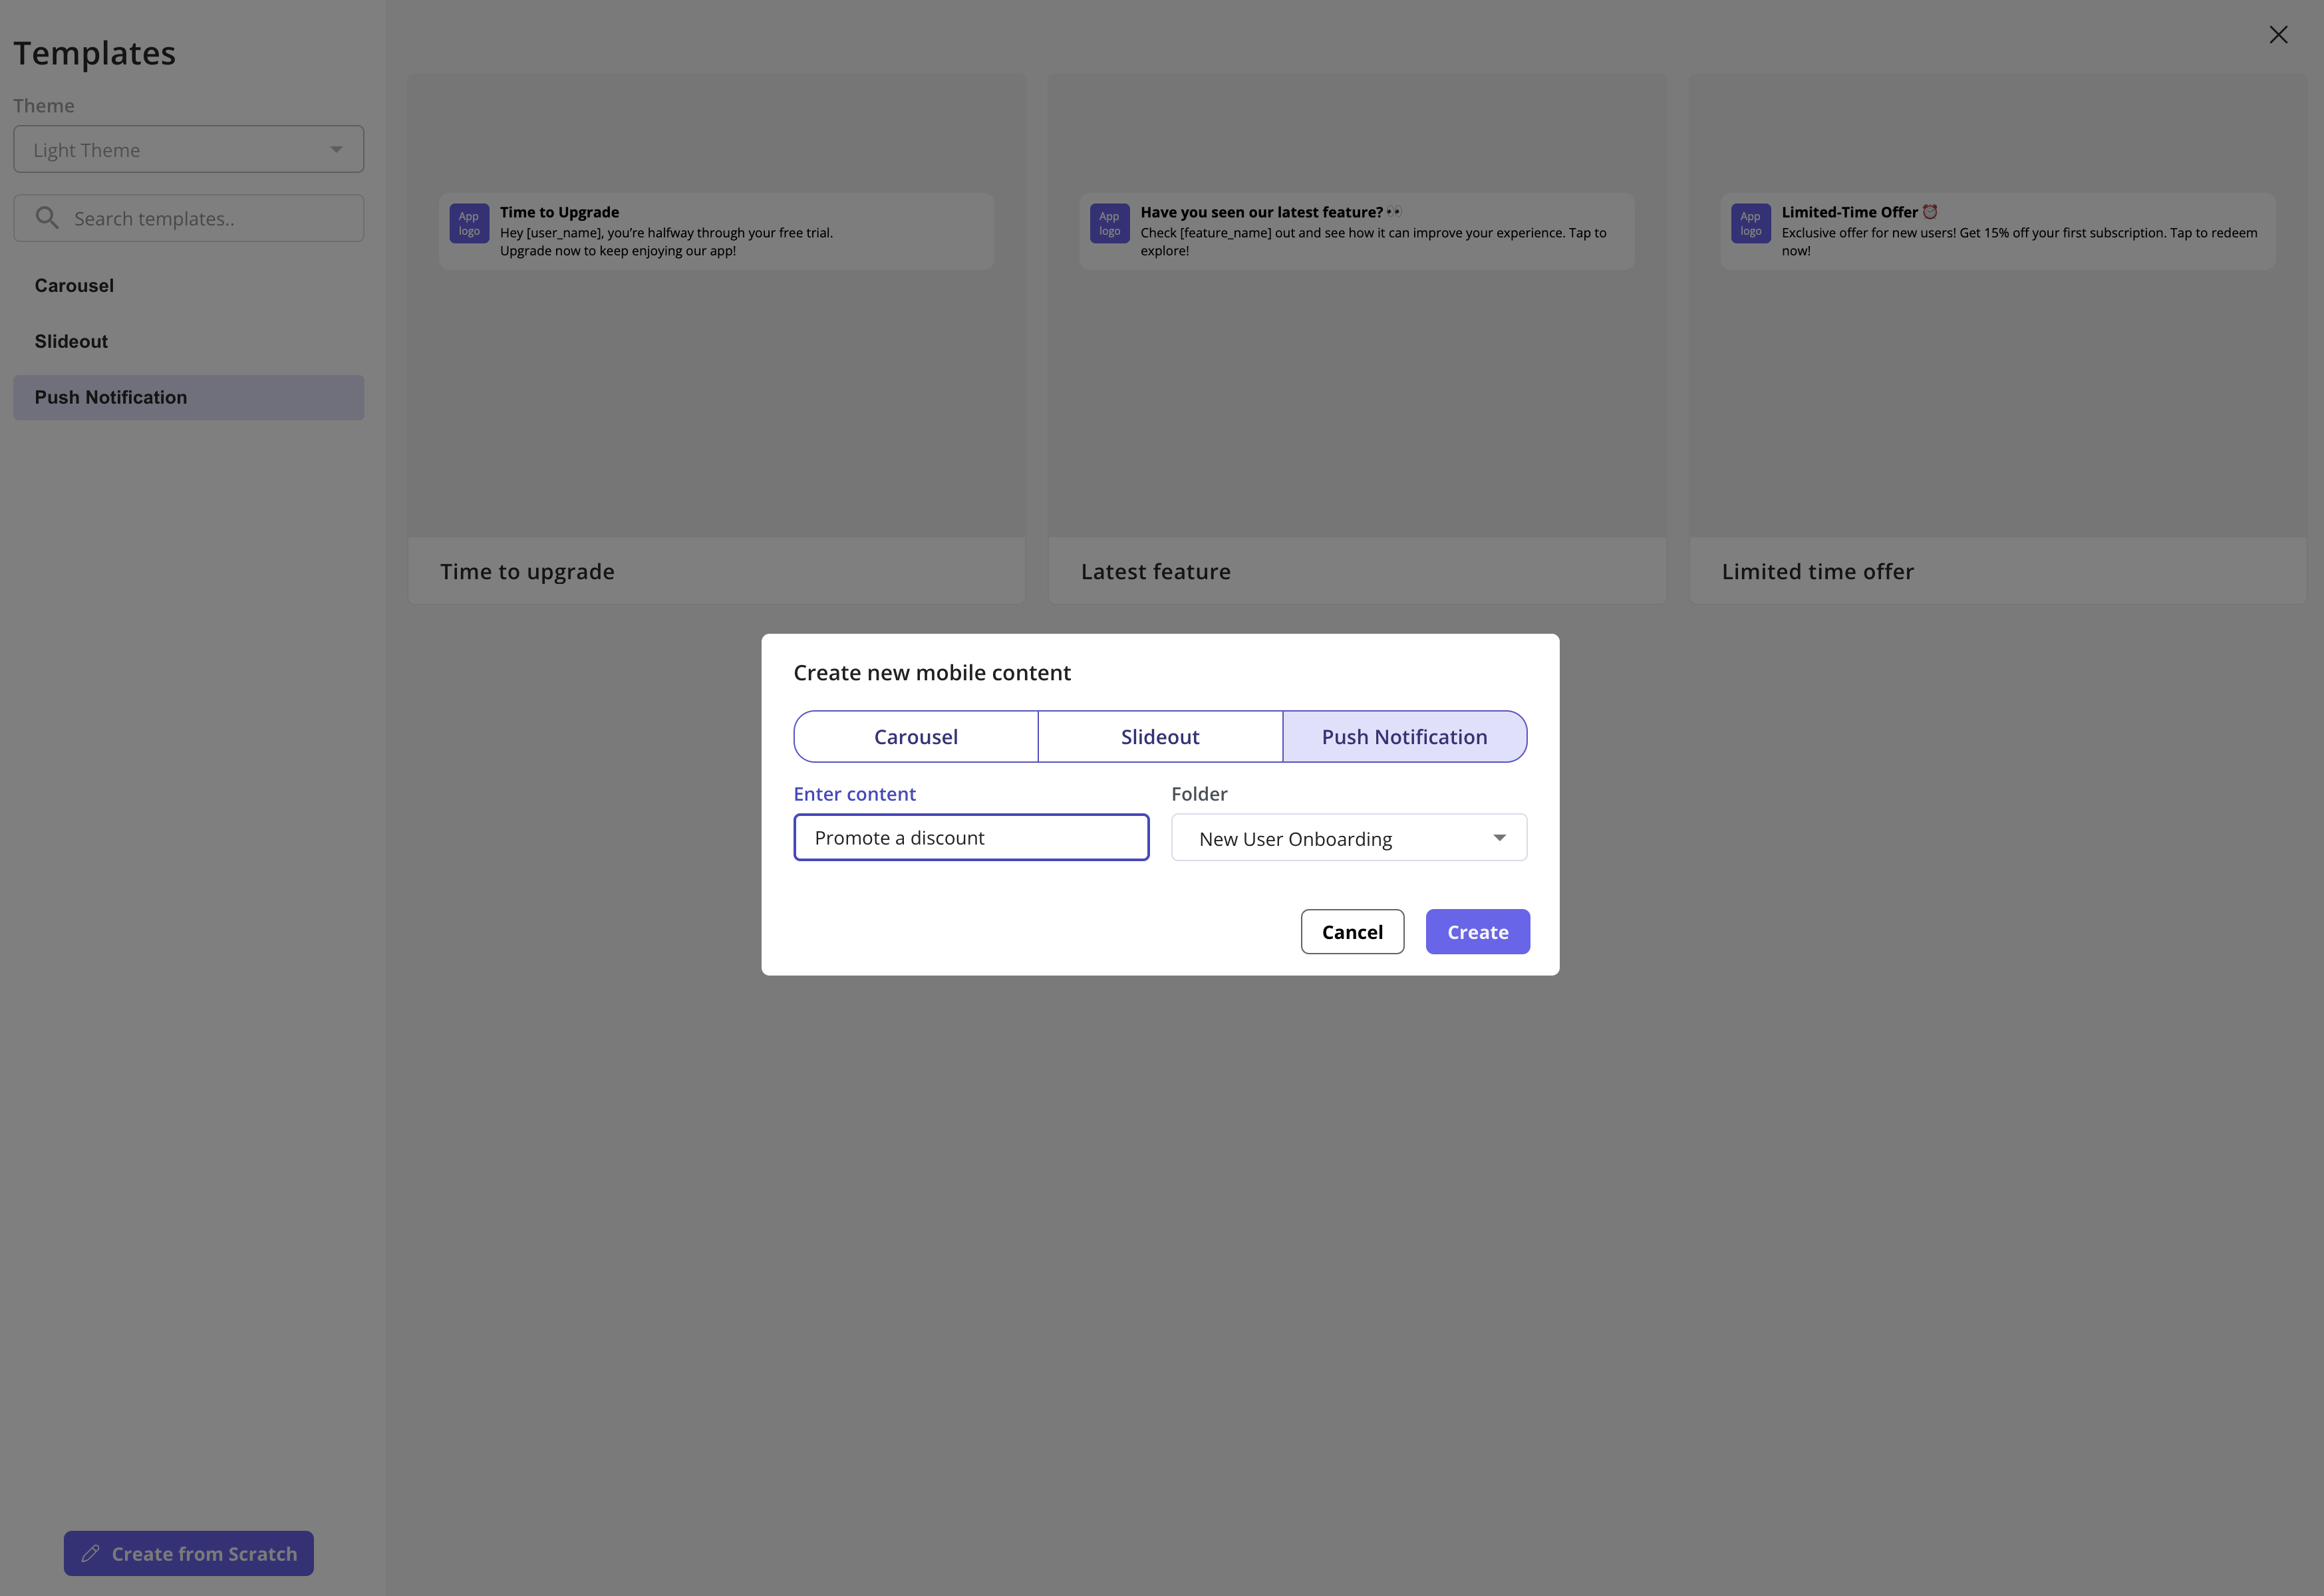
Design your push notification
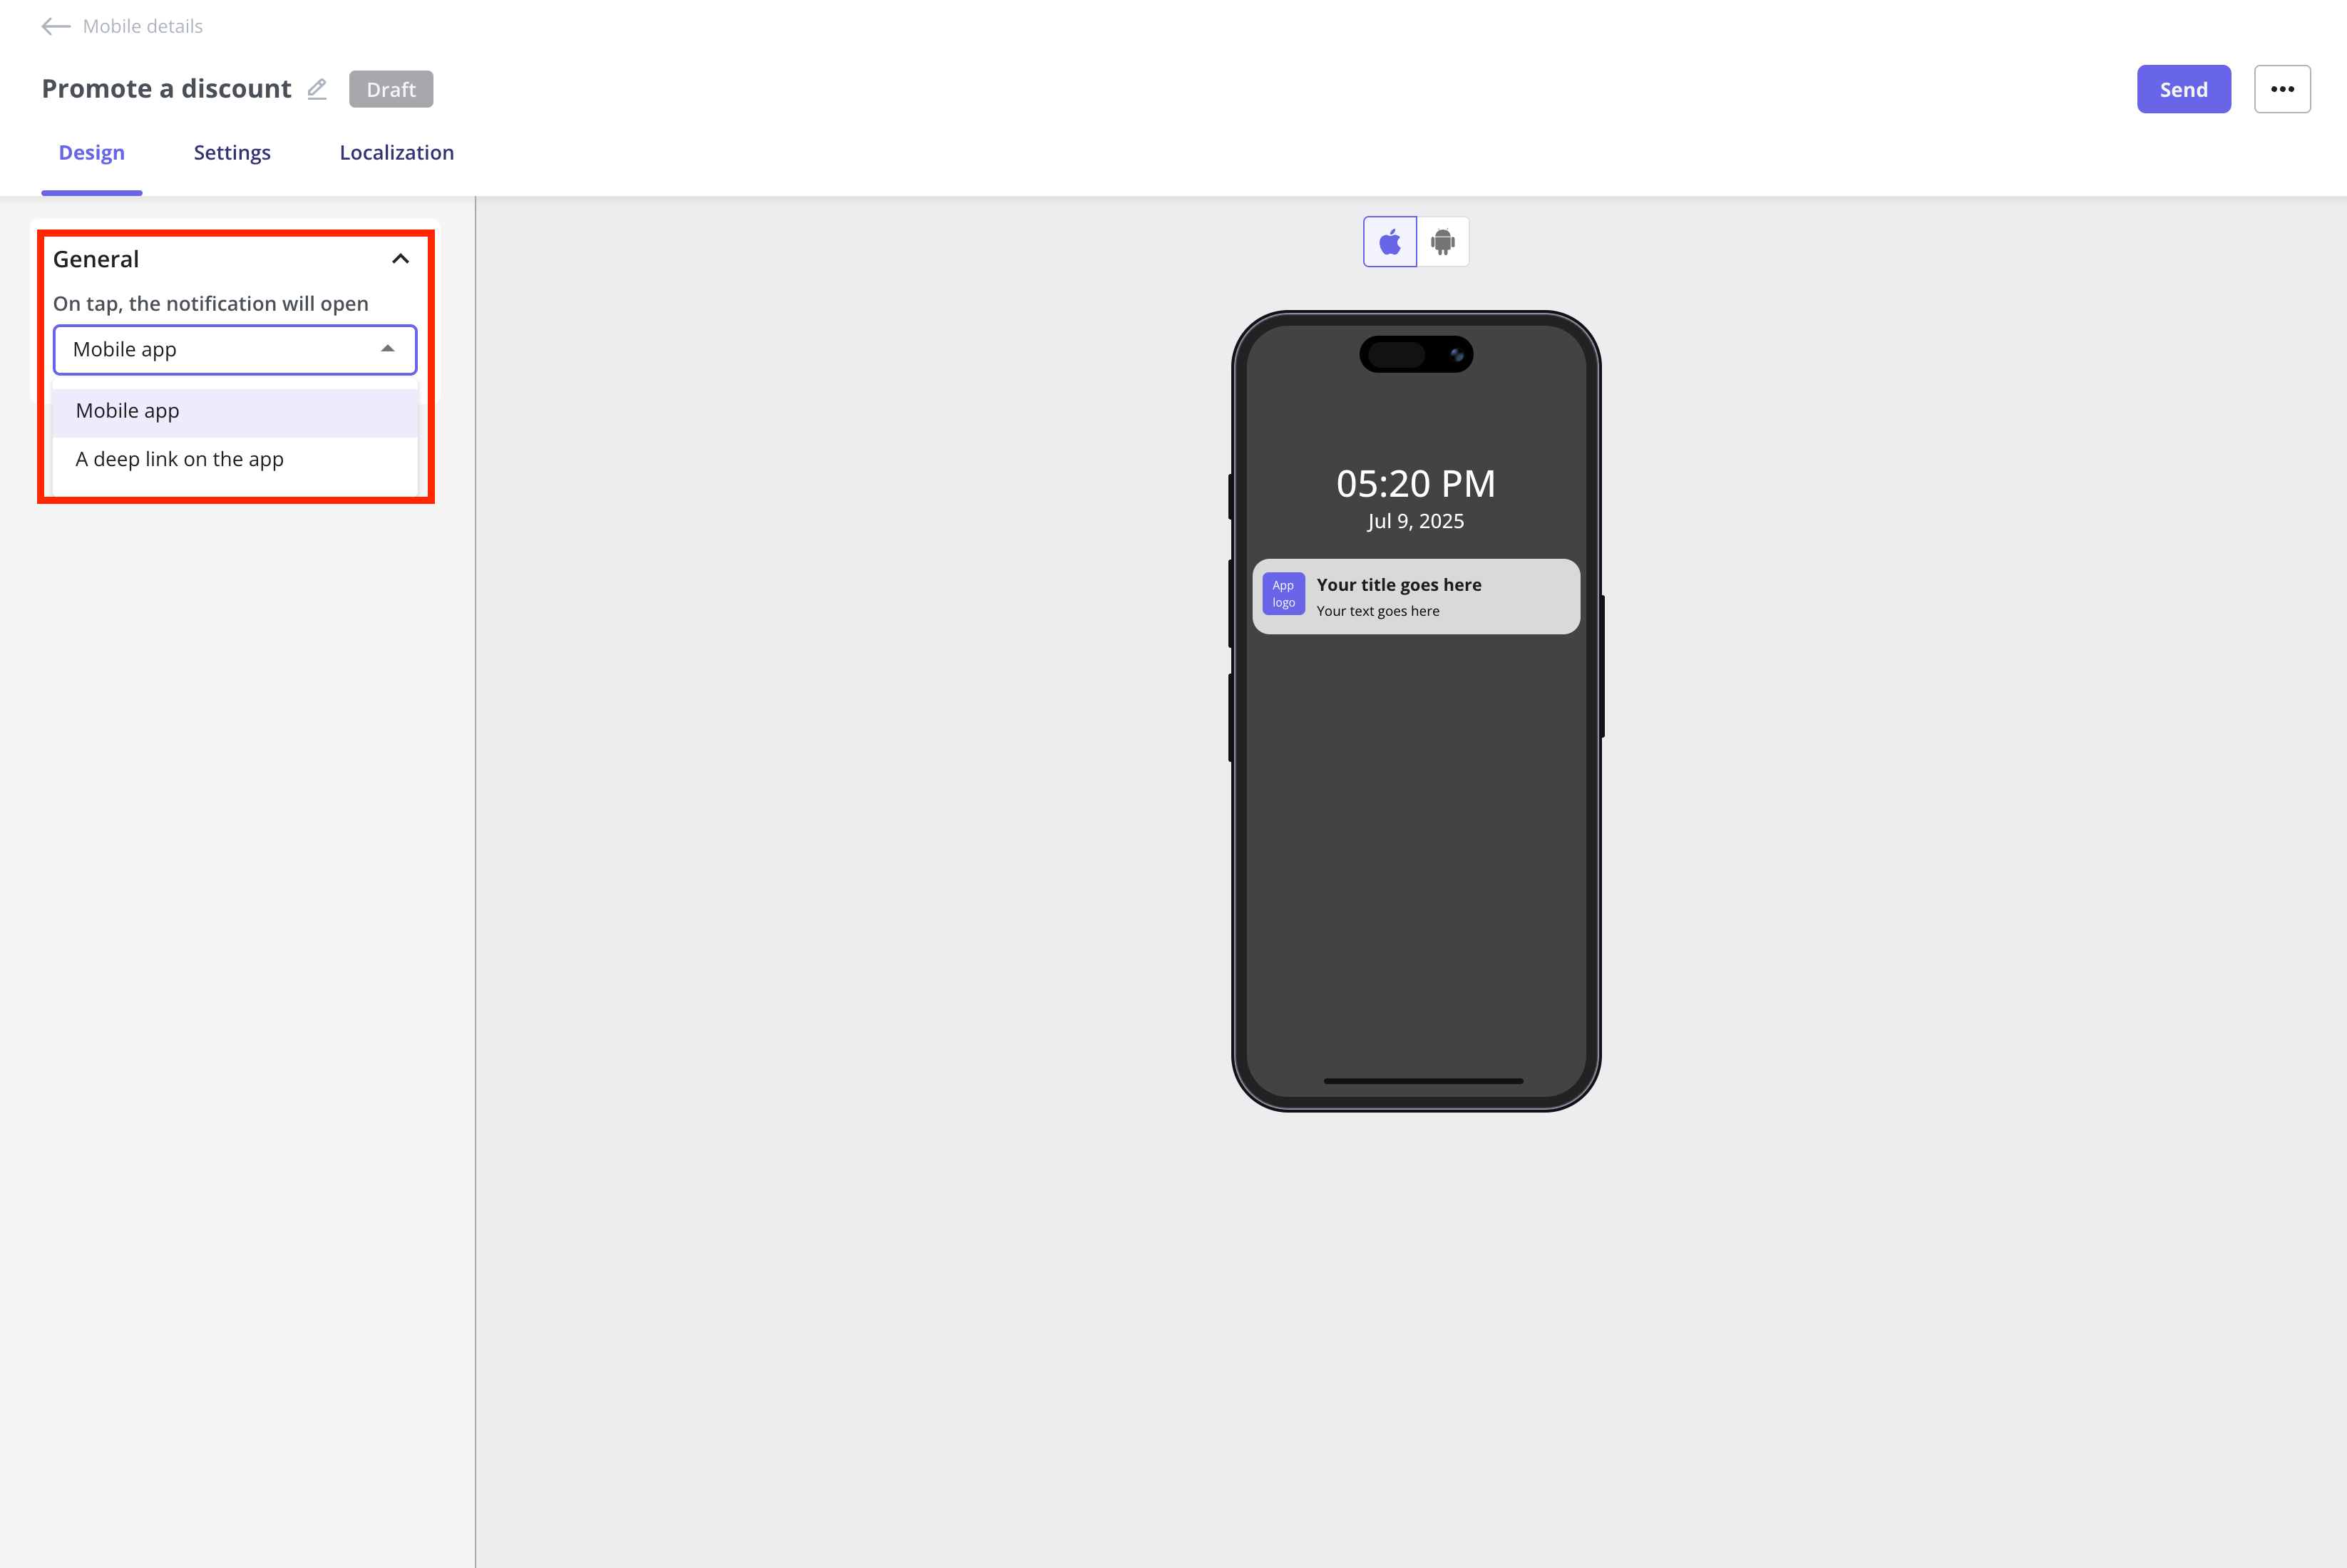
Creating a push notification is simple and only takes a few steps. Just customize the message you want to share with your end users based on your goal, and decide where you want to navigate them after they tap the notification on their mobile device, either simply opening the app or taking them to a specific screen using the deep link. Examples of what happens after users tap your push notification: Open the Mobile App- Title: Don’t Miss Out!
- Body: Check out what’s new in our app today.
- Action: Opens the app’s home screen when tapped.
Userpilot will automatically open your app by default when users tap the notification. You don’t need to configure anything extra when choosing the Open the Mobile App option.
- Title: Special Offer Just for You!
- Body: Get 20% off your next order. Tap to claim.
- Action: Opens the app directly on the Promotions or Checkout screen using a deep link.
Coordinate with your engineering team to get the correct deep links for navigating users to specific screens in your app.
You can’t upload images or videos to push notifications to keep them simple and lightweight. However, you can add emojis to make your message more visually appealing and eye-catching, helping to encourage users to tap and engage.
Test Push Notification
You can send test pushes to a specific user by selecting them directly, making it easy to test on real devices without affecting everyone. The content doesn’t need to be live; you can also test it while it’s still in draft status.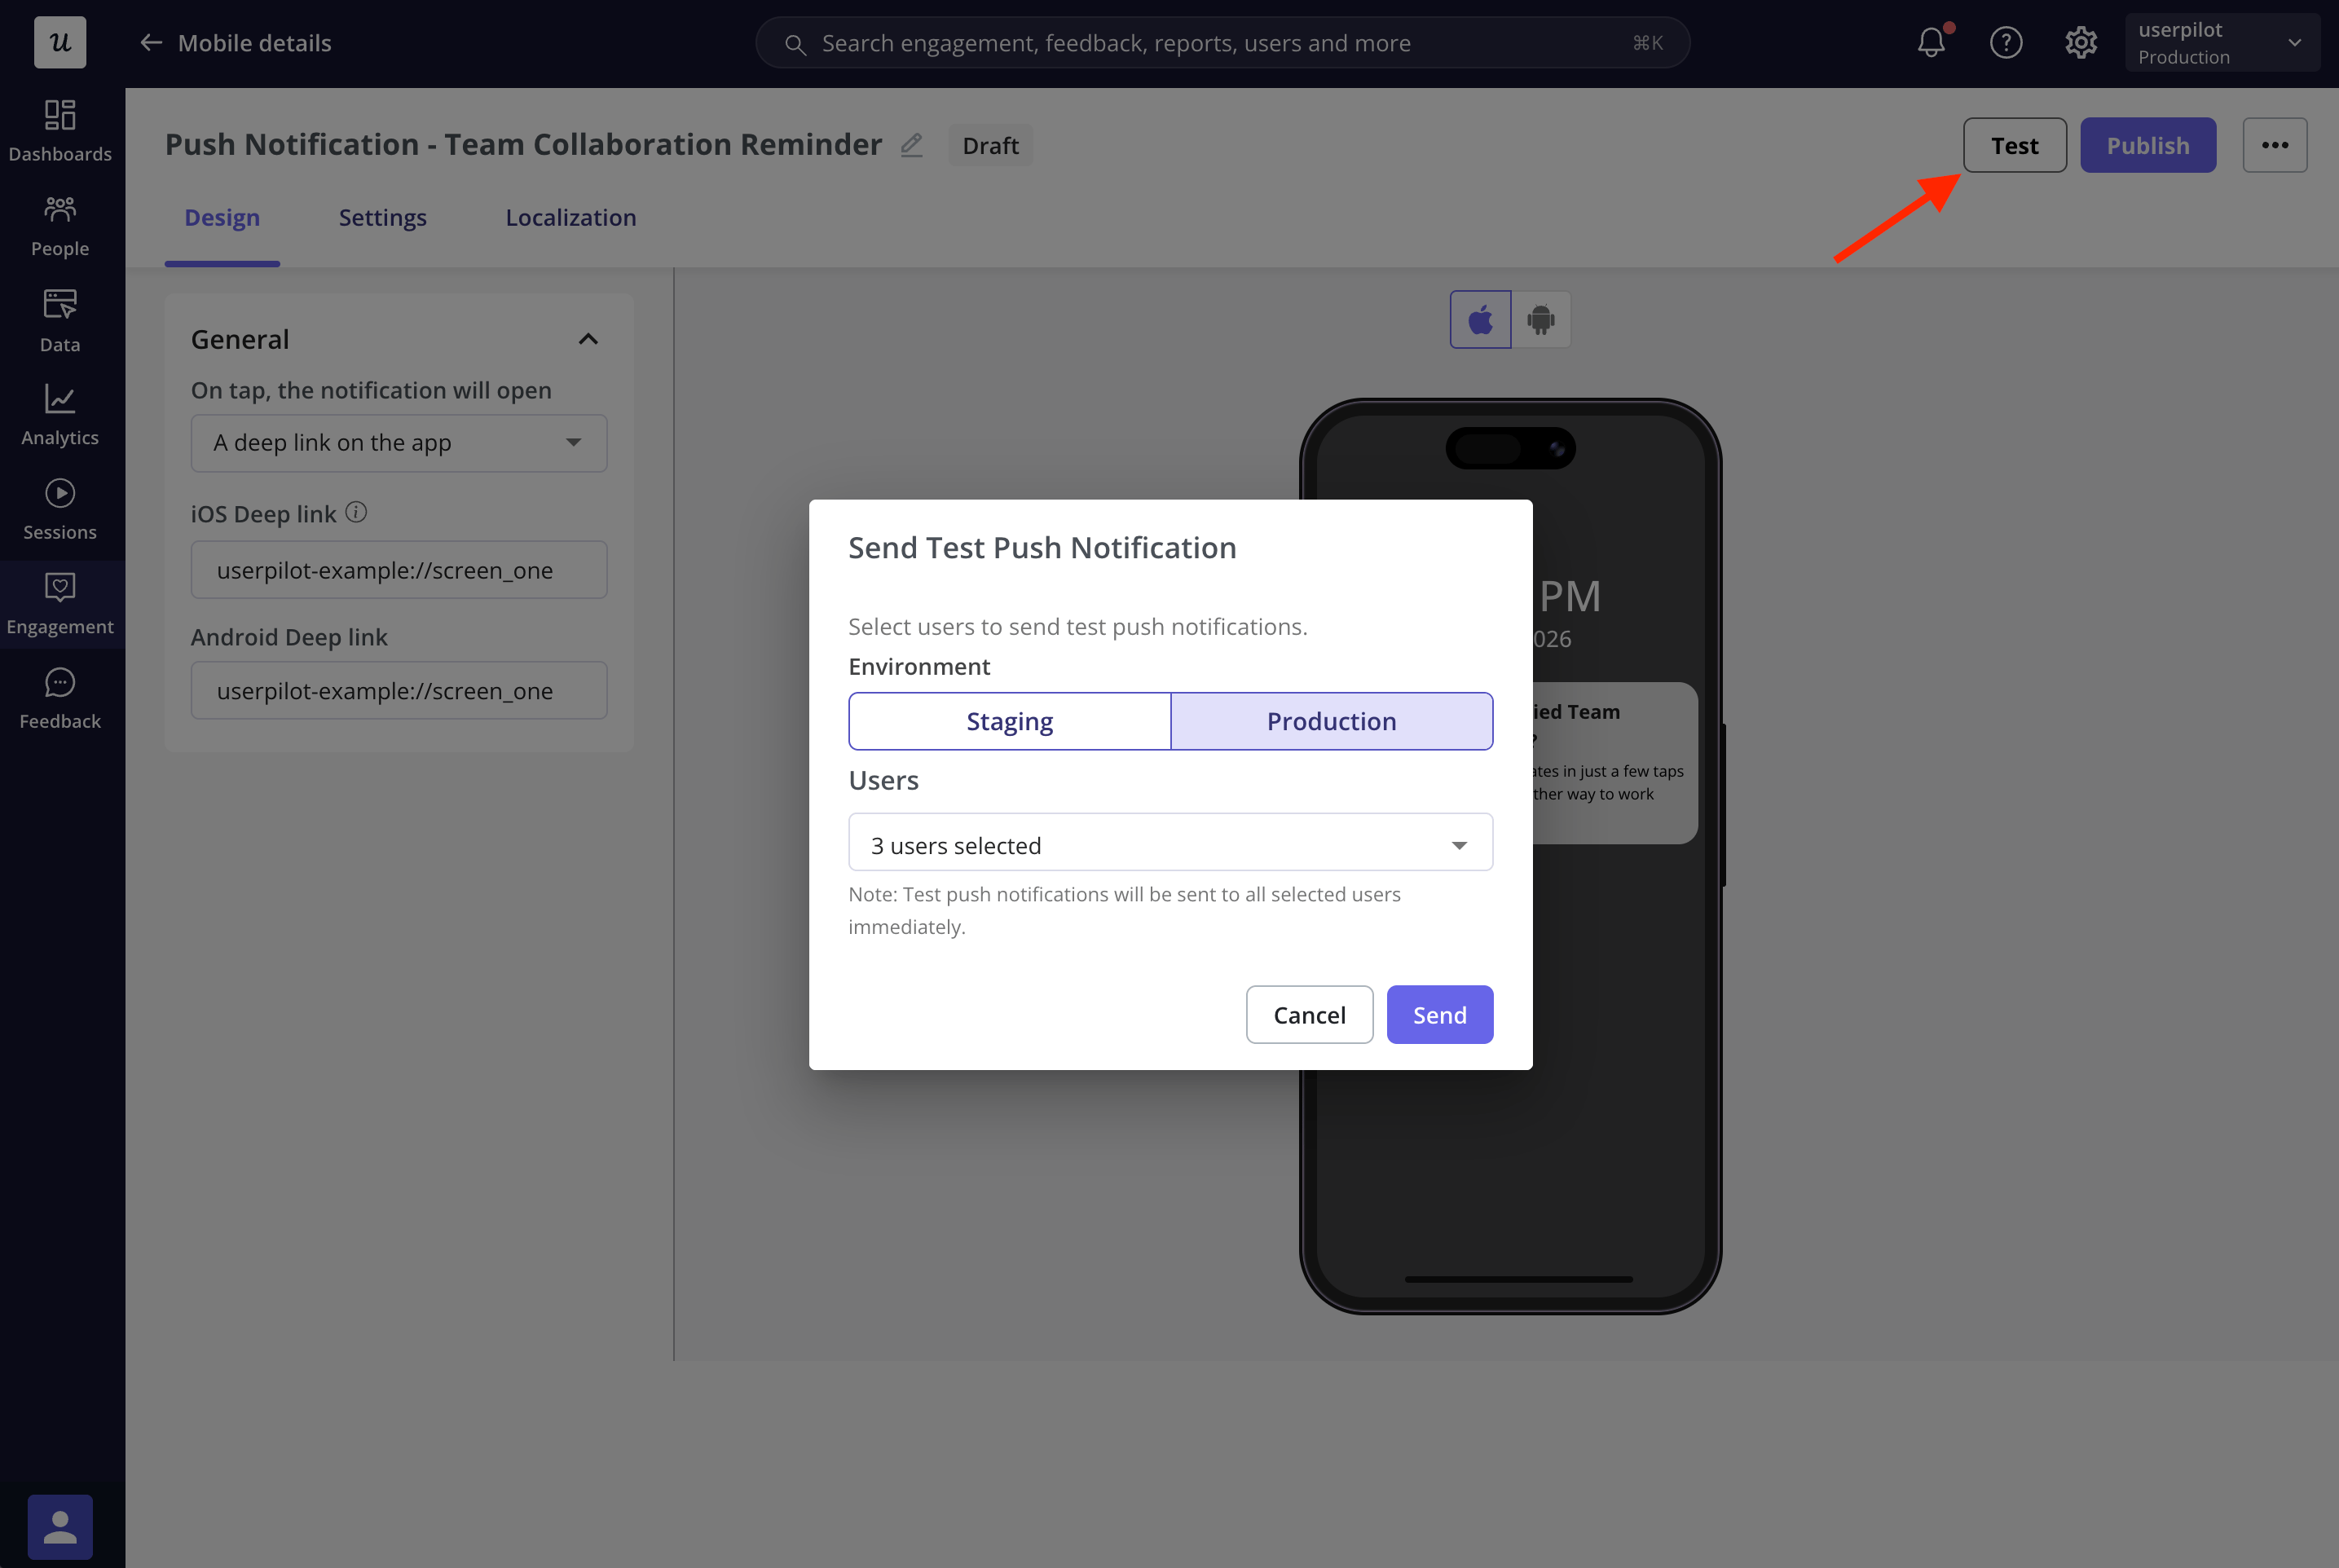
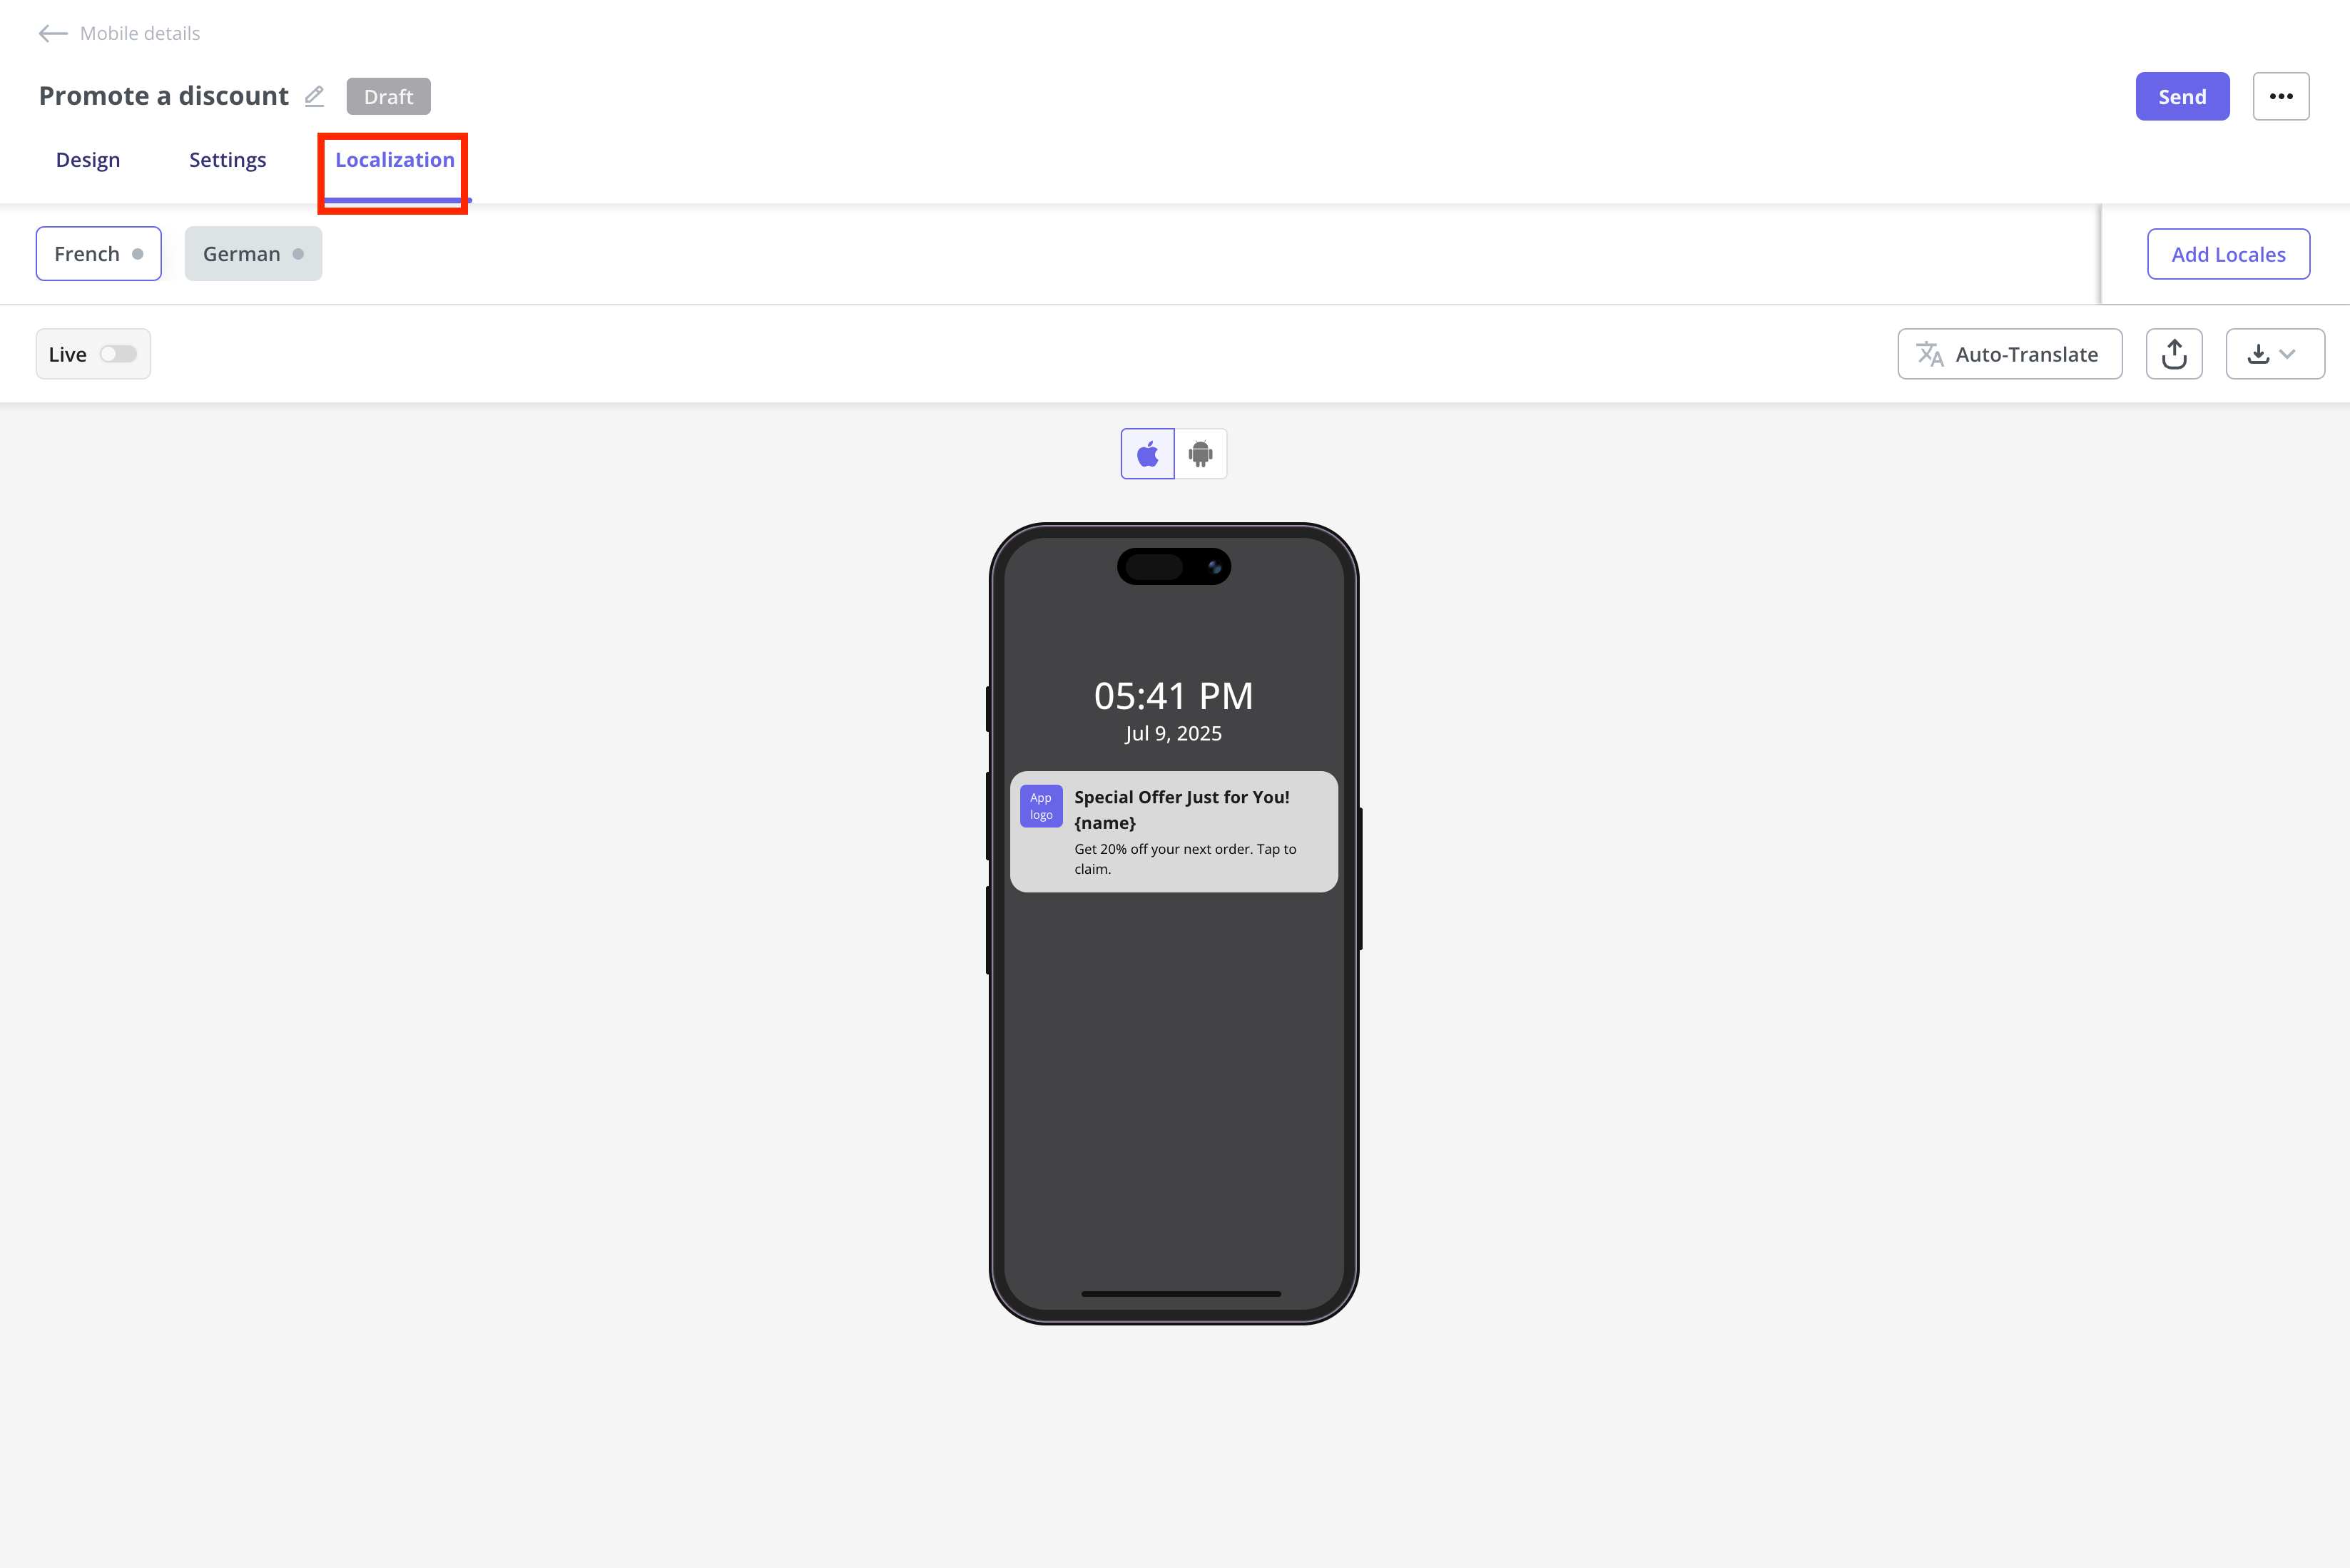
Localization
You first need to activate the localization settings from the Settings page. For detailed instructions, follow the steps in this Localization document.
Mobile localization only works when you pass the 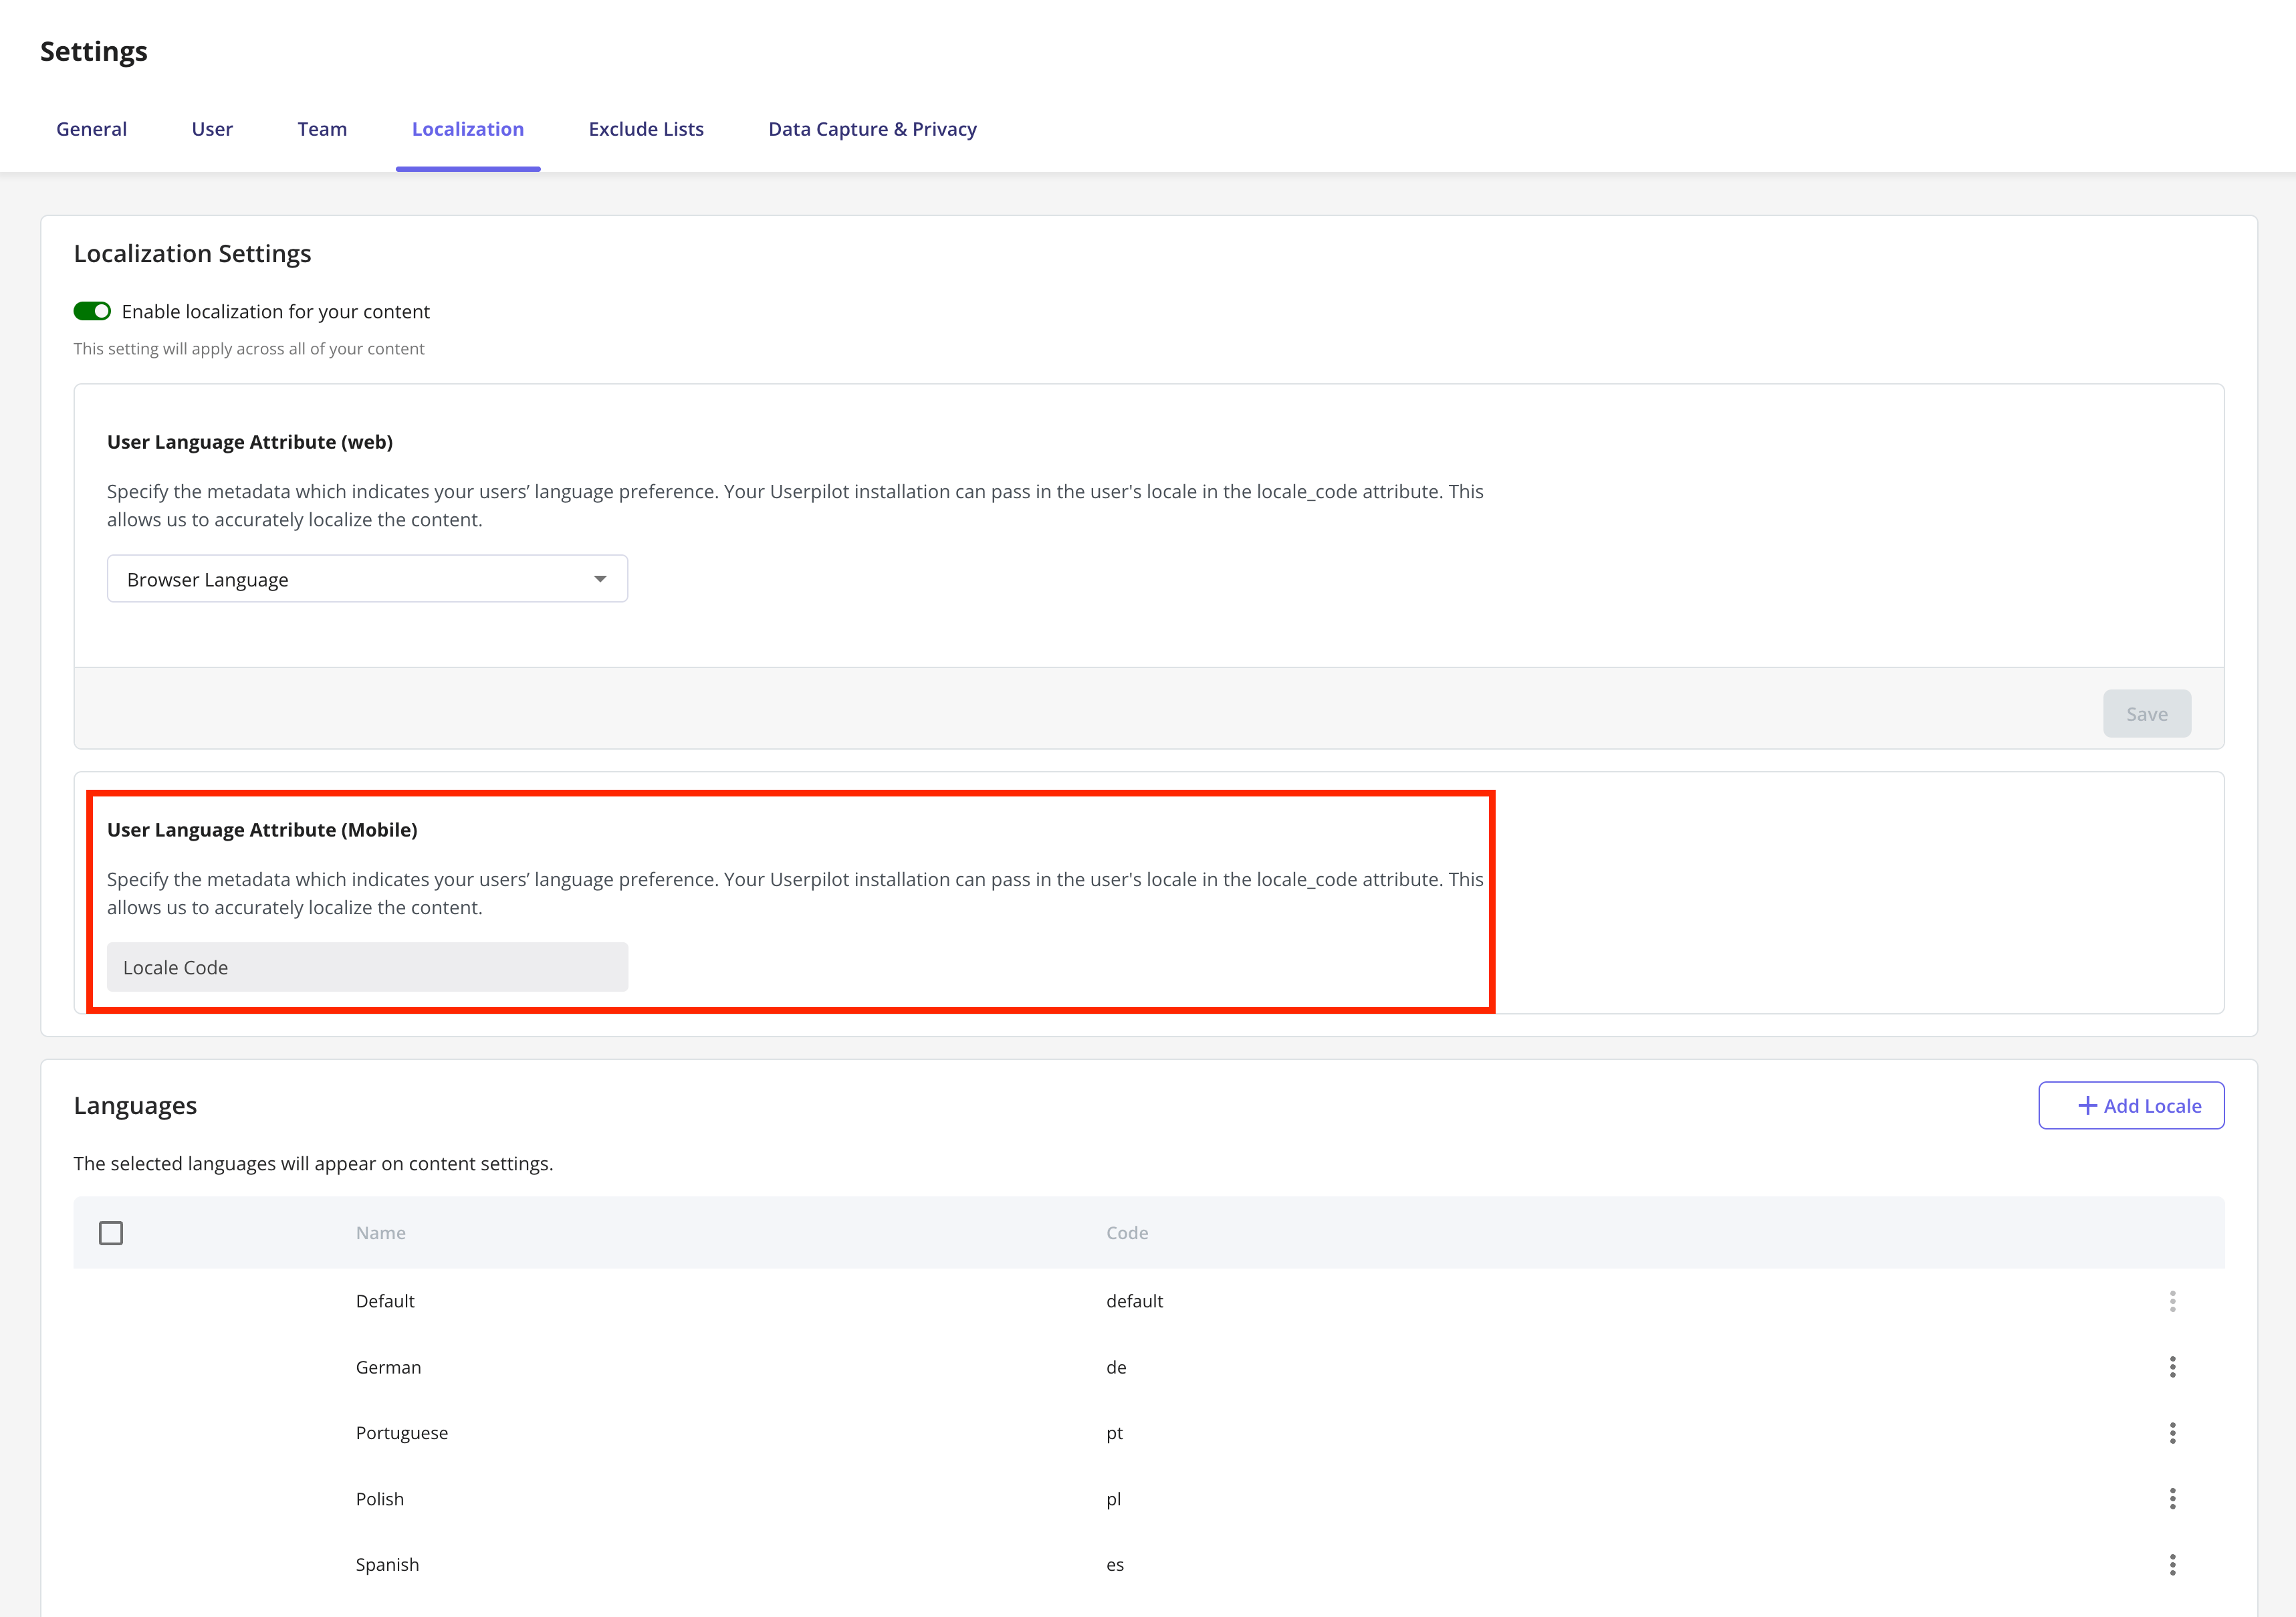
locale_code attribute. Make sure you’re setting up localization for both web and mobile using the locale code, since the browser language won’t automatically work on mobile.Send your push notification to your users
Once you’ve designed your Mobile Push Notification and localized the content, the next step is to configure the push notification settings and send it to your end users.Trigger
This defines what initiates the push notification to be sent. You can choose from:- User matches conditions: Push notifications are sent when a user meets specific audience rules.
- Event occurrence: Triggers the push notification when a specific user action or event takes place (e.g., clicking a button, completing a goal).
Environment
Specify whether the push notification should be delivered in a staging or production environment.- Push notifications can be tested safely in the staging environment.
- In production, Push notifications are sent to real users.
- You can define audience rules per environment to ensure targeting is accurate for each context.
Audience
Choose who receives the push notification based on the targeting logic:- User matches conditions:
- Dynamic: includes current and future users who meet the criteria.
- Best for:
- Automated onboarding welcome messages.
- Behavioral triggers, like sending reminders to users who haven’t opened the app in X days.
- Example use case: automatically send a welcome push notification to all users who sign up from a specific country or plan, today and in the future.
- Best for:
- Fixed: includes only the users who match the criteria at that exact moment.
- Best for:
- One-time announcements or promotions.
- Targeting a specific group of users right now.
- Time-sensitive alerts or limited-time offers.
- Example use case: launch a new feature with a push notification to everyone currently on a specific plan, but exclude new users who join later.
- Best for:
- Dynamic: includes current and future users who meet the criteria.
- All Users: Every identified user in your mobile app will receive the push notification, regardless of their attributes.
- Saved Segment: Use pre-defined segments you’ve created in Userpilot.
- Custom Conditions: Define new conditions on the fly using filters like user attributes, actions, or events.
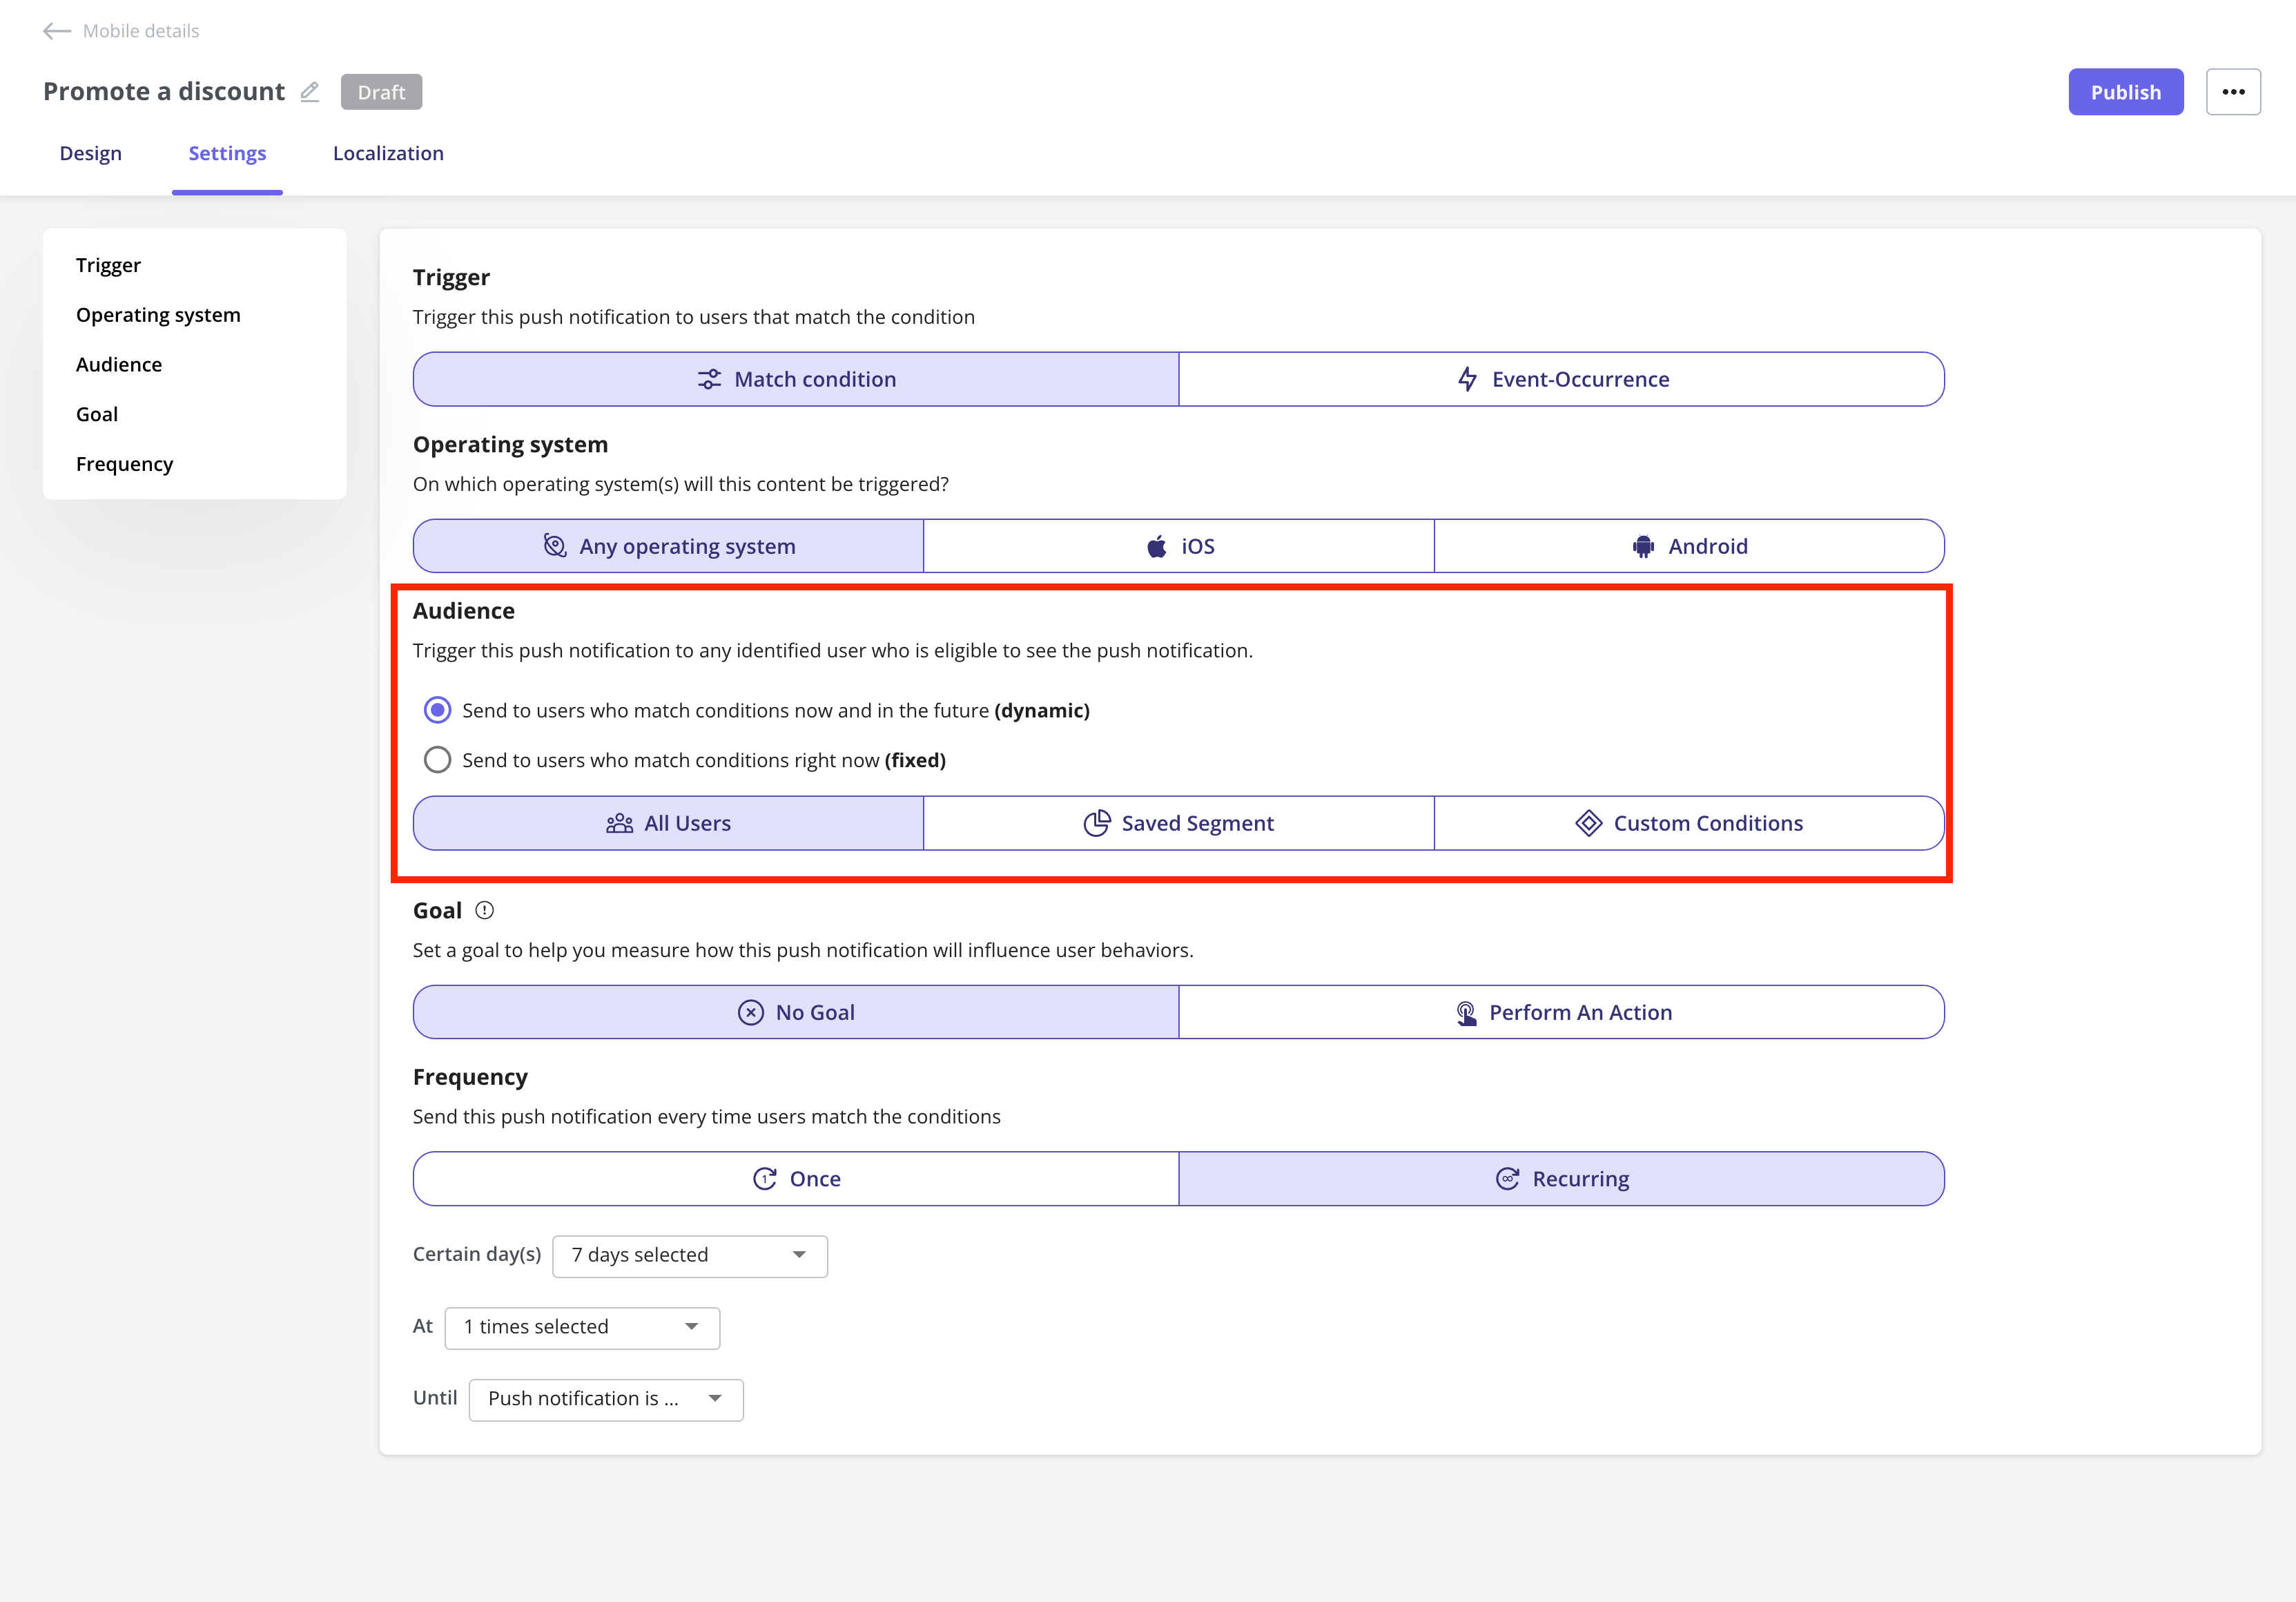
Audience options for Dynamic vs Fixed are only visible when “User matches conditions” is selected as a trigger.
Goal
Define a goal for your push notification, which can be used to:- Track engagement and conversion.
- Determine if the push notification achieved its intended purpose.
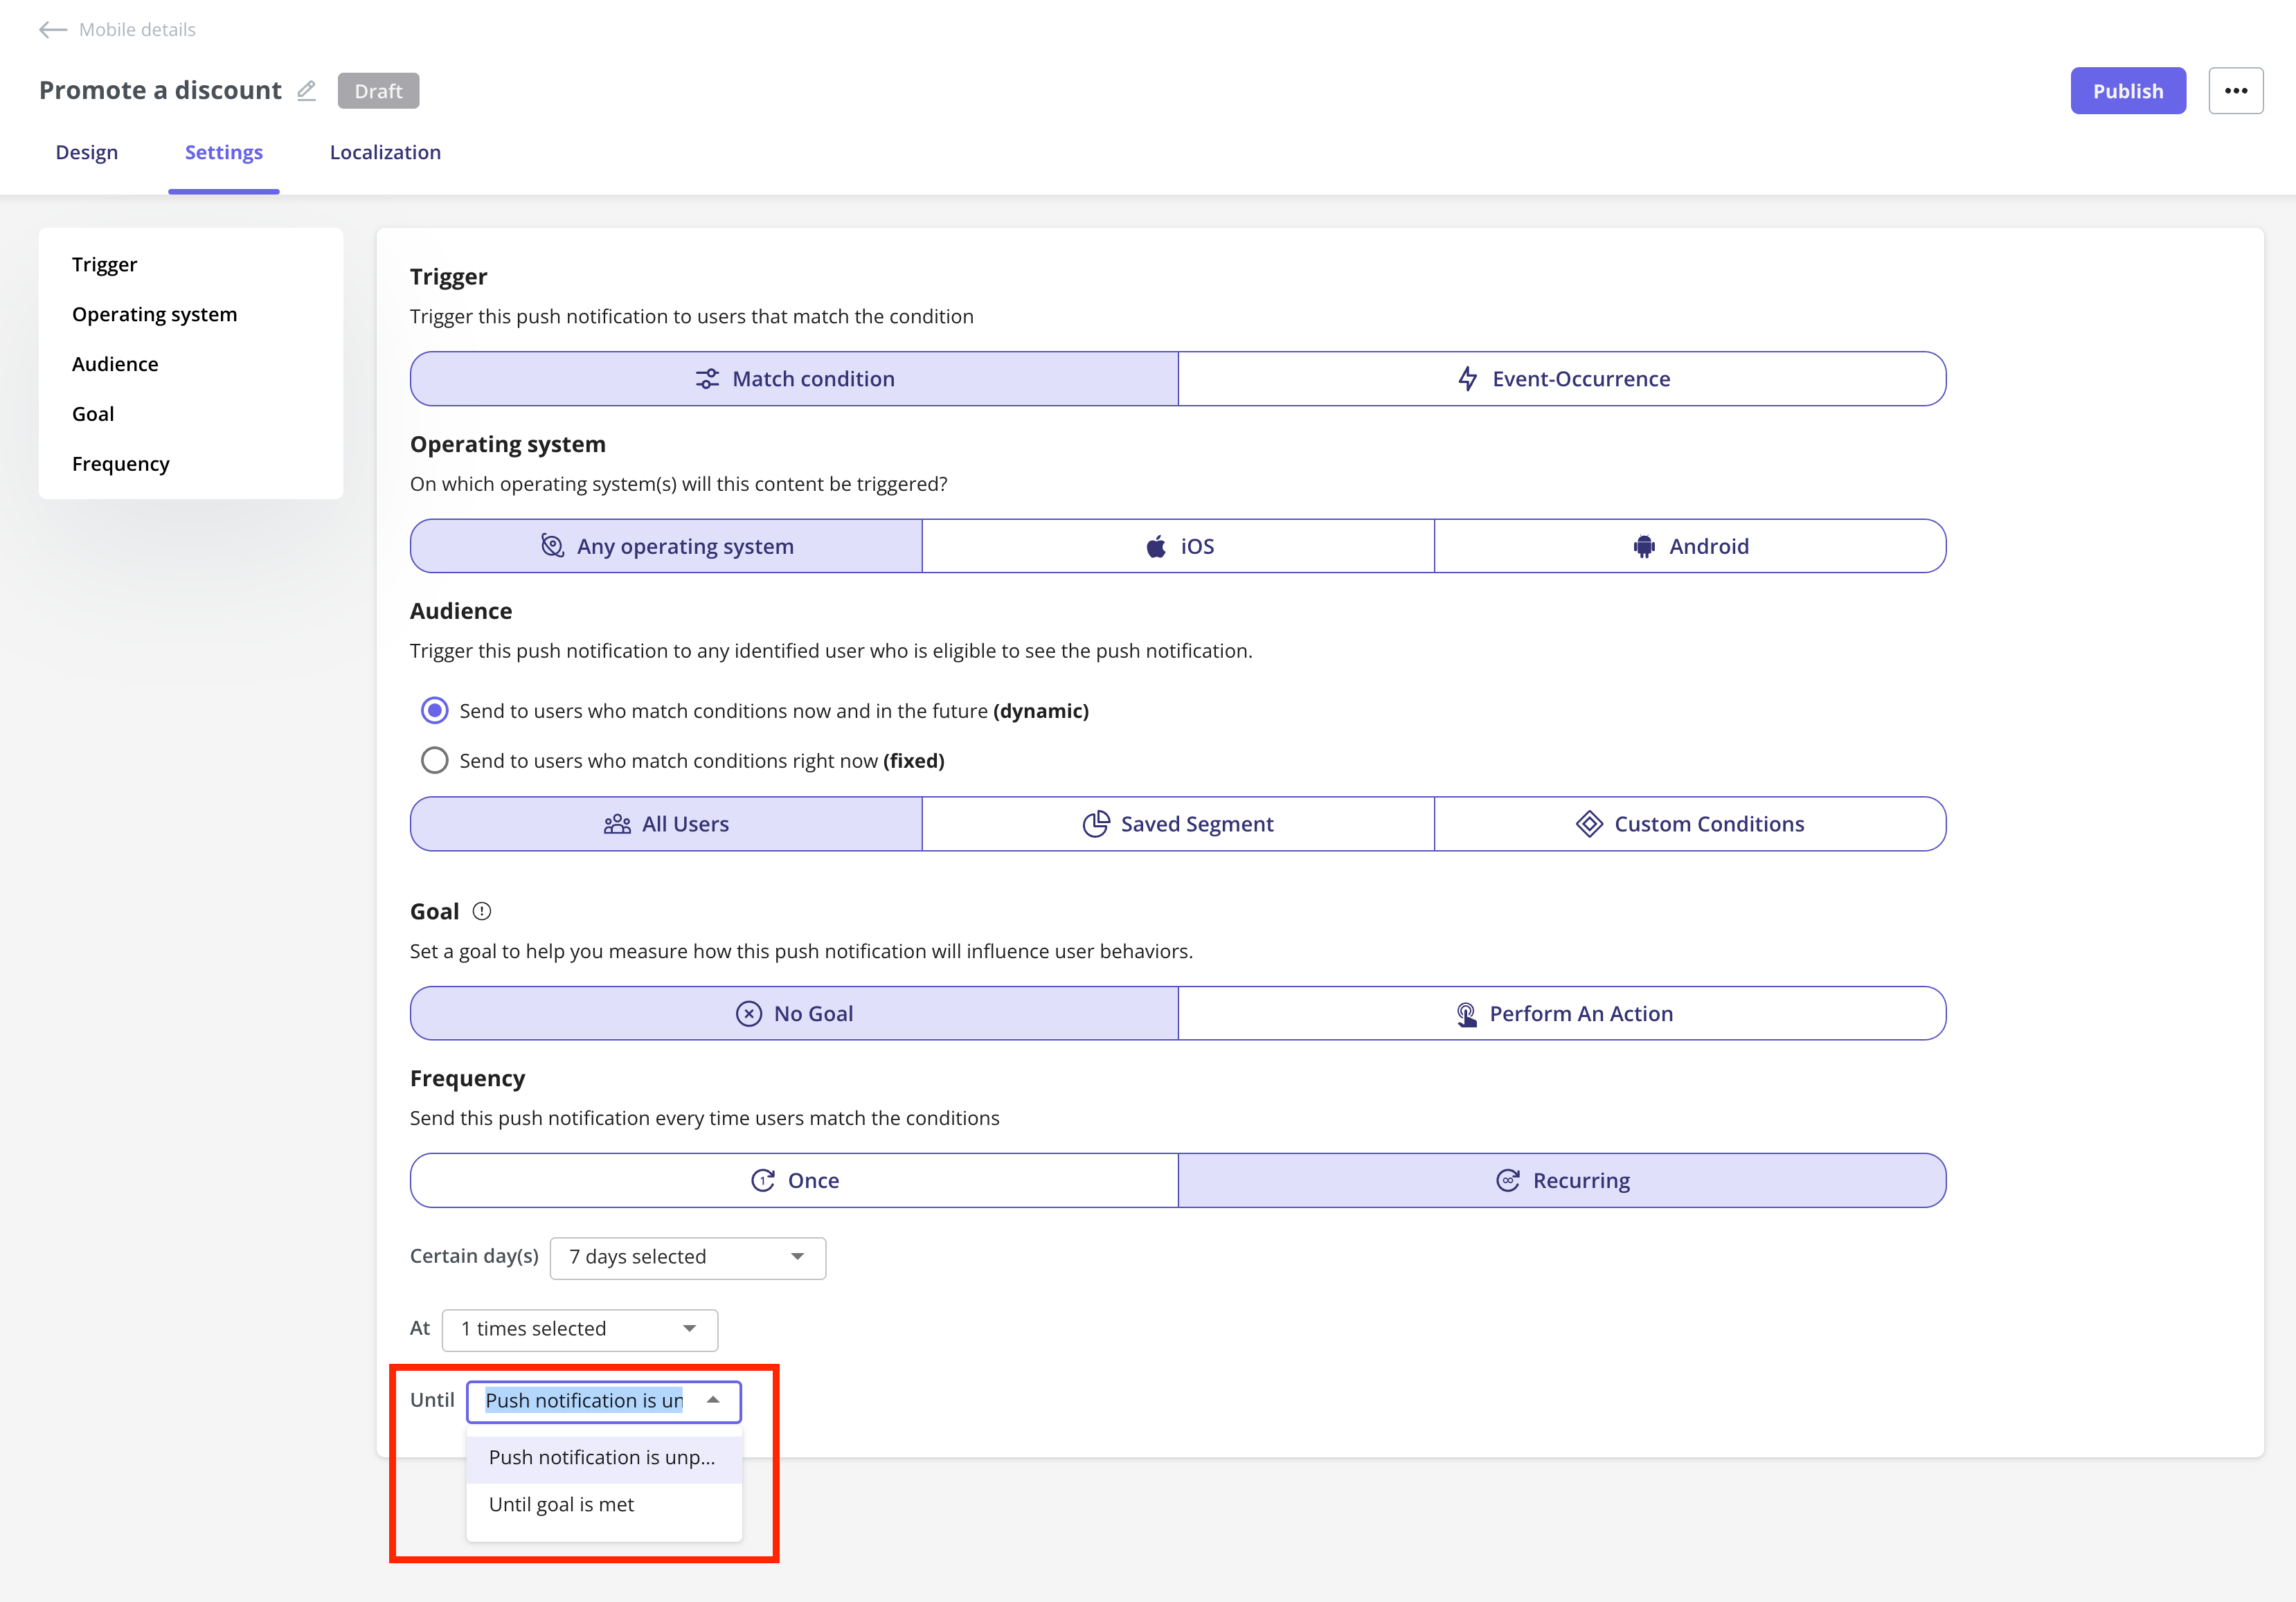
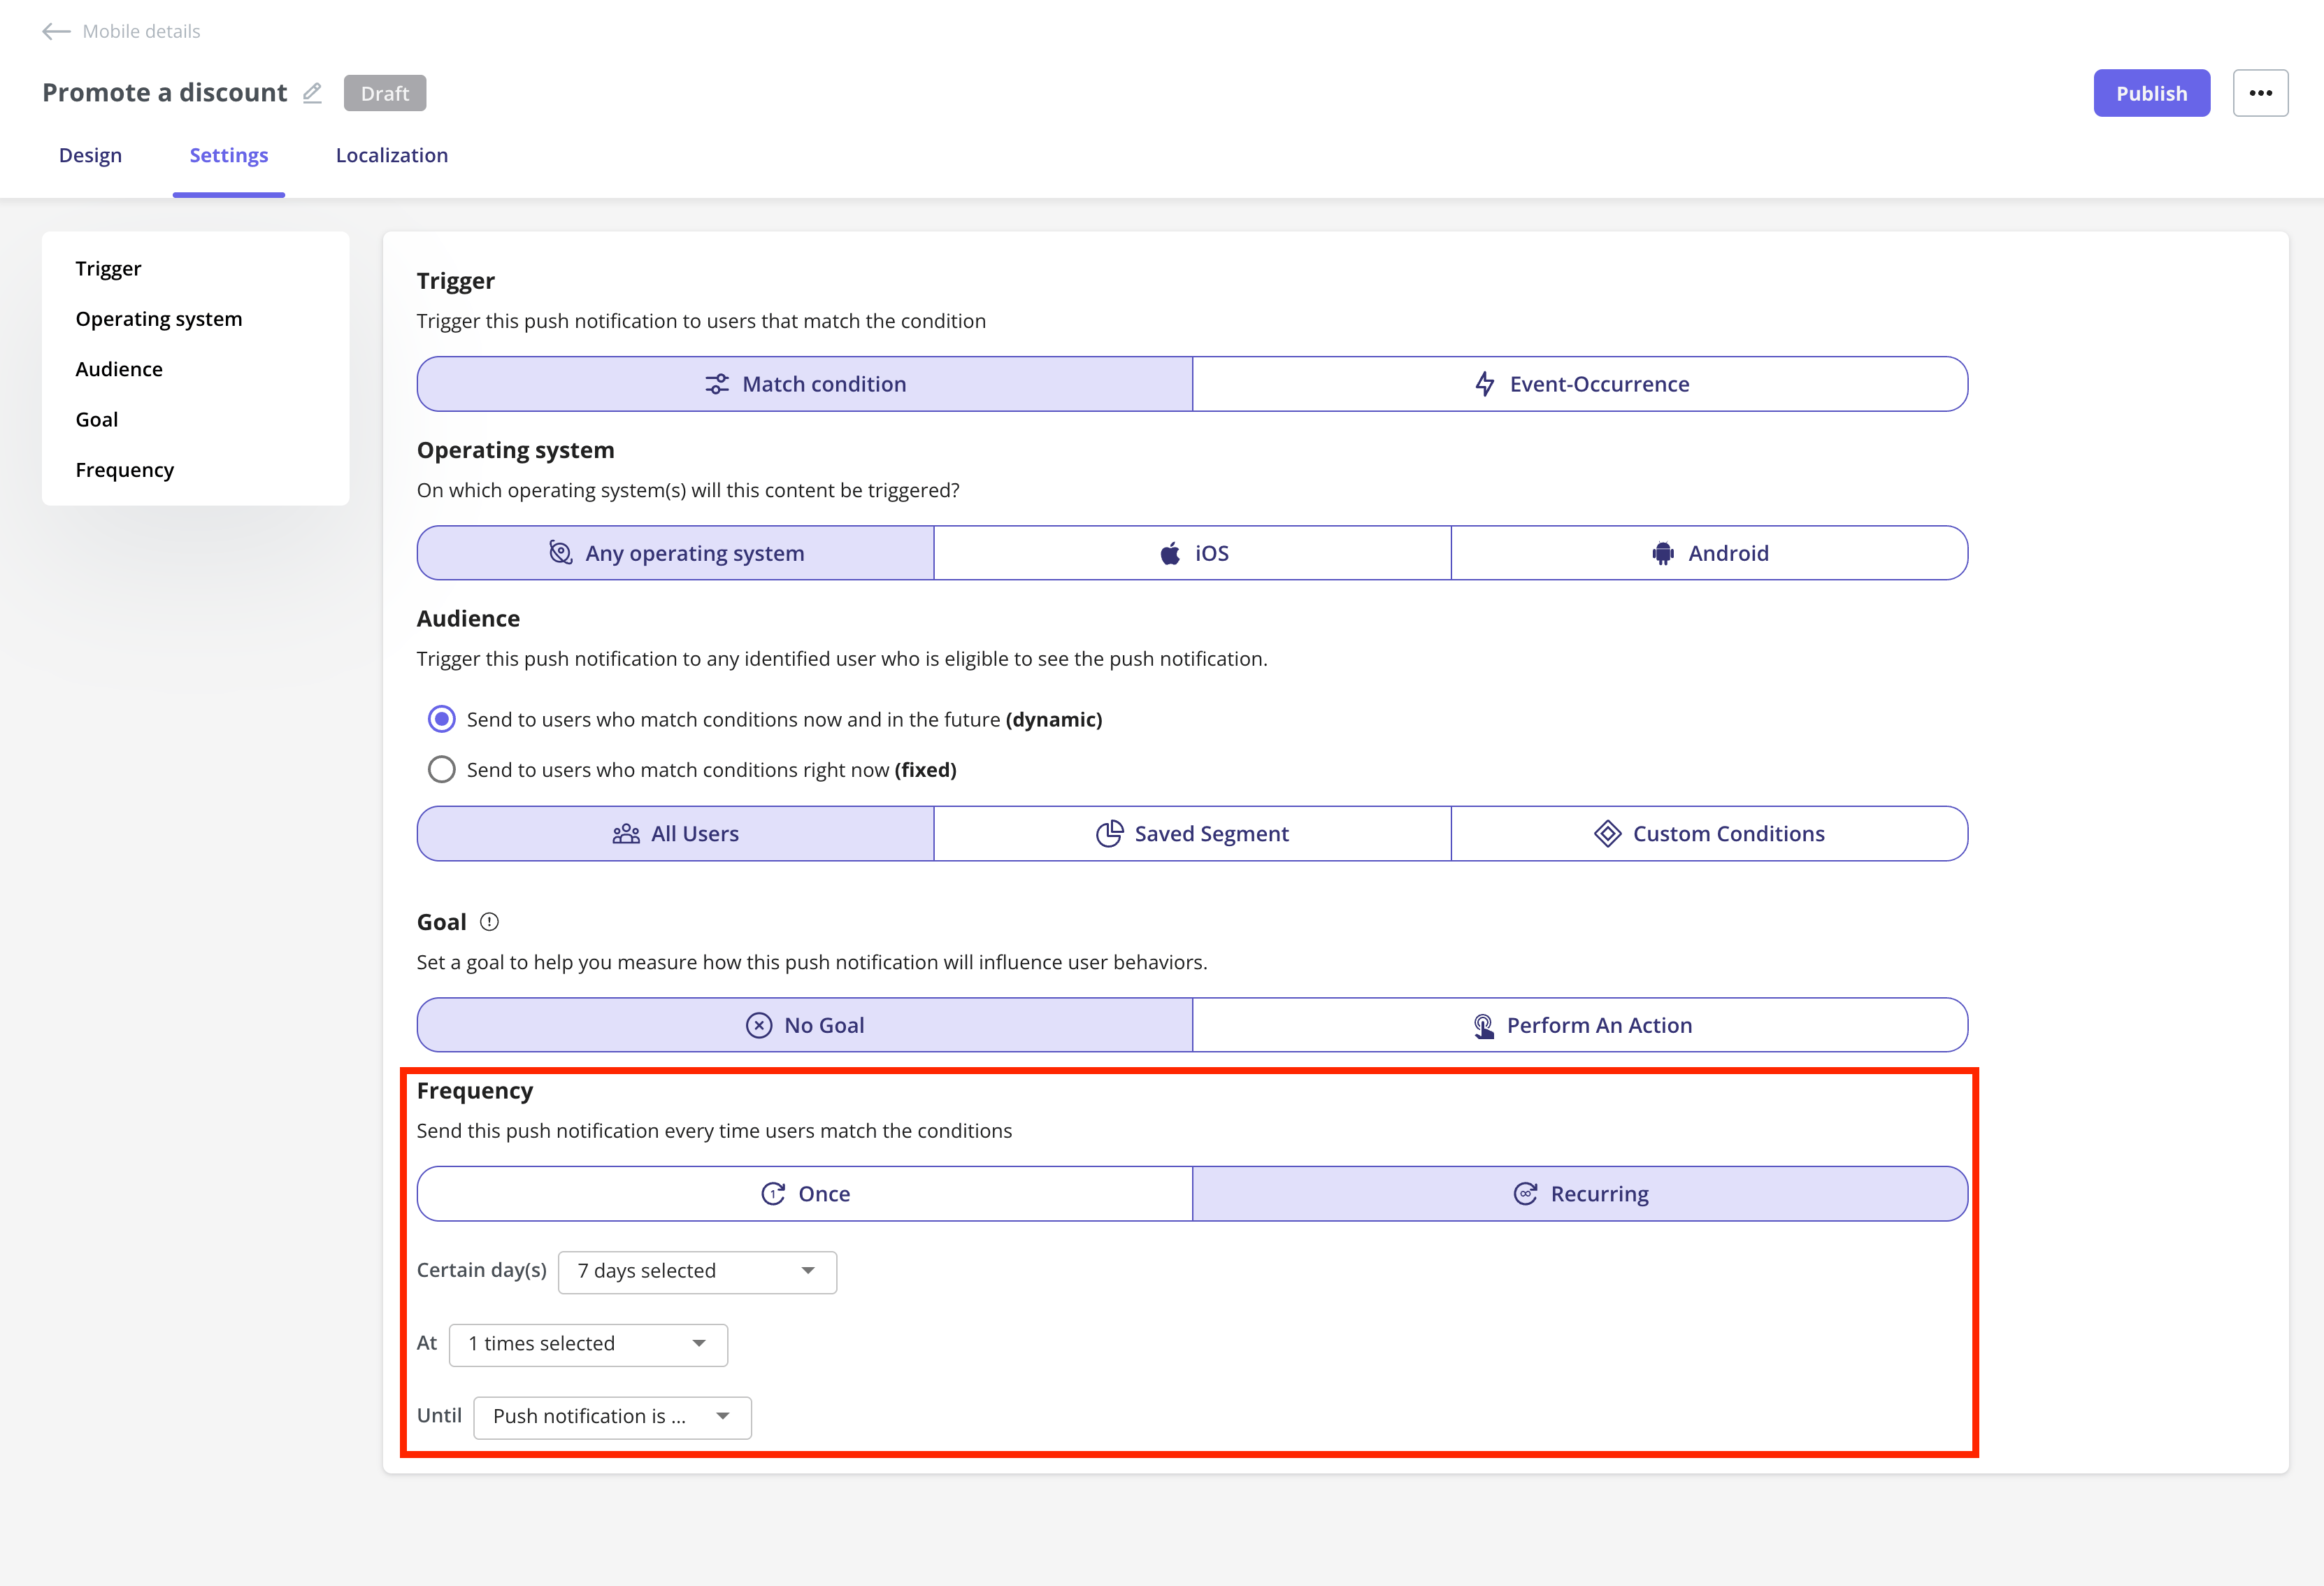
Frequency
Control how often a user receives the push notification:- Only Once
- Immediately
- Send the push notification as soon as a user meets the defined trigger conditions (e.g., signs up, completes an action, etc.).
- Example use case: Send a welcome push notification instantly after a user signs up for your platform.
- At Custom Time
- Schedule the push notification to be sent on specific days and times, even if the user matches the conditions earlier. You can choose one or more days and set a specific time.
- Example use case: Send an onboarding tips push notification every Monday and Friday at 9 AM to users who signed up that week.
- Immediately
Userpilot will send the push notification based on the time zone specified in the General Settings page.
- Recurring
- Trigger - Based on the match condition
- Send the push notification repeatedly to users who match the dynamic conditions.
- You can choose:
- How often (e.g., once every 7 days)
- When to stop (see “Until” options below)
- Example use case: send a weekly usage reminder to users who have not completed a key action until they do.
- Trigger - Based on event occurrence
- Send the push notification every time a selected event occurs (e.g., user creates a flow, completes a checklist).
- You can define:
- Recurrence limit (e.g., once every X days)
- Stop conditions
- Example use case: send a push notification every time a user publishes a flow, reminding them to share it with their team, but only once per day.
- “Until” Stop Conditions (for Recurring push notifications)
- You can define when recurring push notifications should stop. Options include:
- Until push notification is unpublished: Userpilot will continue sending the push notification until you manually unpublish it.
- Until goal is met: Userpilot will stop sending the push notification once the user completes the associated goal (e.g., completes a task or flow).
- You can define when recurring push notifications should stop. Options include:
- Trigger - Based on the match condition